
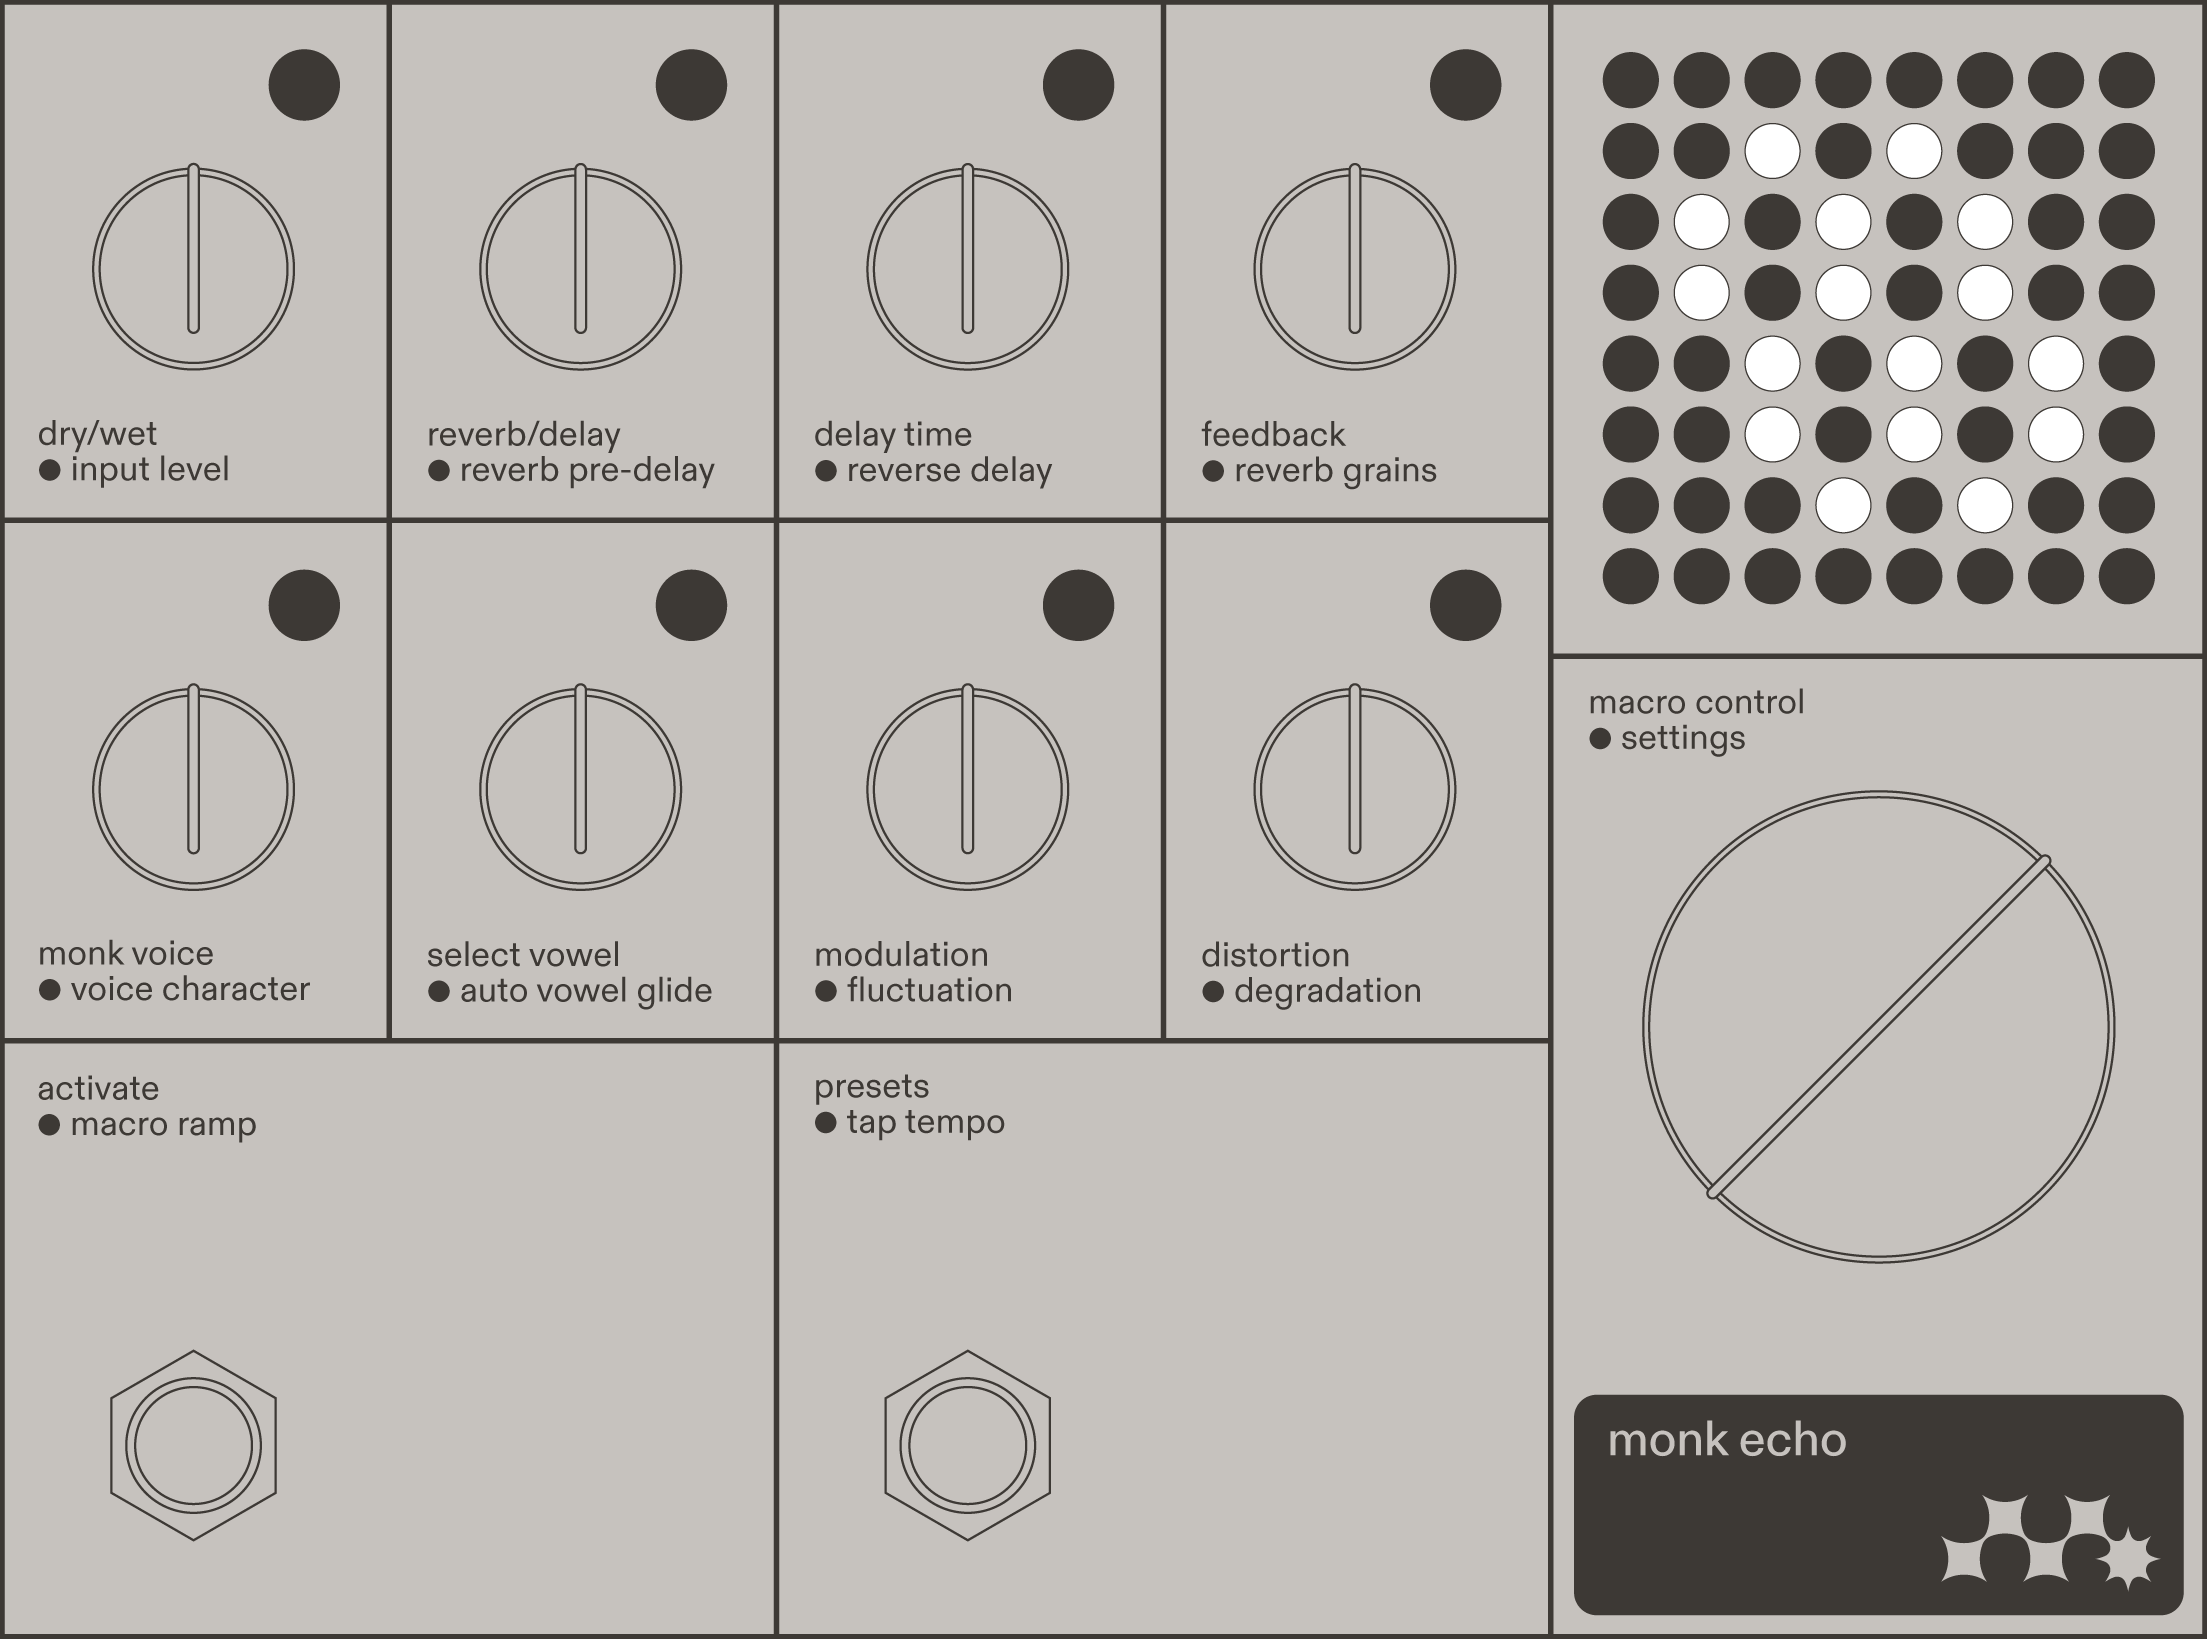
Introduction
This is Monk Echo. Reverb and delay — both beautiful and strange.
Inspired by Latvian choral music heritage, Monk Echo infuses reverb and delay with the character of the human voice. Using this as a starting point, we developed an echo that honors the traditions of reverb and delay while also offering new sounds and new ways to interact with them.
The main idea behind Monk Echo’s interface is this: there are no predefined algorithms to choose from. Instead, a carefully tuned set of knobs and buttons makes all sounds available at all times. From an immersive, human-like echo to an ugly collapse of audio, any sound can morph into another right under your fingertips or foot.
Rather than sticking to traditional echo tones — which Monk Echo can easily do — it is all about exploring sound and movement.
Monk Echo is filled with useful functionality, as well as less useful — perhaps more experimental — things. The user interface aims to put the most important aspects of creating sounds within easy reach, while also giving direct access to more uncommon features without forcing you to dig through system settings.
This user manual is designed to be read sequentially: start with the basic sounds and work your way toward the deepest settings. But you can also jump around using the table of contents and internal links. For example, you can jump ahead to factory presets for various sounds and applications, then work your way backwards, learning how to achieve them.
Coming soon: a companion web app is in the works. It will allow you to update the firmware, manage and backup presets as well as manage pedal’s system settings from a browser.
Overview
Left side
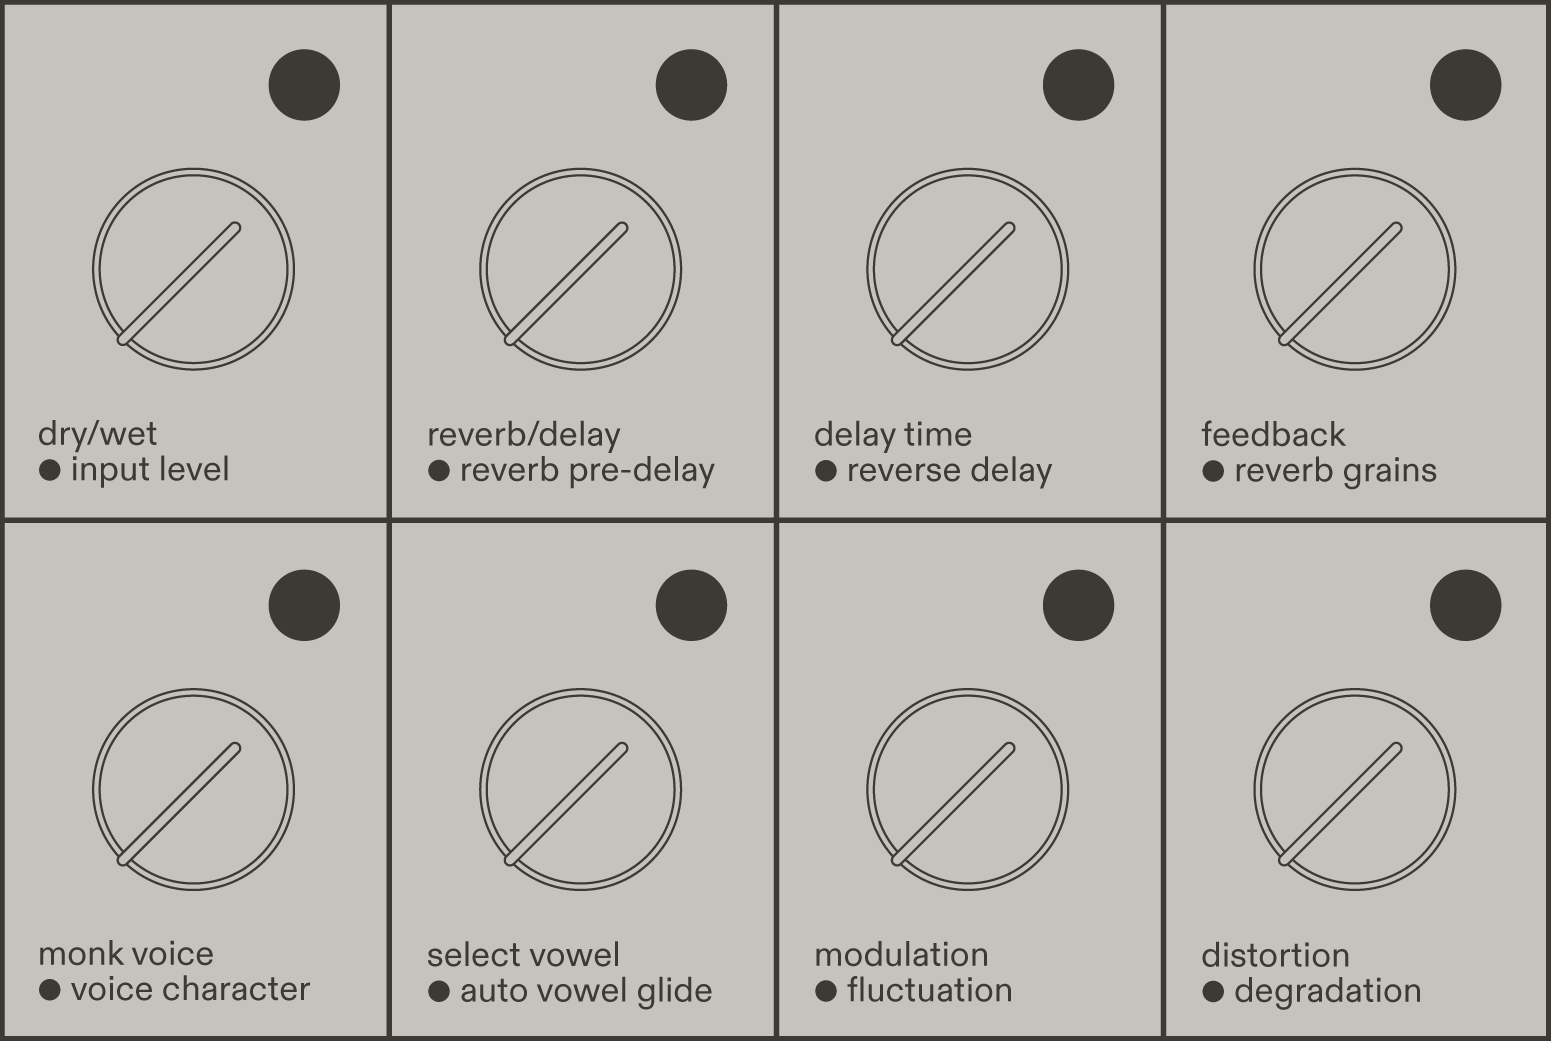
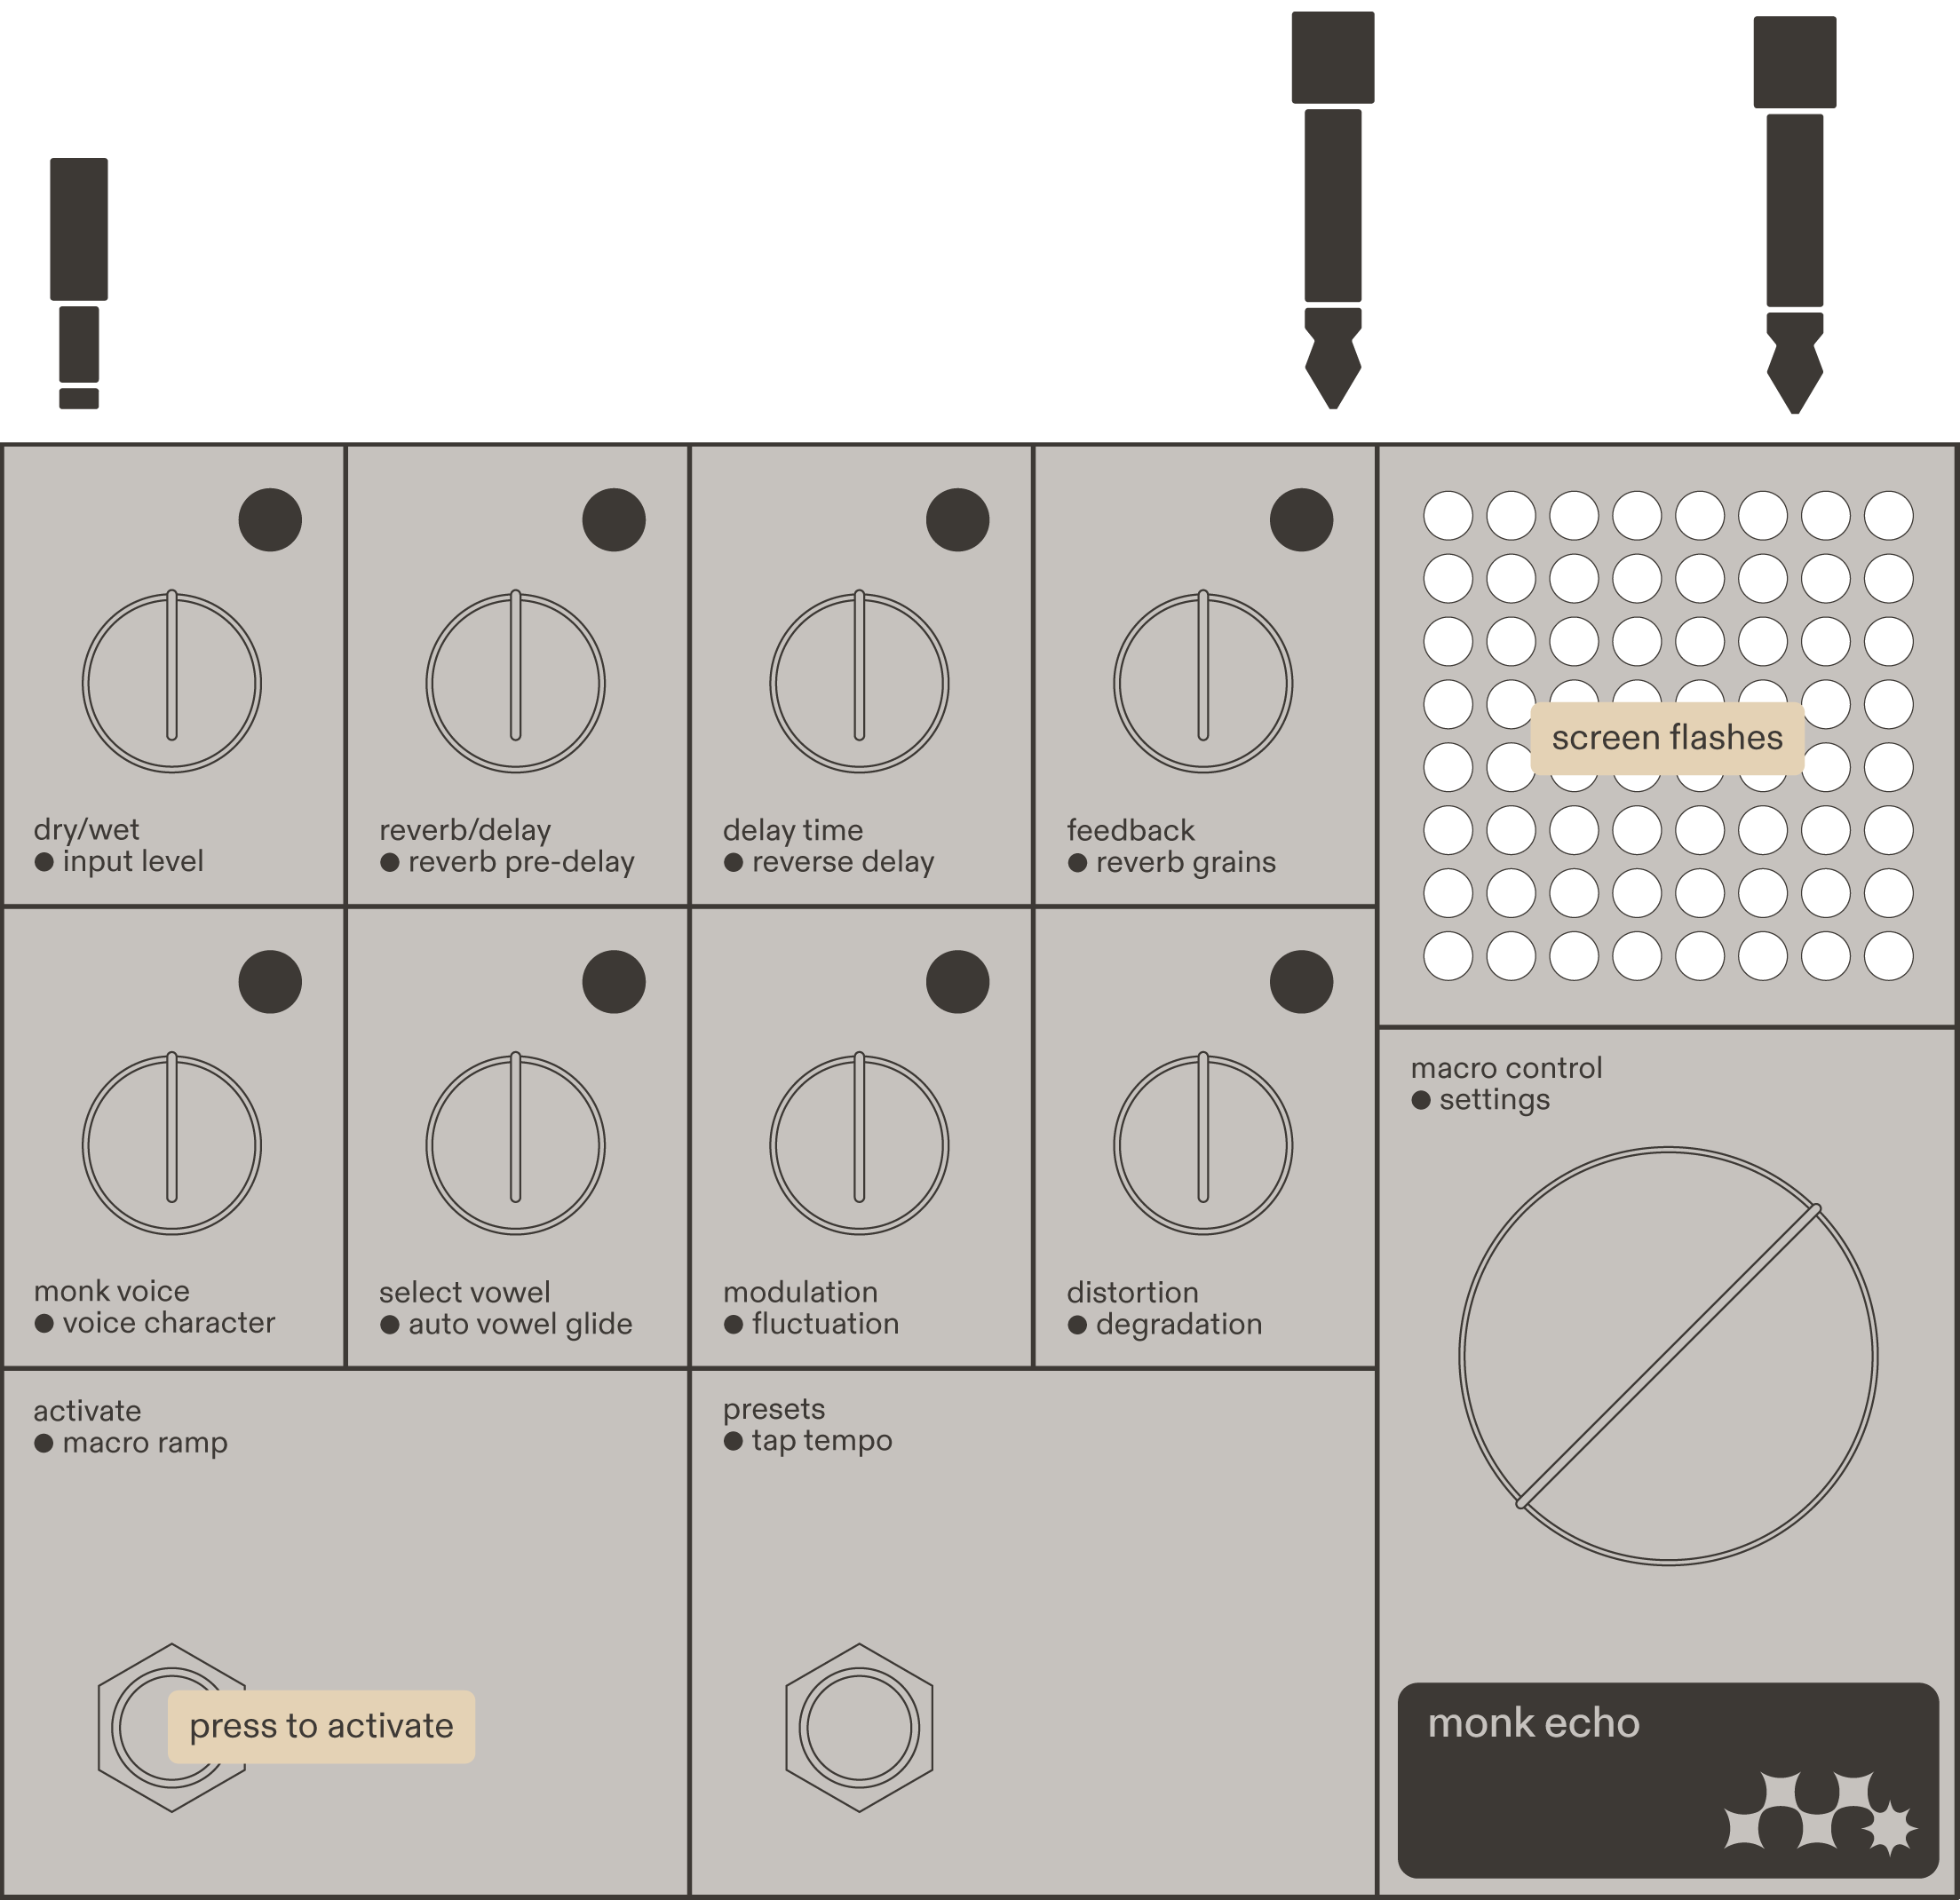
The left side of Monk Echo resembles a very traditional effects pedal.
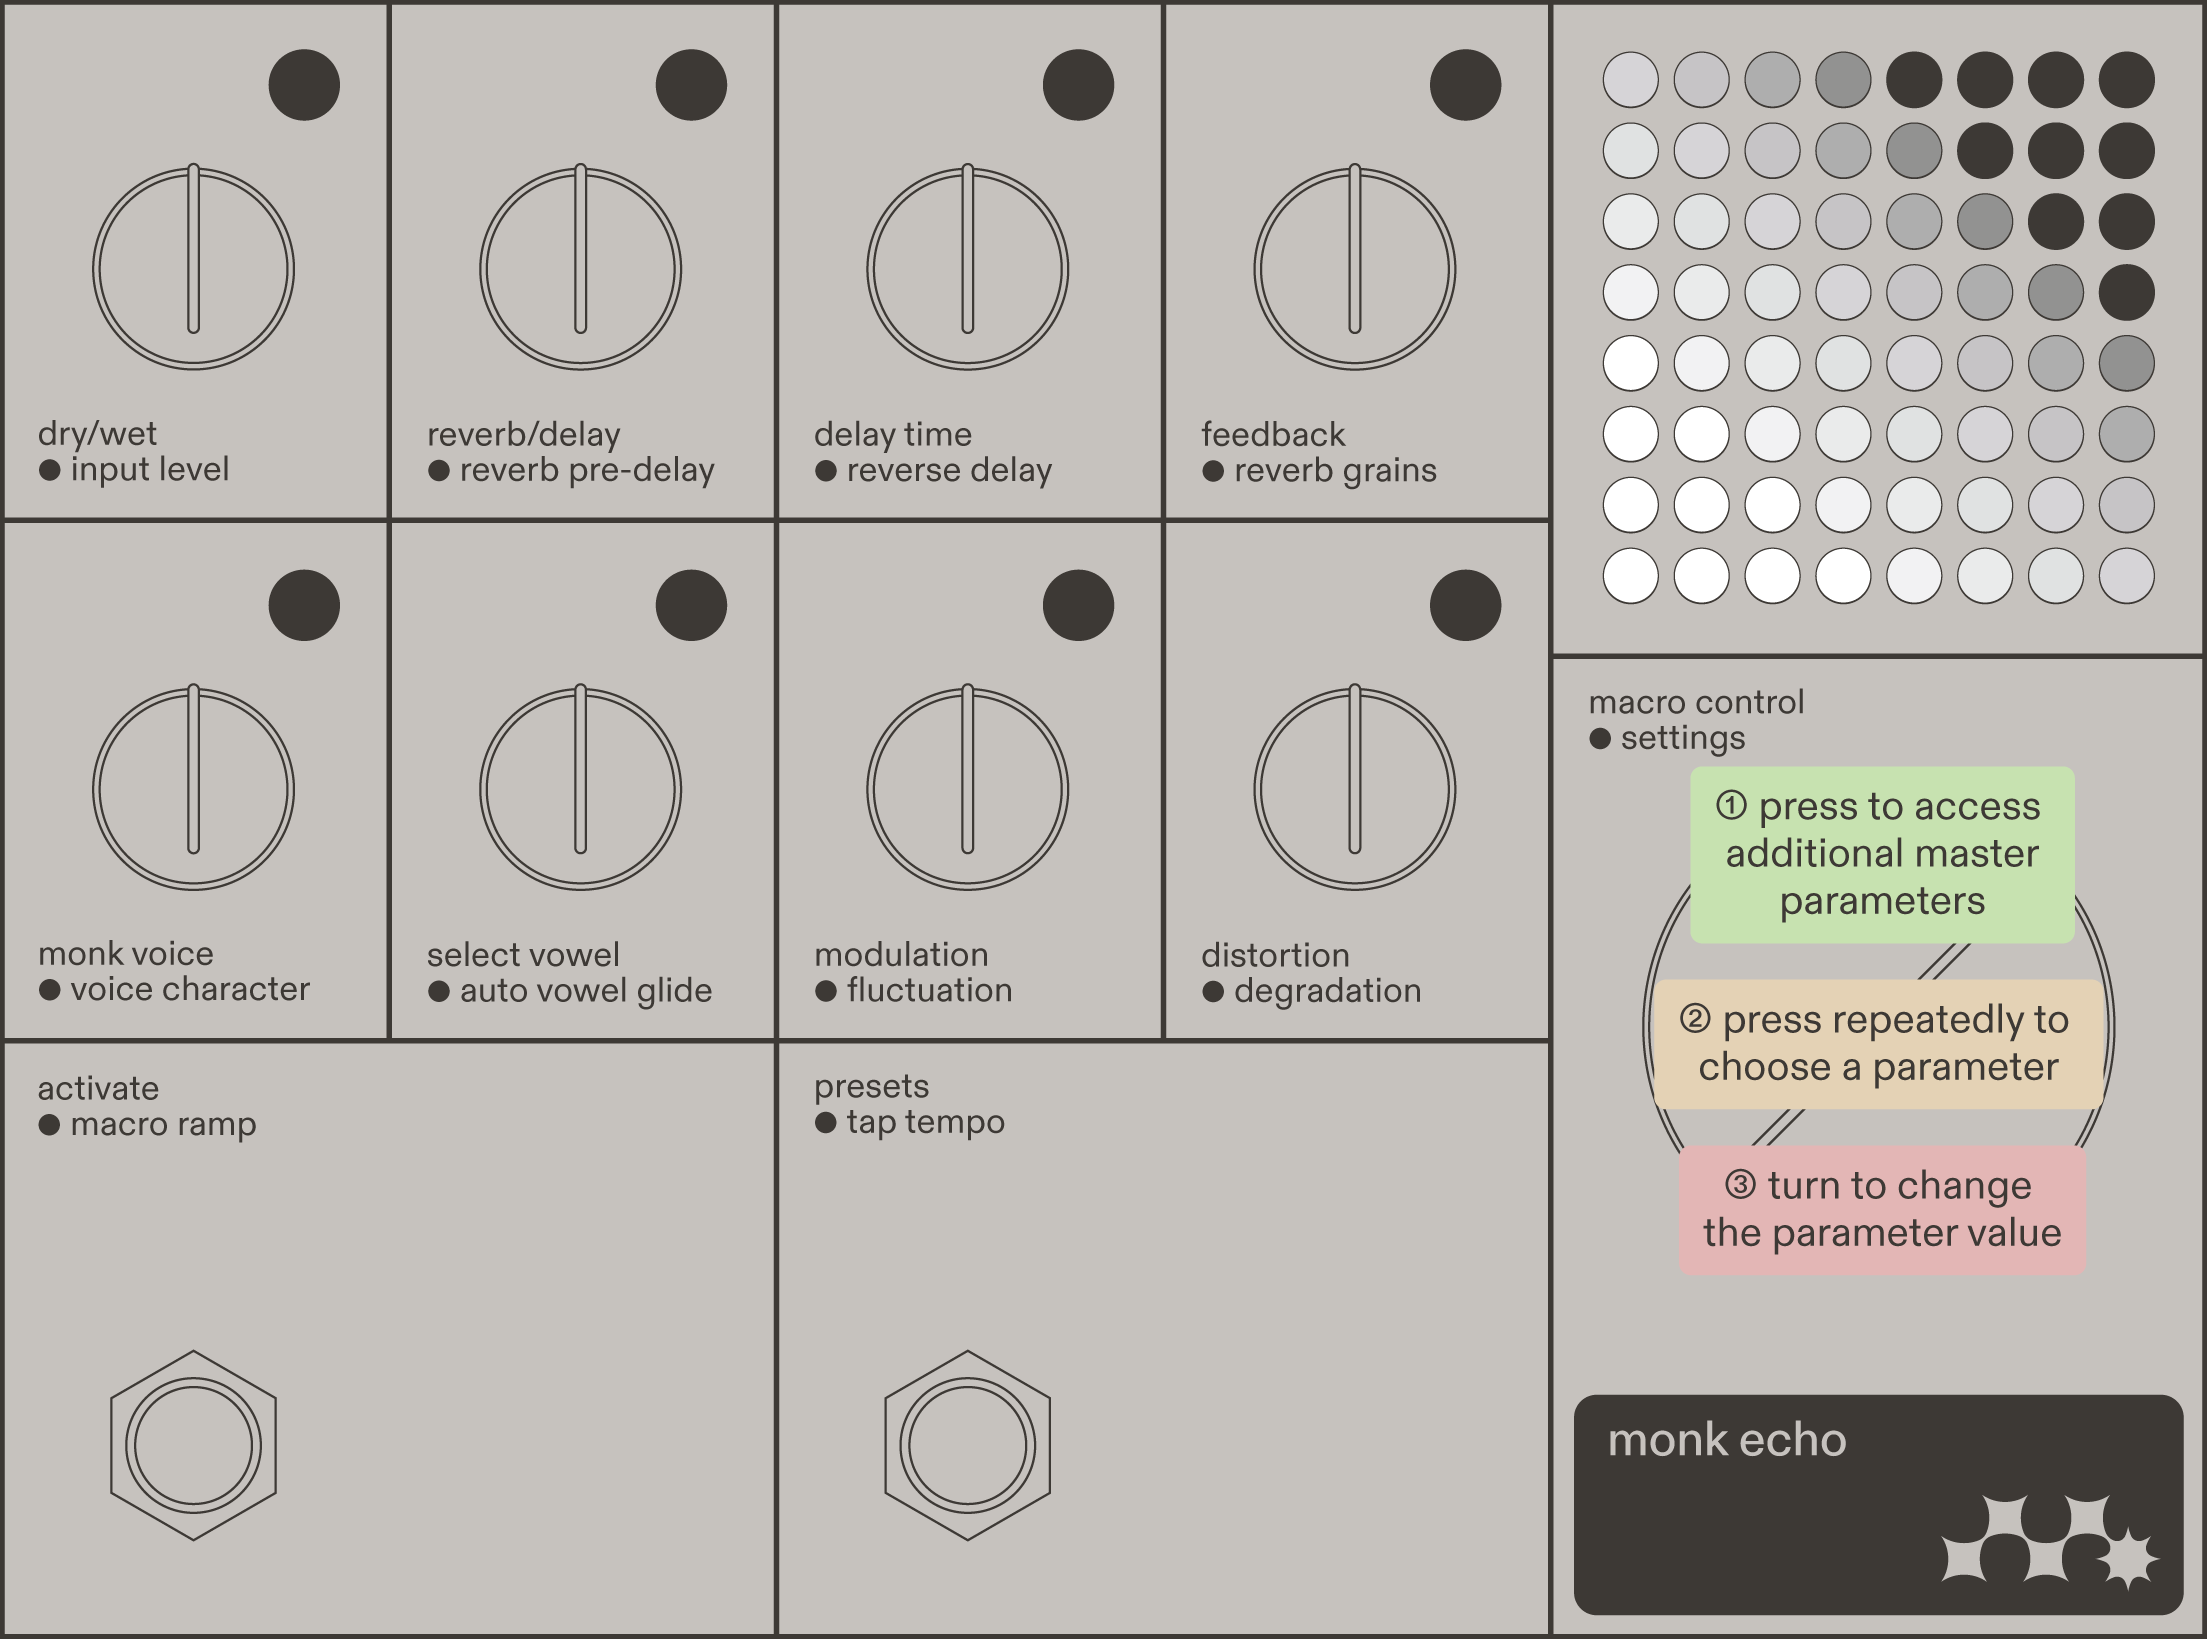
There are 8 knob-and-button combinations to dial in the sound. Each combination controls the sound as indicated by the labels below it. The top line shows the function with the button off; the bottom line shows the function with the button on.
In some cases, the button completely changes what the knob does. In others, it toggles another aspect of the sound while leaving the knob function unchanged. We’ll go through them one by one later, or you can jump ahead to the creating sounds section.
Right side
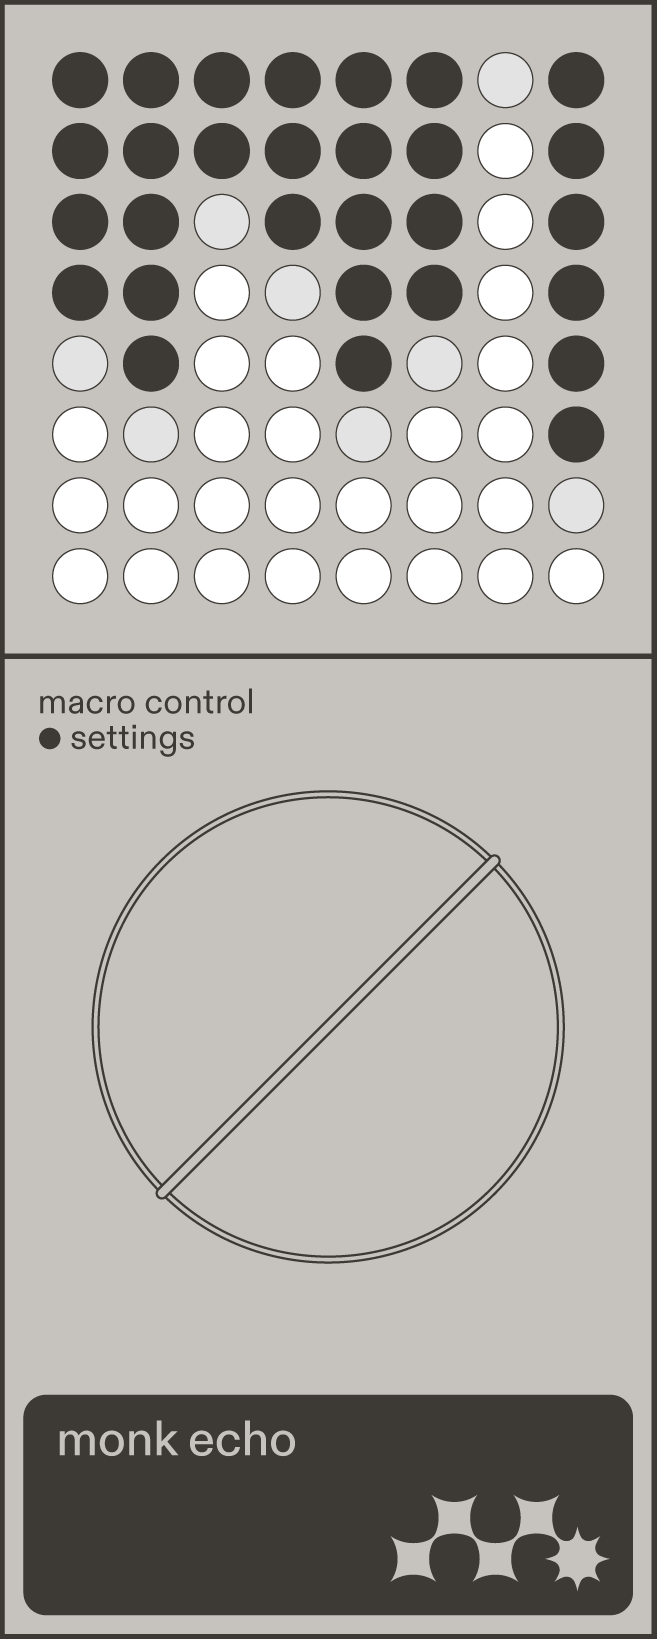
The right side sets Monk Echo apart from other effects pedals. The big macro control knob can morph all eight parameters and their associated button states. With a single expressive movement, you can morph the sound any way you like.
By default, the macro control knob is not set up to do anything. Instead, you’re in charge — it’s waiting for you to set it up. Jump ahead to the macro control section. However, almost all factory presets have macro control set up, so you can preview what it can do.
In addition to macro control, the big knob also gives access to additional master parameters and system settings.
The dot display indicates parameter changes. As you turn each knob, the corresponding column on the dot display follows its position. The dot display brightness can be reduced in the system settings.
Bottom part
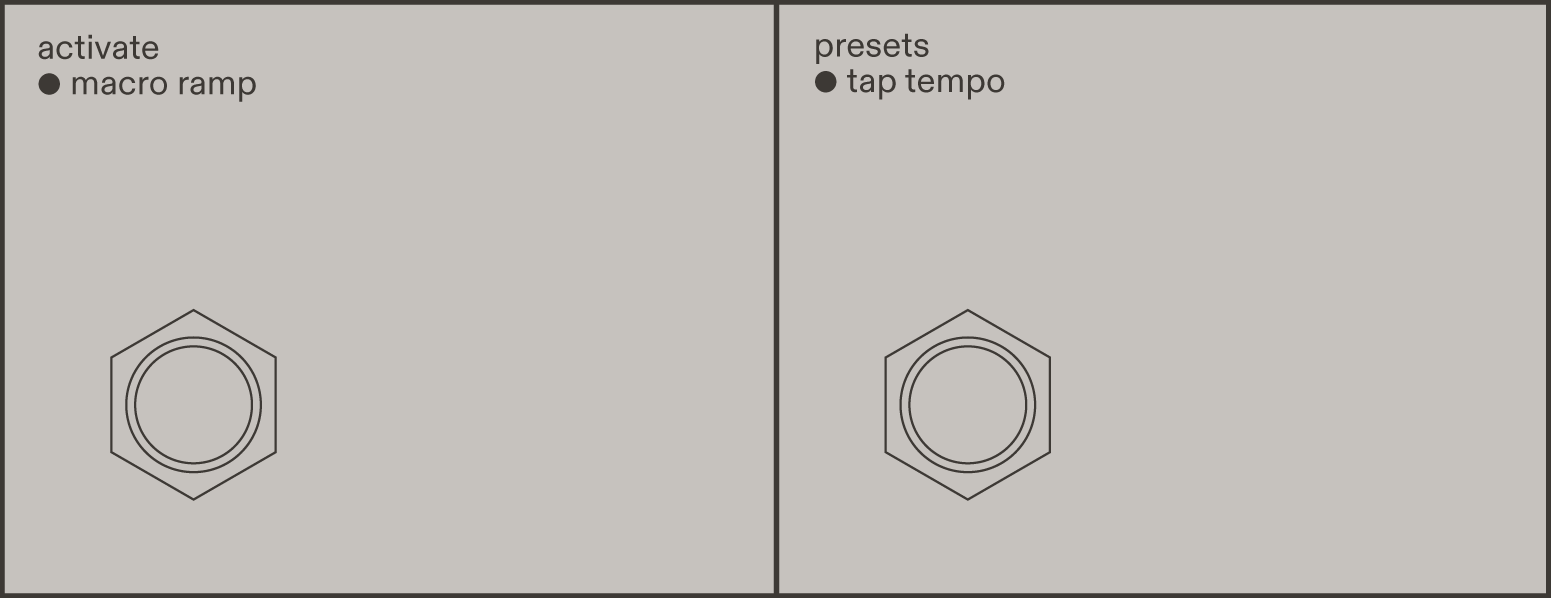
The two footswitches provide multiple functions: activating or bypassing the effect, controlling macro ramp, recalling presets, and tapping tempo.
The top line of each label indicates a quick-press action, while the bottom line indicates a long-press action.
For now, you only need to know that a quick press of the left footswitch activates the effect or puts it in bypass. When toggling between the two, the whole dot display flashes, and it is brighter when the effect is active.
Back panel
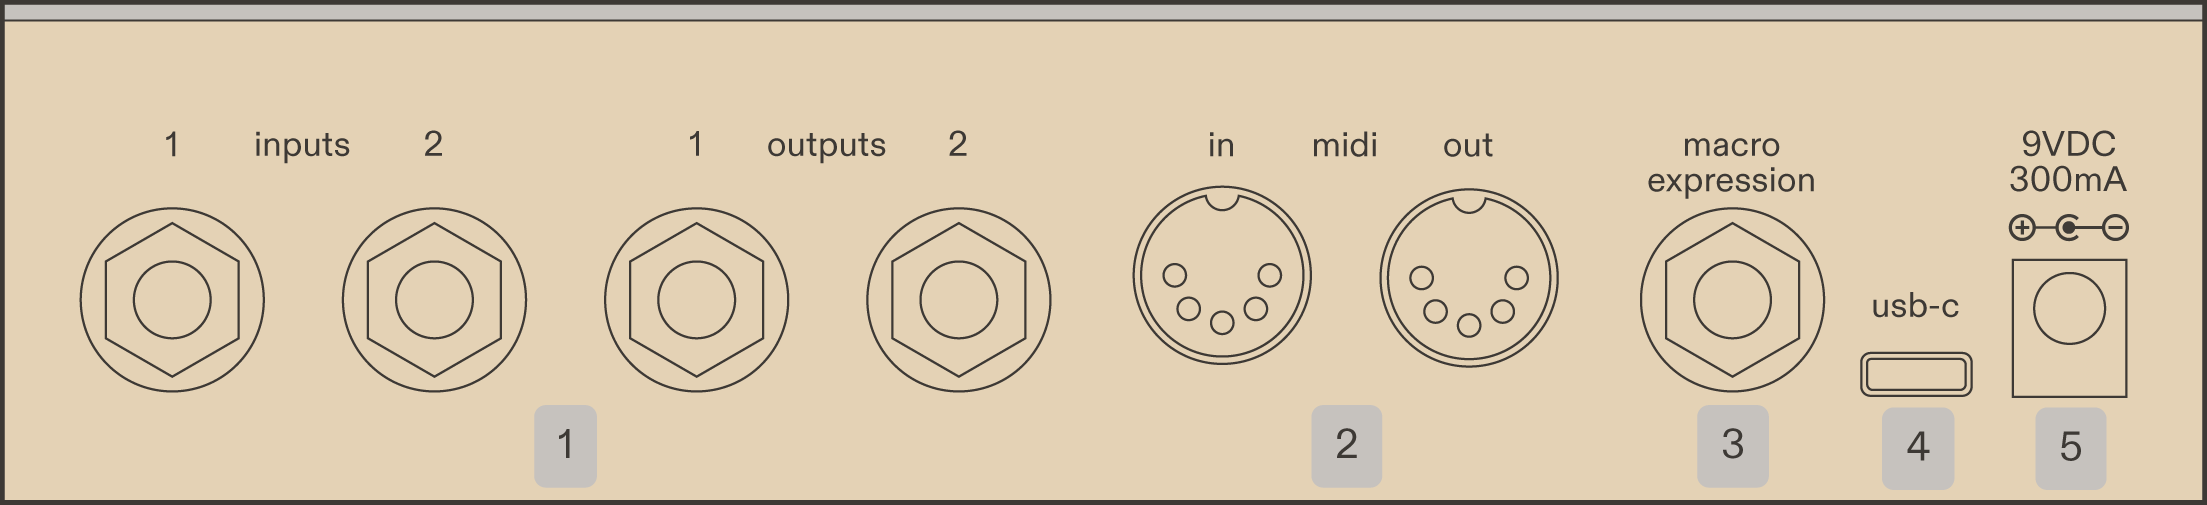
- Stereo audio inputs and outputs for both instrument- and line-level signals.
- MIDI input and output. Jump ahead to the MIDI section.
- Macro expression input for an expression pedal or control voltage signal (0 to +3.3 V). Jump ahead to the macro expression section.
- (coming soon) USB-C connectivity for preset management, firmware updates and system settings via a web app, as well as MIDI through USB.
- 9V DC center-negative power connector. A power supply is not included, as most pedal owners use universal multi-output power supplies. Please refer to the Technical specifications for more details.
Getting started
To start using Monk Echo:
- Connect it to a 9 V DC power supply with center-negative polarity and at least 300 mA. When powered on, Monk Echo is in bypass.
- Connect your instrument to input 1, or to both inputs for a stereo setup.
- Connect output 1, or both outputs, to your guitar amplifier, mixer, or other audio equipment.
- Press the activate footswitch once to exit bypass and activate the effect. The dot display will flash once as an indication, then become brighter.
Creating sounds
For now, let’s focus on dialing in sounds using the eight knobs and LED buttons.
Keep in mind that these parameters can also be morphed using the macro control, and that there are additional master parameters. All of these are described in the following sections.
dry/wet input level
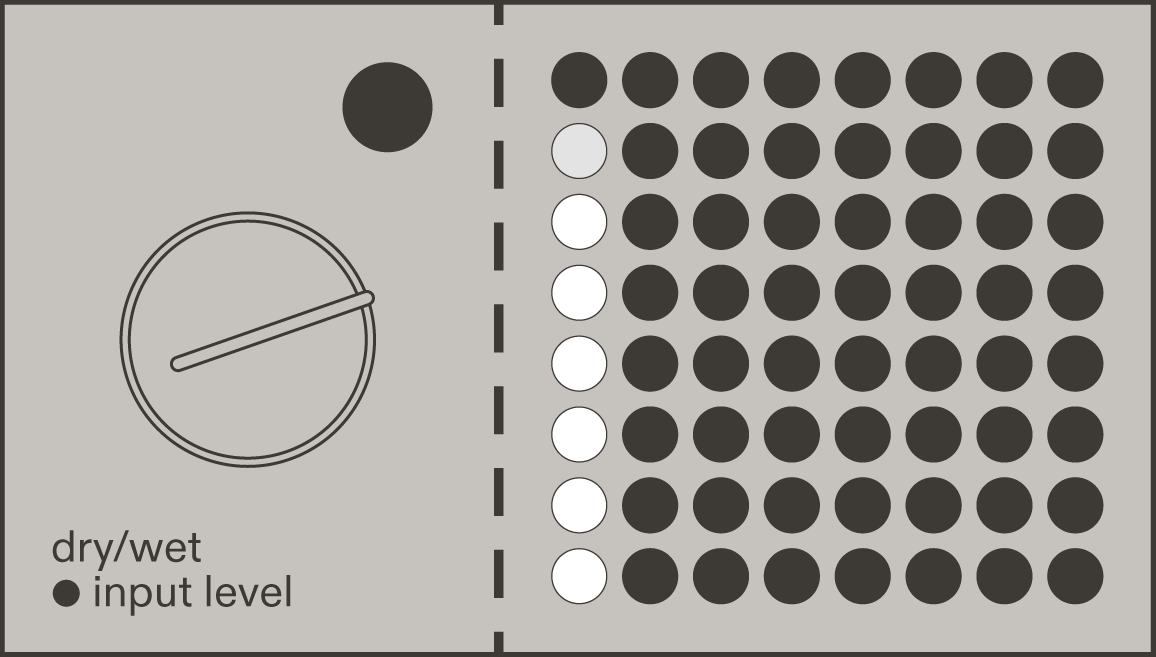
Control the balance between the input signal and the effect. The behavior depends on the state of the button above. As you turn the knob, the first column on the dot display follows its position, providing visual feedback.
button off
With the button off, the knob functions as a traditional dry/wet mix control. The center position provides an equal mix of dry and wet signals.
button on
With the button on, both the dry and wet signals remain at full volume. The knob controls how much of the dry signal is fed into the effect. Turning the knob down does not reduce the volume of echoes that are already sounding — they simply ring out while less of the input signal is fed into the effect.
This allows you to play expressively by sending certain notes or phrases more deeply into the effect while keeping others more dry, without changing the volume of the echoes.
If you are using Monk Echo in a mixer send channel or another setup where a dry signal is not needed, you can disable the dry signal completely in the system settings. The function of this knob is adjusted accordingly: it controls output volume with the button off and input volume with the button on.
reverb/delay reverb pre-delay
button off
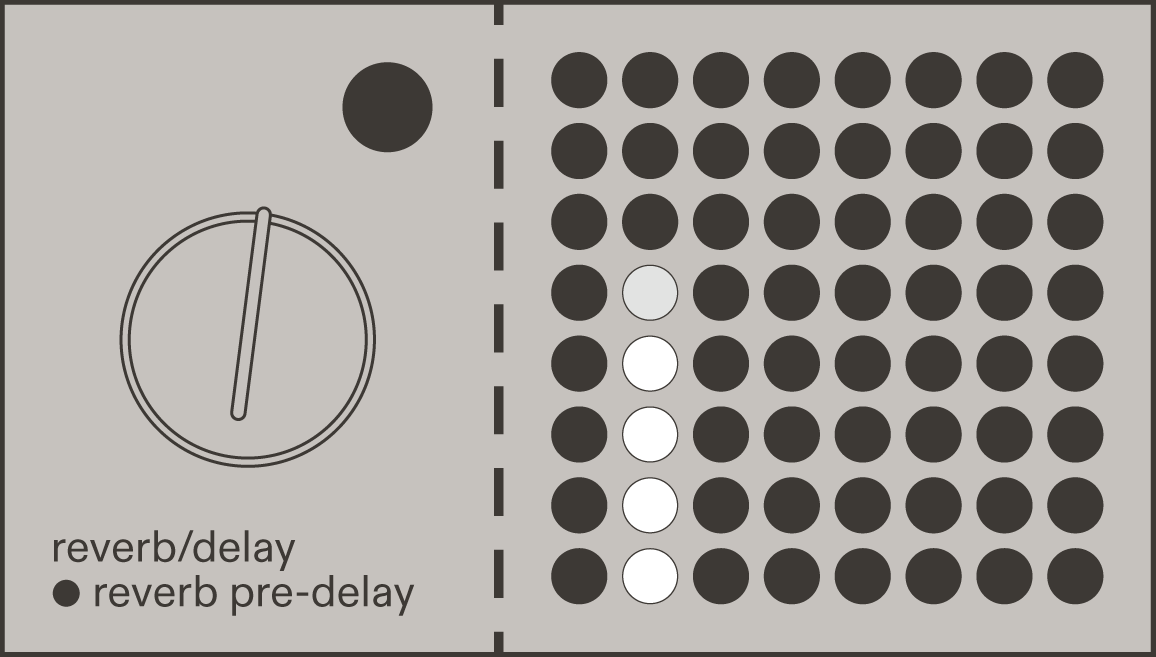
Adjust the balance between reverb and delay. At the minimum setting, only reverb is heard. At the maximum setting, only delay is heard. In between, the mix of reverb and delay varies continuously.
The delay is also fed into the reverb. The knob controls both the delay output level and how much of the delay is fed into the reverb. The center position typically yields a massive sound, with both reverb and delay wide open and feeding into each other.
button on
Pressing the LED button does not change the behavior of this knob. Instead, it adds pre-delay to the reverb signal. The pre-delay time depends on the delay time, which is controlled by the next knob.
delay time reverse delay
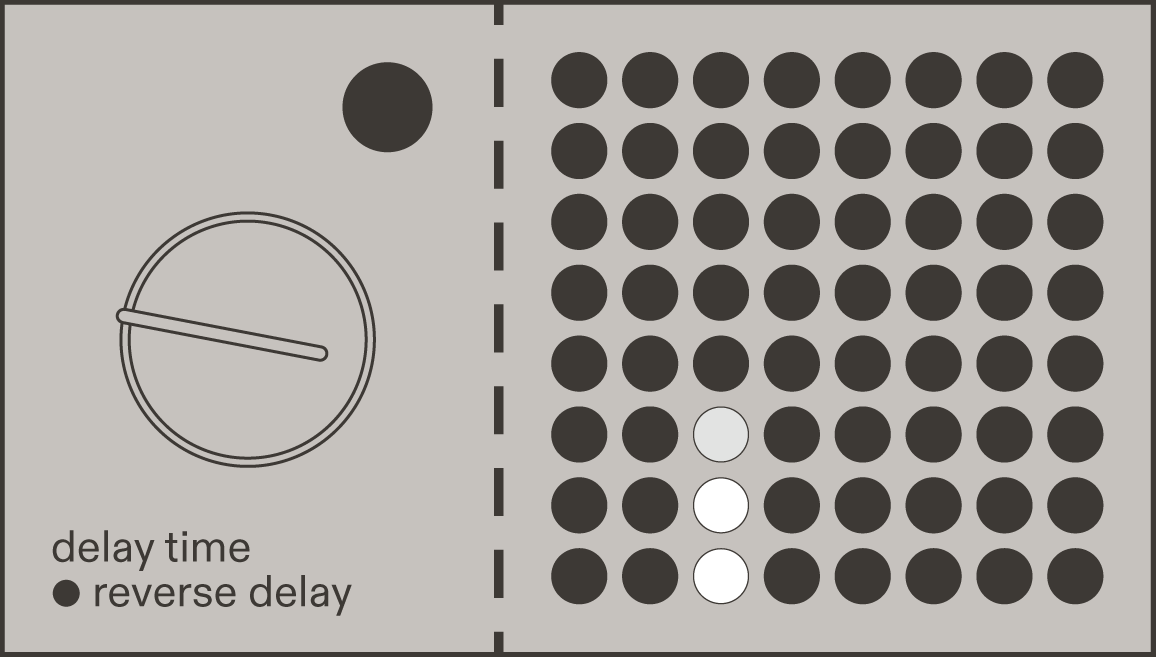
button off
The delay time ranges from 1 millisecond to 10 seconds. At very short delay times, it produces metallic resonance tones and doubling effects, as well as flanging and chorusing when combined with modulation. As the delay time increases, the sound moves through slap-back type delays all the way to very long repeats.
A trick for applying some of the Monk Echo tones to the dry signal is to use minimum feedback, the shortest delay time, and the dry/wet control set to maximum.
Because of this very wide time range, dialing in an exact rhythmic rate might be faster using tap tempo.
The delay time also affects the reverb pre-delay time when it is engaged. The pre-delay is always half as long as the delay time.
button on
Press the button to instantly reverse the delay. Any delay that is already sounding will continue to ring out, but in reverse. Press the button again to return the delay to normal playback. In the few-millisecond delay range, reverse creates abrasive tones.
feedback reverb grains
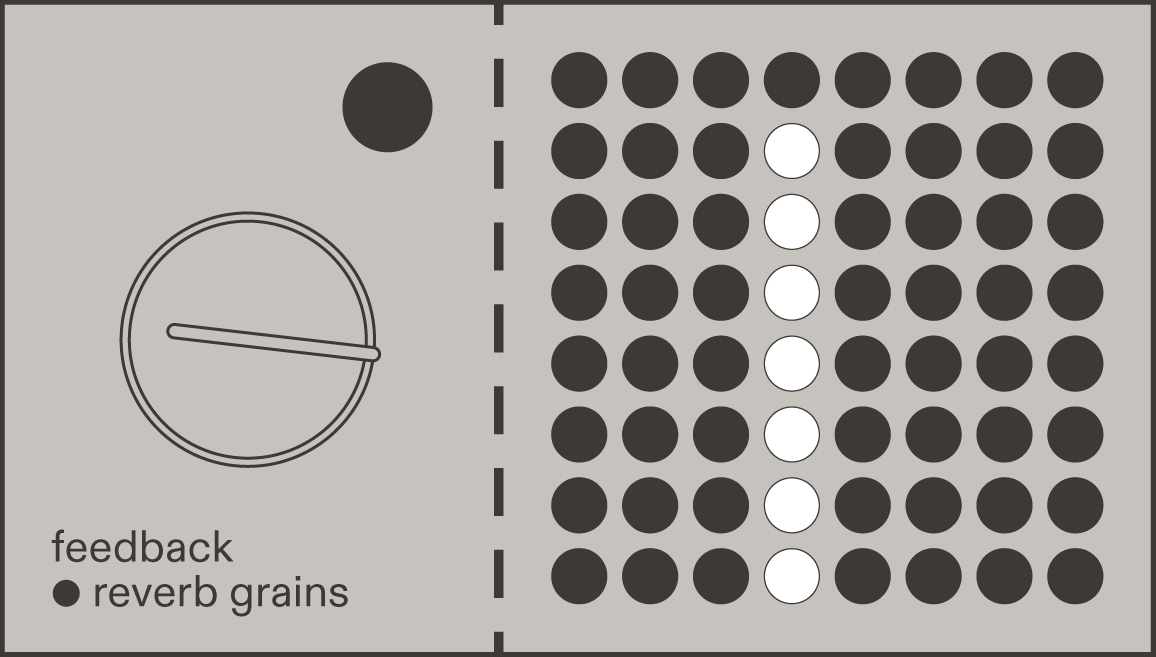
This knob controls both reverb decay and delay repeats.
button off
Start low for short early reflections and a single delay repeat. Turn it up to reach lush echo tails. Between 3 and 4 o’clock, you’ll discover the sweet spot where both reverb and delay can sustain almost indefinitely without becoming unstable. Keep turning the knob, and let the self-oscillating feedback take over. Monk Echo is not designed to be safe and calm — very high feedback settings can and will cause the audio to clip. A loud noise warning is warranted.
System settings allow you to choose between multiple bypass and tails options, including a safe tails option that reduces high feedback as you put Monk Echo into bypass while allowing the echoes to ring out. There is also a tails option without any safety measures. In this mode, self-oscillating feedback will continue ringing out indefinitely, even when Monk Echo is in bypass.
button on
The button activates granular reverb processing. The reverb tail is sliced into grains that jump between octave and perfect fifth intervals. As with the pre-delay, the grain size remains rhythmically linked to the delay time knob. The resulting tones range from audio-rate textures to slow, pitch-shifted modulation. The button does not affect the feedback control.
monk voice voice character
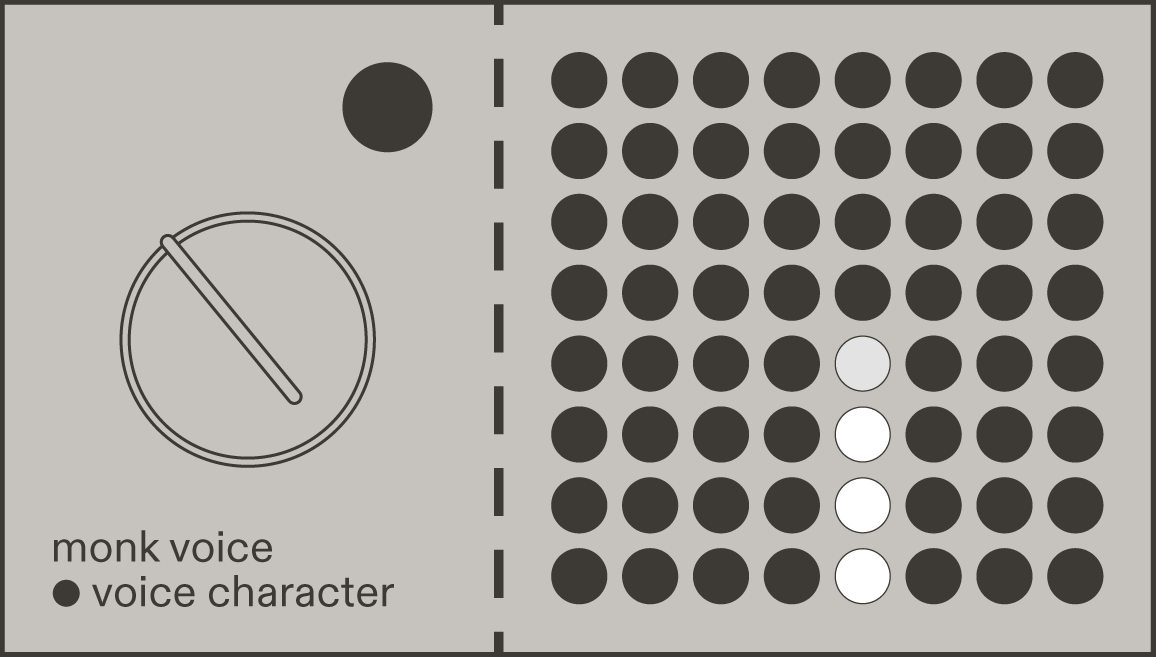
This is the control that gives Monk Echo its voice.
button off
With the button off, it determines how much of the reverb and delay passes through the monk formant filters. Turn it all the way up to hear only the strange monk resonances. Dial it back to blend them with clean and lush echoes.
button on
Press the button to switch to voice character mode. At the minimum setting, the monk voice uses male formants; at the maximum setting, it uses female formants. In the middle, you get an equal mix of male and female formants.
Switching the button off and on keeps the parameter setting for each mode in memory, so you can switch between them without losing your settings.
To achieve more choir-like sounds, try adding some reverb & delay modulation.
select vowel auto vowel glide
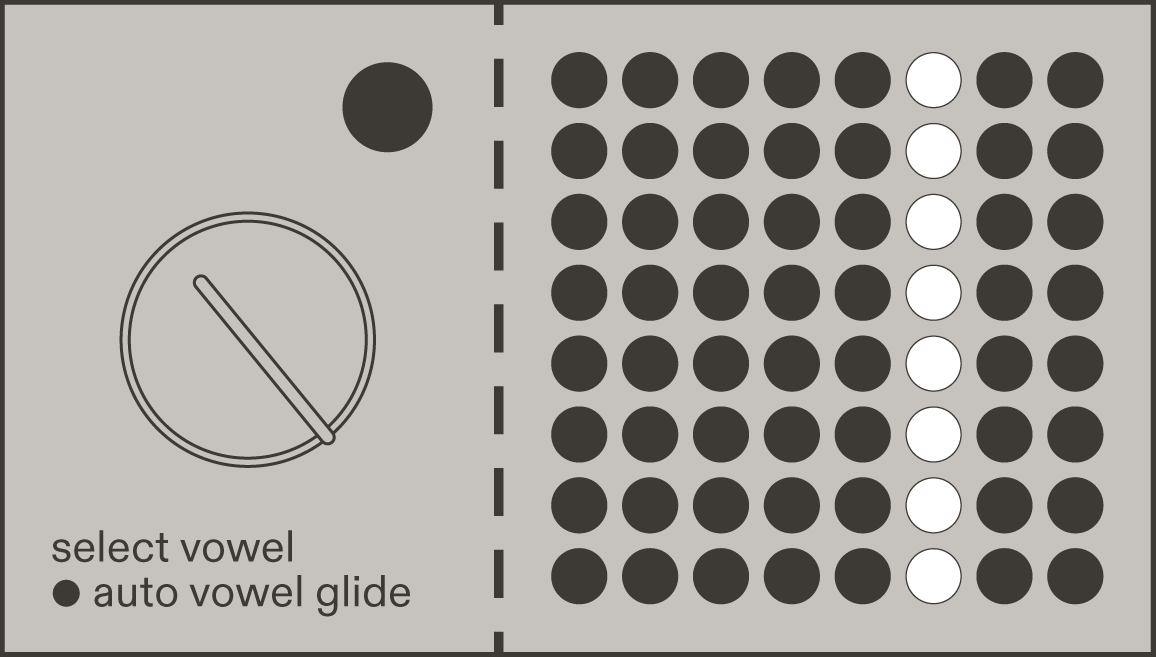
Two ways for the monk voice to accompany you.
button off
With the button off, you are in control. The knob lets you move through various vowels — find the one that feels good. However, you don’t necessarily need to think of this as adding vowels. At a low and subtle monk voice setting, different vowels can be used as an overall echo tone-shaping tool without making the voice character obvious.
button on
Press the button to let the monk voice take over. Focus on your musical phrasing, and once Monk Echo detects an attack after a short break, it will choose a different vowel. Turn the knob to determine how quickly one vowel glides into another, from quick robotic jumps to smooth, human-like transitions.
If you switch back to manual vowel selection, Monk Echo will remember the glide time and apply it to manual vowel selection as well. As a result you can manually, or with the macro control choose the desired vowel and gradually glide into it from the previous one.
modulation fluctuation
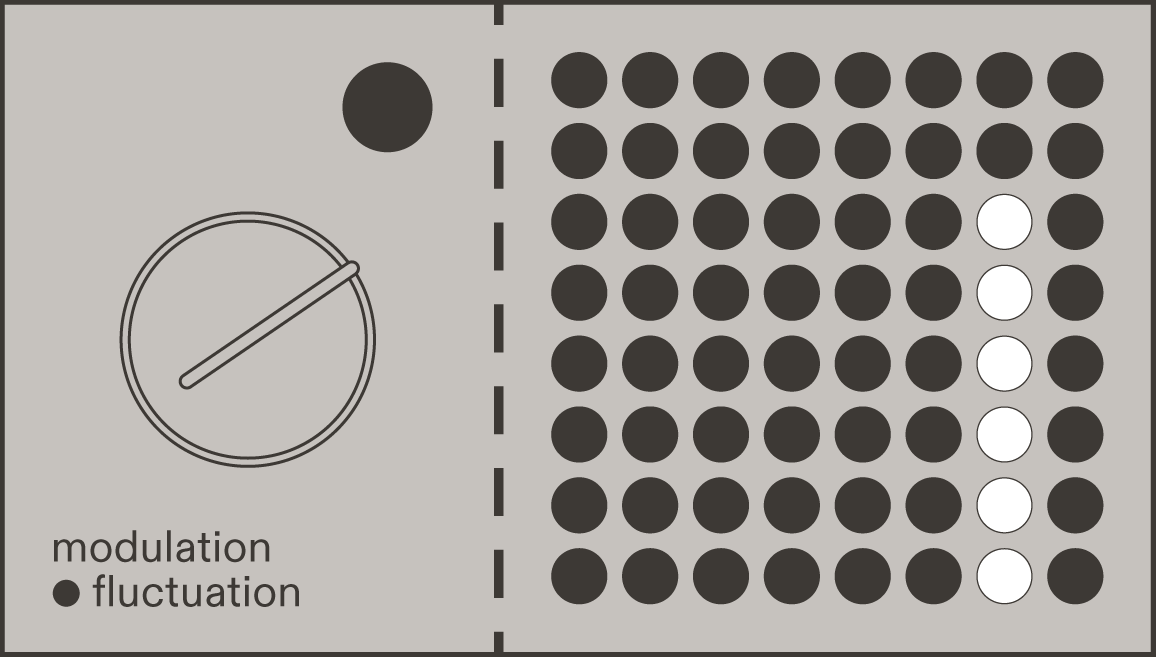
Add movement. From slight chorusing to sickening instability. Both modes control reverb and delay modulation, but in different ways.
button off
With the button off, you are in modulation mode. The knob controls the depth of a classic static sine-wave modulation applied to both reverb and delay. The results differ between the two: reverb modulation is more subtle, adding a sense of depth, while delay modulation produces more prominent pitch shifting and chorusing.
button on
Press the button to enter fluctuation mode, where the movement follows your musical phrasing. Using the same phrasing detection as the auto vowel glide, the delay time momentarily jumps to a random value. The knob controls the range of this fluctuation. Unlike classic modulation, which continuously moves the delay time back and forth, fluctuation changes it once and then holds it until the next trigger. It also affects the reverb modulation amount, opening up a huge range of new modulation sounds. See the suggested settings section to learn more.
Tip: Because the reverb pre-delay and grain size are always relative to the delay time, fluctuation affects them too. This means you can use fluctuation to alter these effects even when the delay itself is not mixed in.
distortion degradation
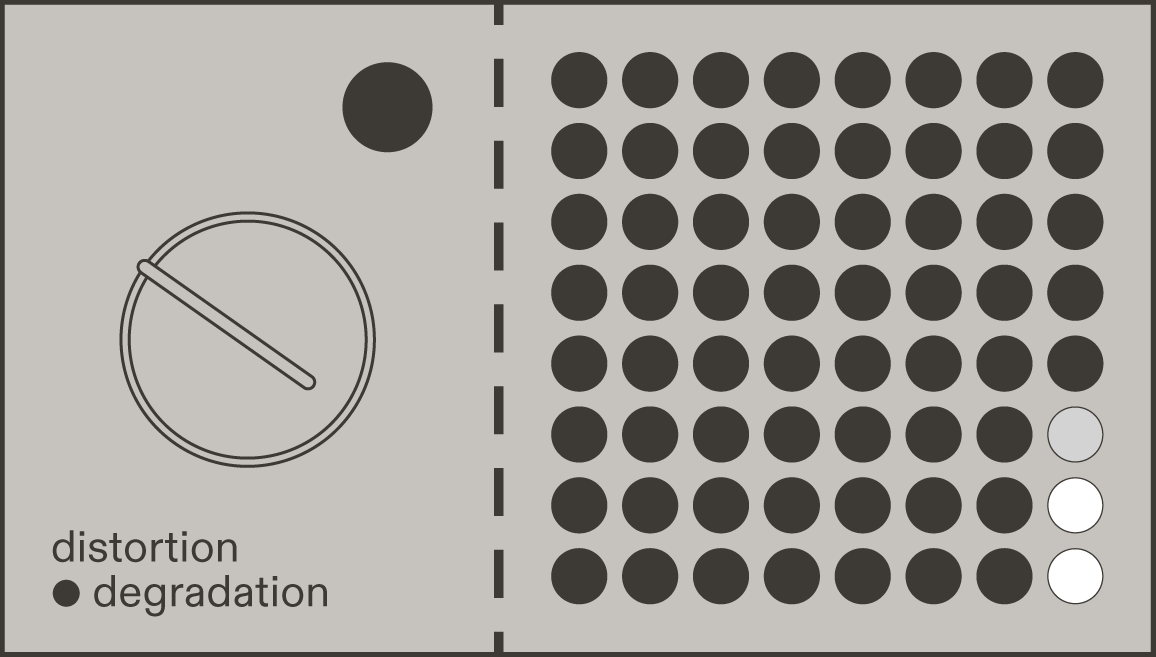
By now, your Monk Echo should be sounding pretty sweet. Now it is time to make it ugly.
button off
With the button off, you distort the once-beautiful reverb and delay tails. At first, it is a very subtle distortion. Keep turning the knob and you’ll eventually reach a massive wall of overblown sound. Depending on the musical scenario, the distortion can produce excessive low and high frequencies. Use the low- and high-cut filters to tame the sound.
button on
Press the button to explore a more subtle side of ugly. If distortion adds to the sound, degradation takes it away. It removes a few bits of the sound here and there and adds noise, like vinyl crackle that occasionally disrupts the music in a strangely pleasant way. Increase the degradation and Monk Echo loses even more bits of itself, inevitably ending up with only a few short fragments of what it used to be — like a disintegrating mind.
Additional master parameters
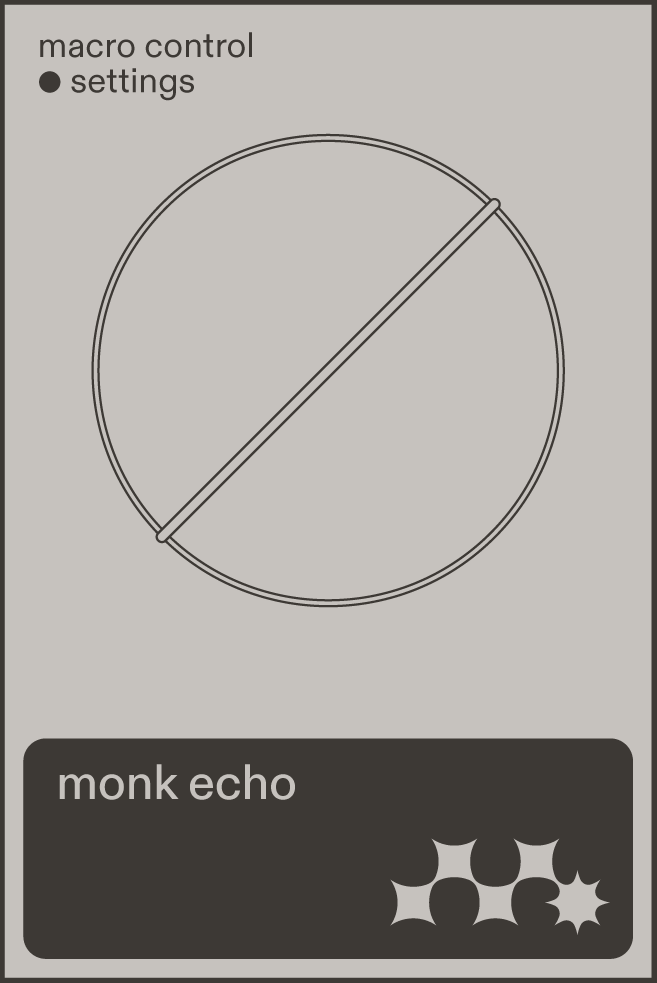
The huge knob is an encoder we call the macro control. Its main purpose is to morph all the sound parameters, but it also gives access to a few additional master parameters.
Press the encoder repeatedly to cycle through them, then turn the encoder to adjust each parameter. Press and hold the encoder for a short while to exit the additional master parameters.
Low-cut and high-cut filters
Monk Echo works with the full audio spectrum, but sometimes it is useful to tame low-end rumble or high-end harshness. You might want to reduce the low end when running Monk Echo into a guitar amp, or dial back the high frequencies when running it into a mixer or PA. Both filters can of course also be used for more pronounced tone shaping. When both filters are set to their minimum values, very little audio passes through, allowing you to dial in exactly how much of the spectrum you want to keep.
The filters are 12 dB/octave high-pass and low-pass filters.
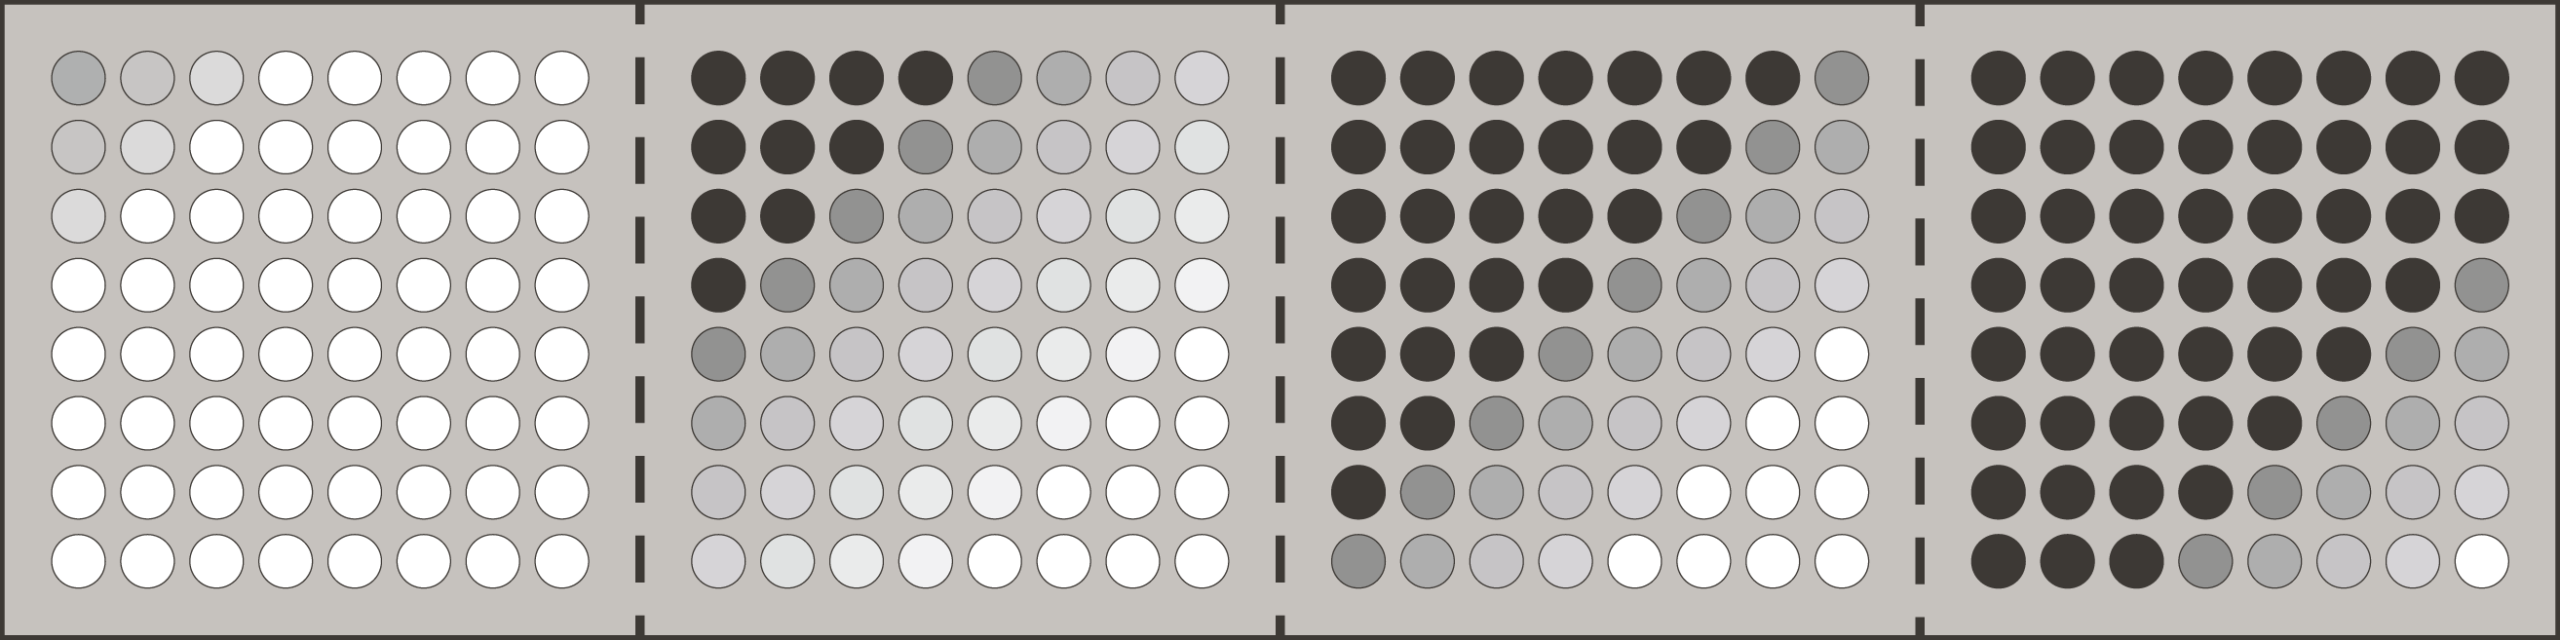
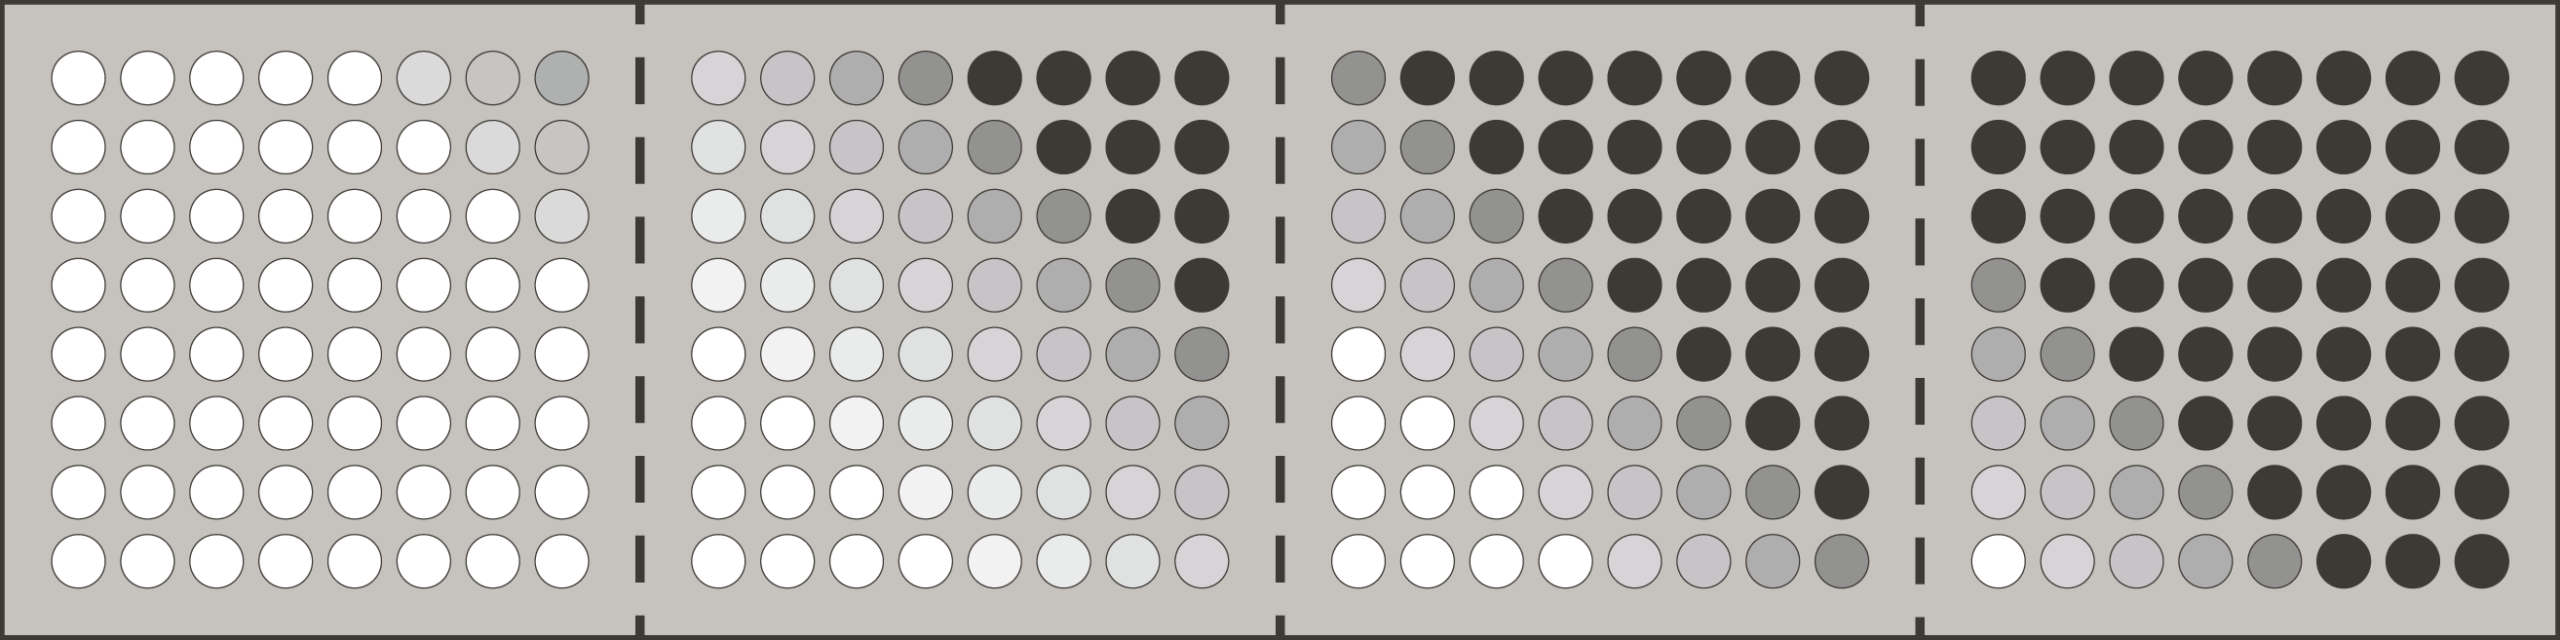
Delay panning
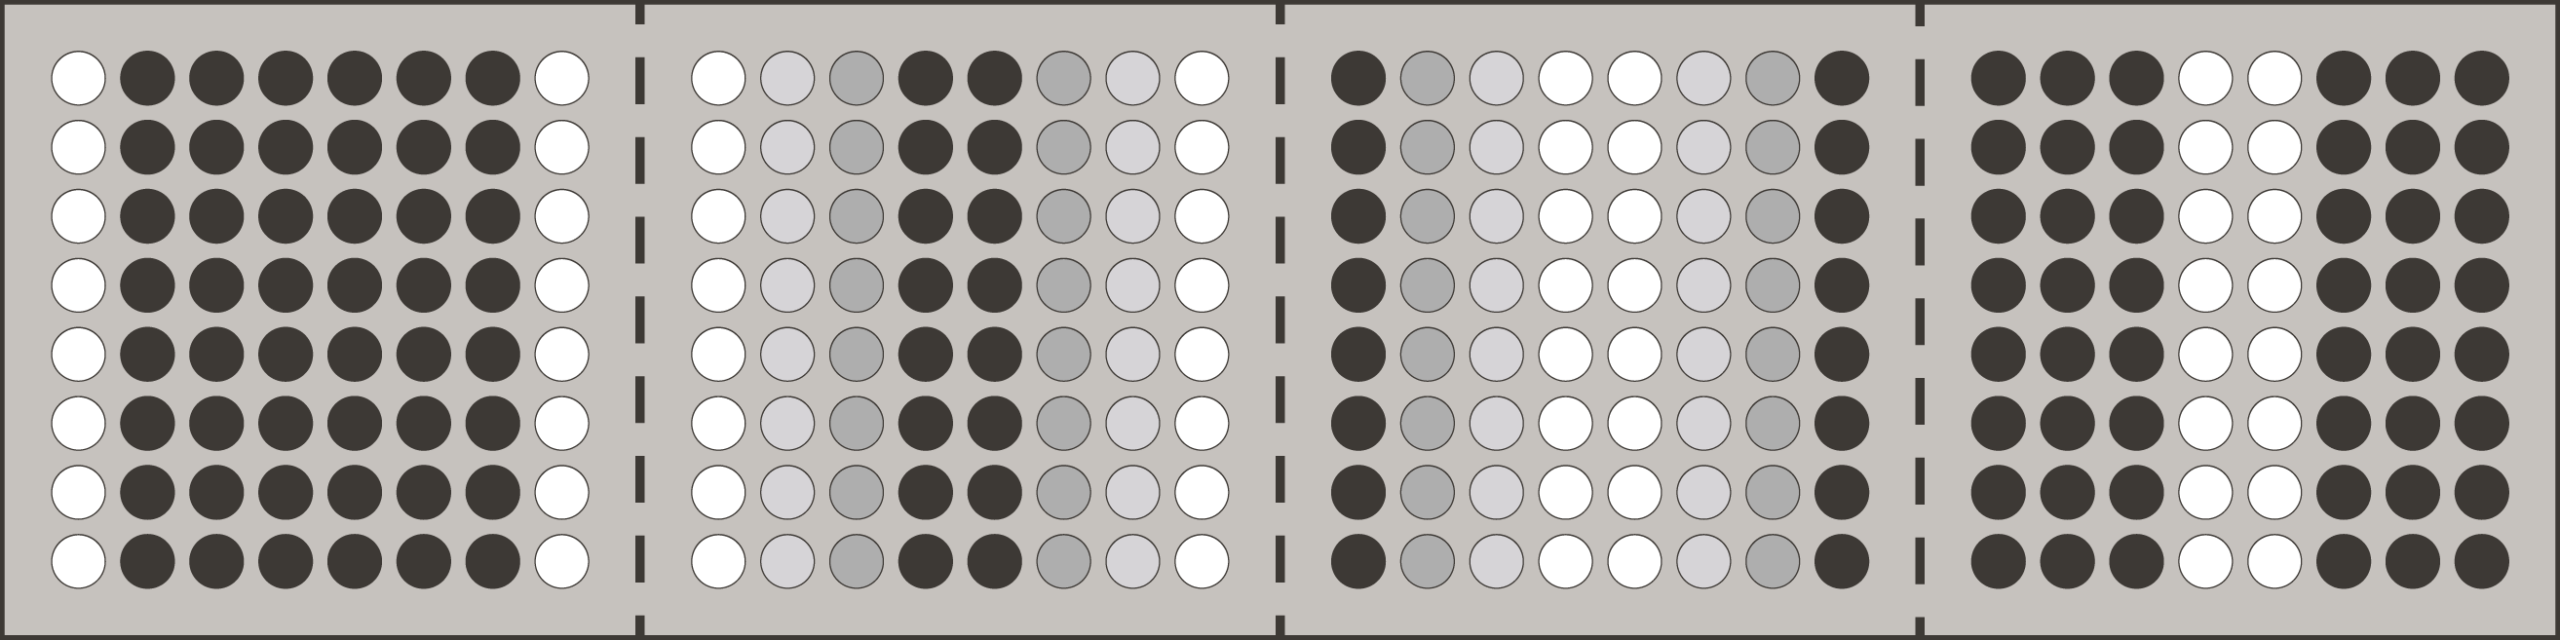
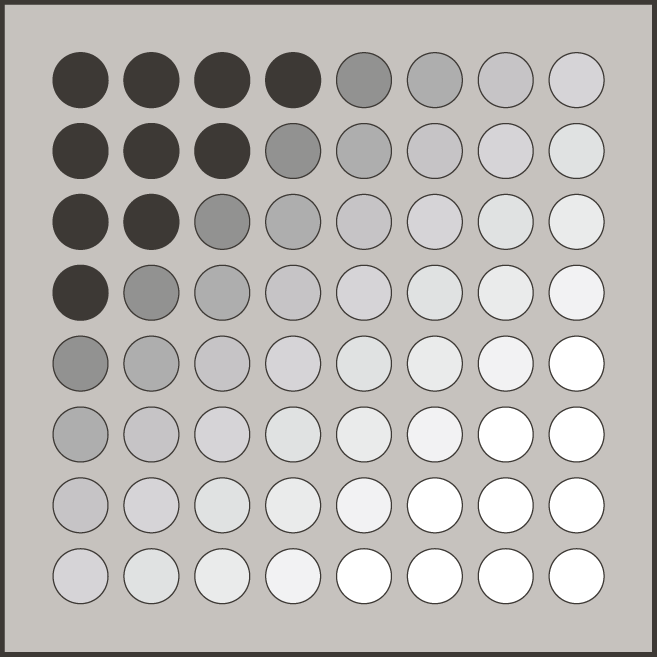
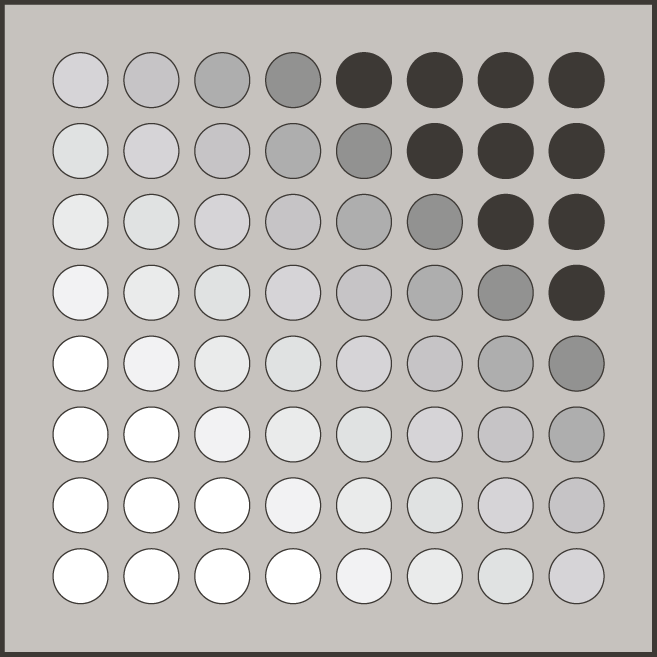
By default, Monk Echo’s delay taps are panned fully left and right for a ping-pong effect. This control lets you gradually move them toward the center, from fully panned to fully centered.
When centered, the delays remain stereo, but each delay tap is present in both channels instead of alternating between them in ping-pong mode.
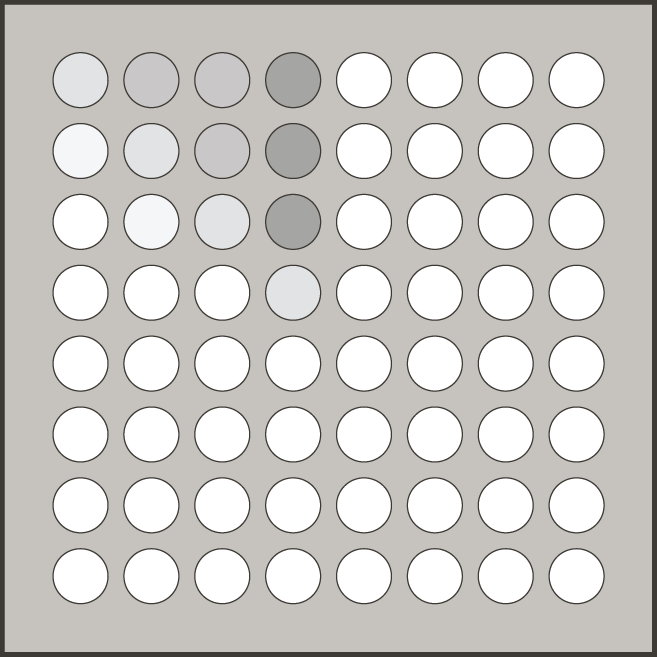
The left side of the example below shows taps fully paned and the right side – fully centered.
Subdivisions
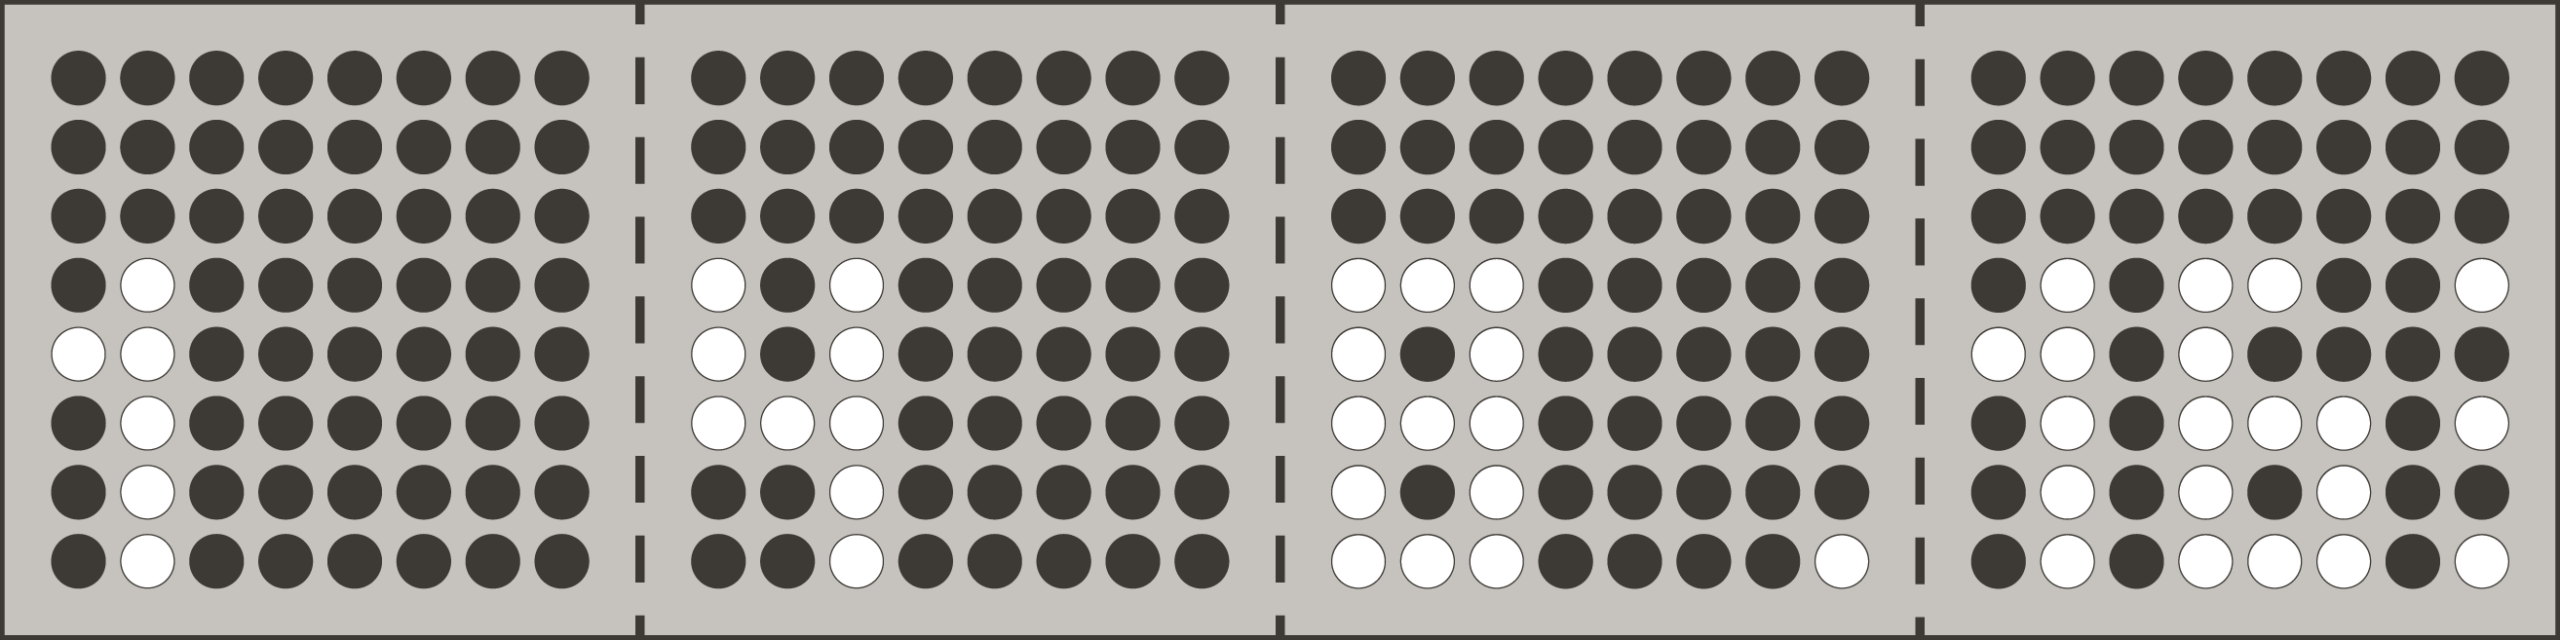
This parameter selects the subdivisions shared by tap tempo and MIDI clock. Instead of quantizing the delay time knob, the subdivision is set here. This keeps the delay time knob unquantized, allowing expressive delay time changes even when using tap tempo or MIDI clock.
The full functionality is described in the tap-tempo section.
The available subdivisions are from 1/1 to 1/64 including dotted and triplet notes. The below example shows only a few of the available options.
Macro ramp rate
This parameter determines the speed at which the macro control ramps up and down when using the macro ramp footswitch. Read more about macro control in the next section.
The macro ramp rate is indicated by a clockface type animation.
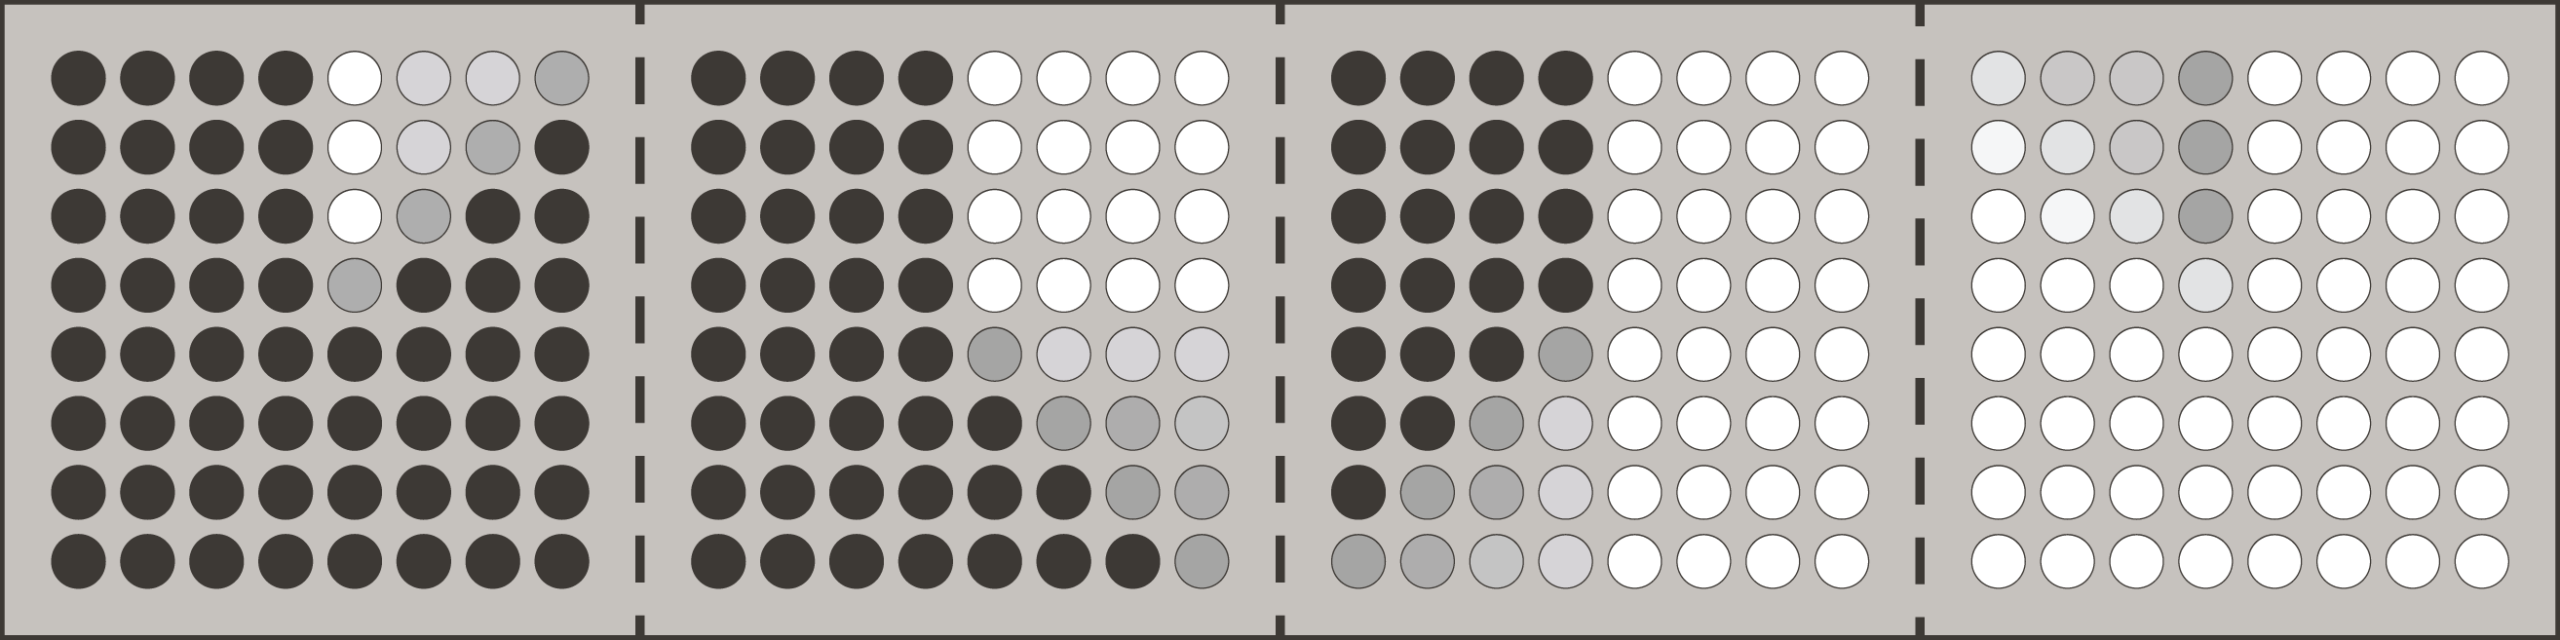
The shortest macro ramp rate is almost instant jump to the maximum after a long press is detected with the footswitch.
The longest macro ramp rate takes about 20 seconds to fully reach the maximum.
Macro control
The macro control lets you morph all parameters across the eight knobs and switch all eight LED buttons with a single expressive movement. As you turn the macro control knob, each parameter can morph up or down by a specific amount.
The macro control can do everything from simple, utilitarian tasks — like increasing feedback while reducing the wet mix — to wildly morphing sounds where most, if not all, parameters change. Or you can use it to control a single parameter with the macro ramp footswitch or an external expression pedal.
By default, the macro control is not set up to do anything. It is simply waiting for you to set it up, which is a quick and easy process. Once set up, it is saved with the preset. When you recall a preset, you recall not just the sound, but also the way you interact with it.
The macro control is not only a tool for planned moments of expression, but also a source of unexpected sounds.
Macro setup
Macro setup for a knob
The macro control can move each parameter up or down by a specific amount.
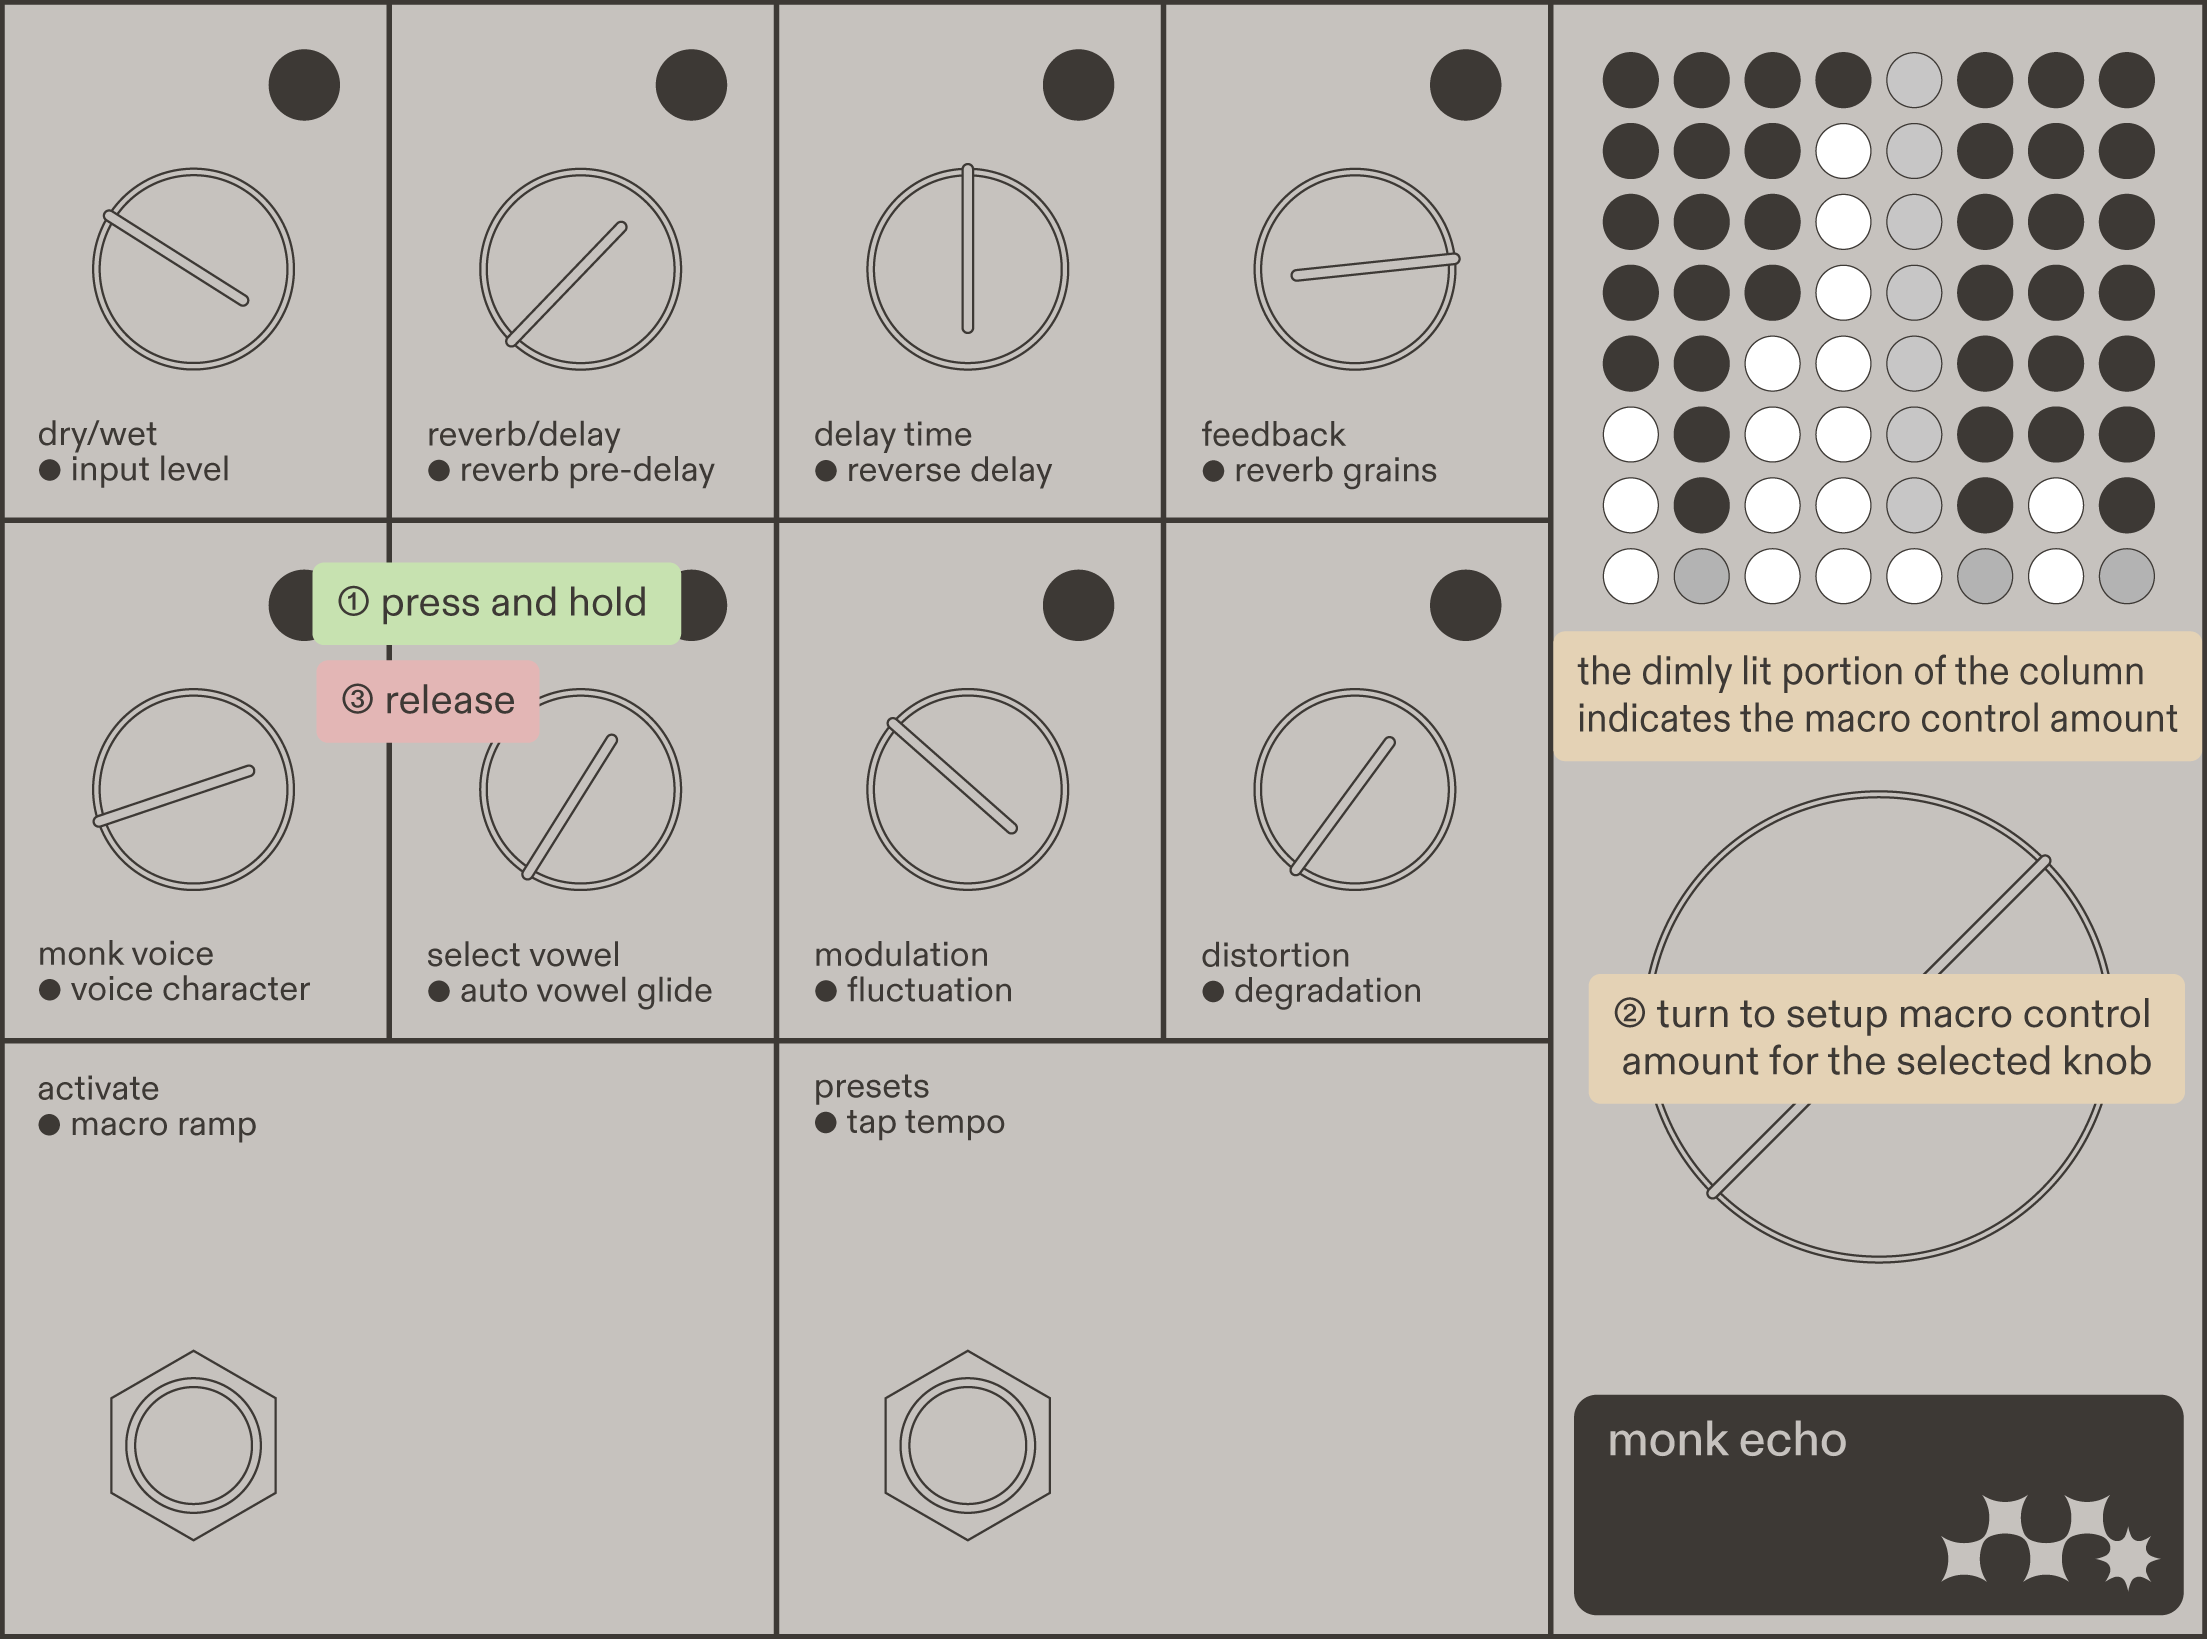
To set up macro control for a knob:
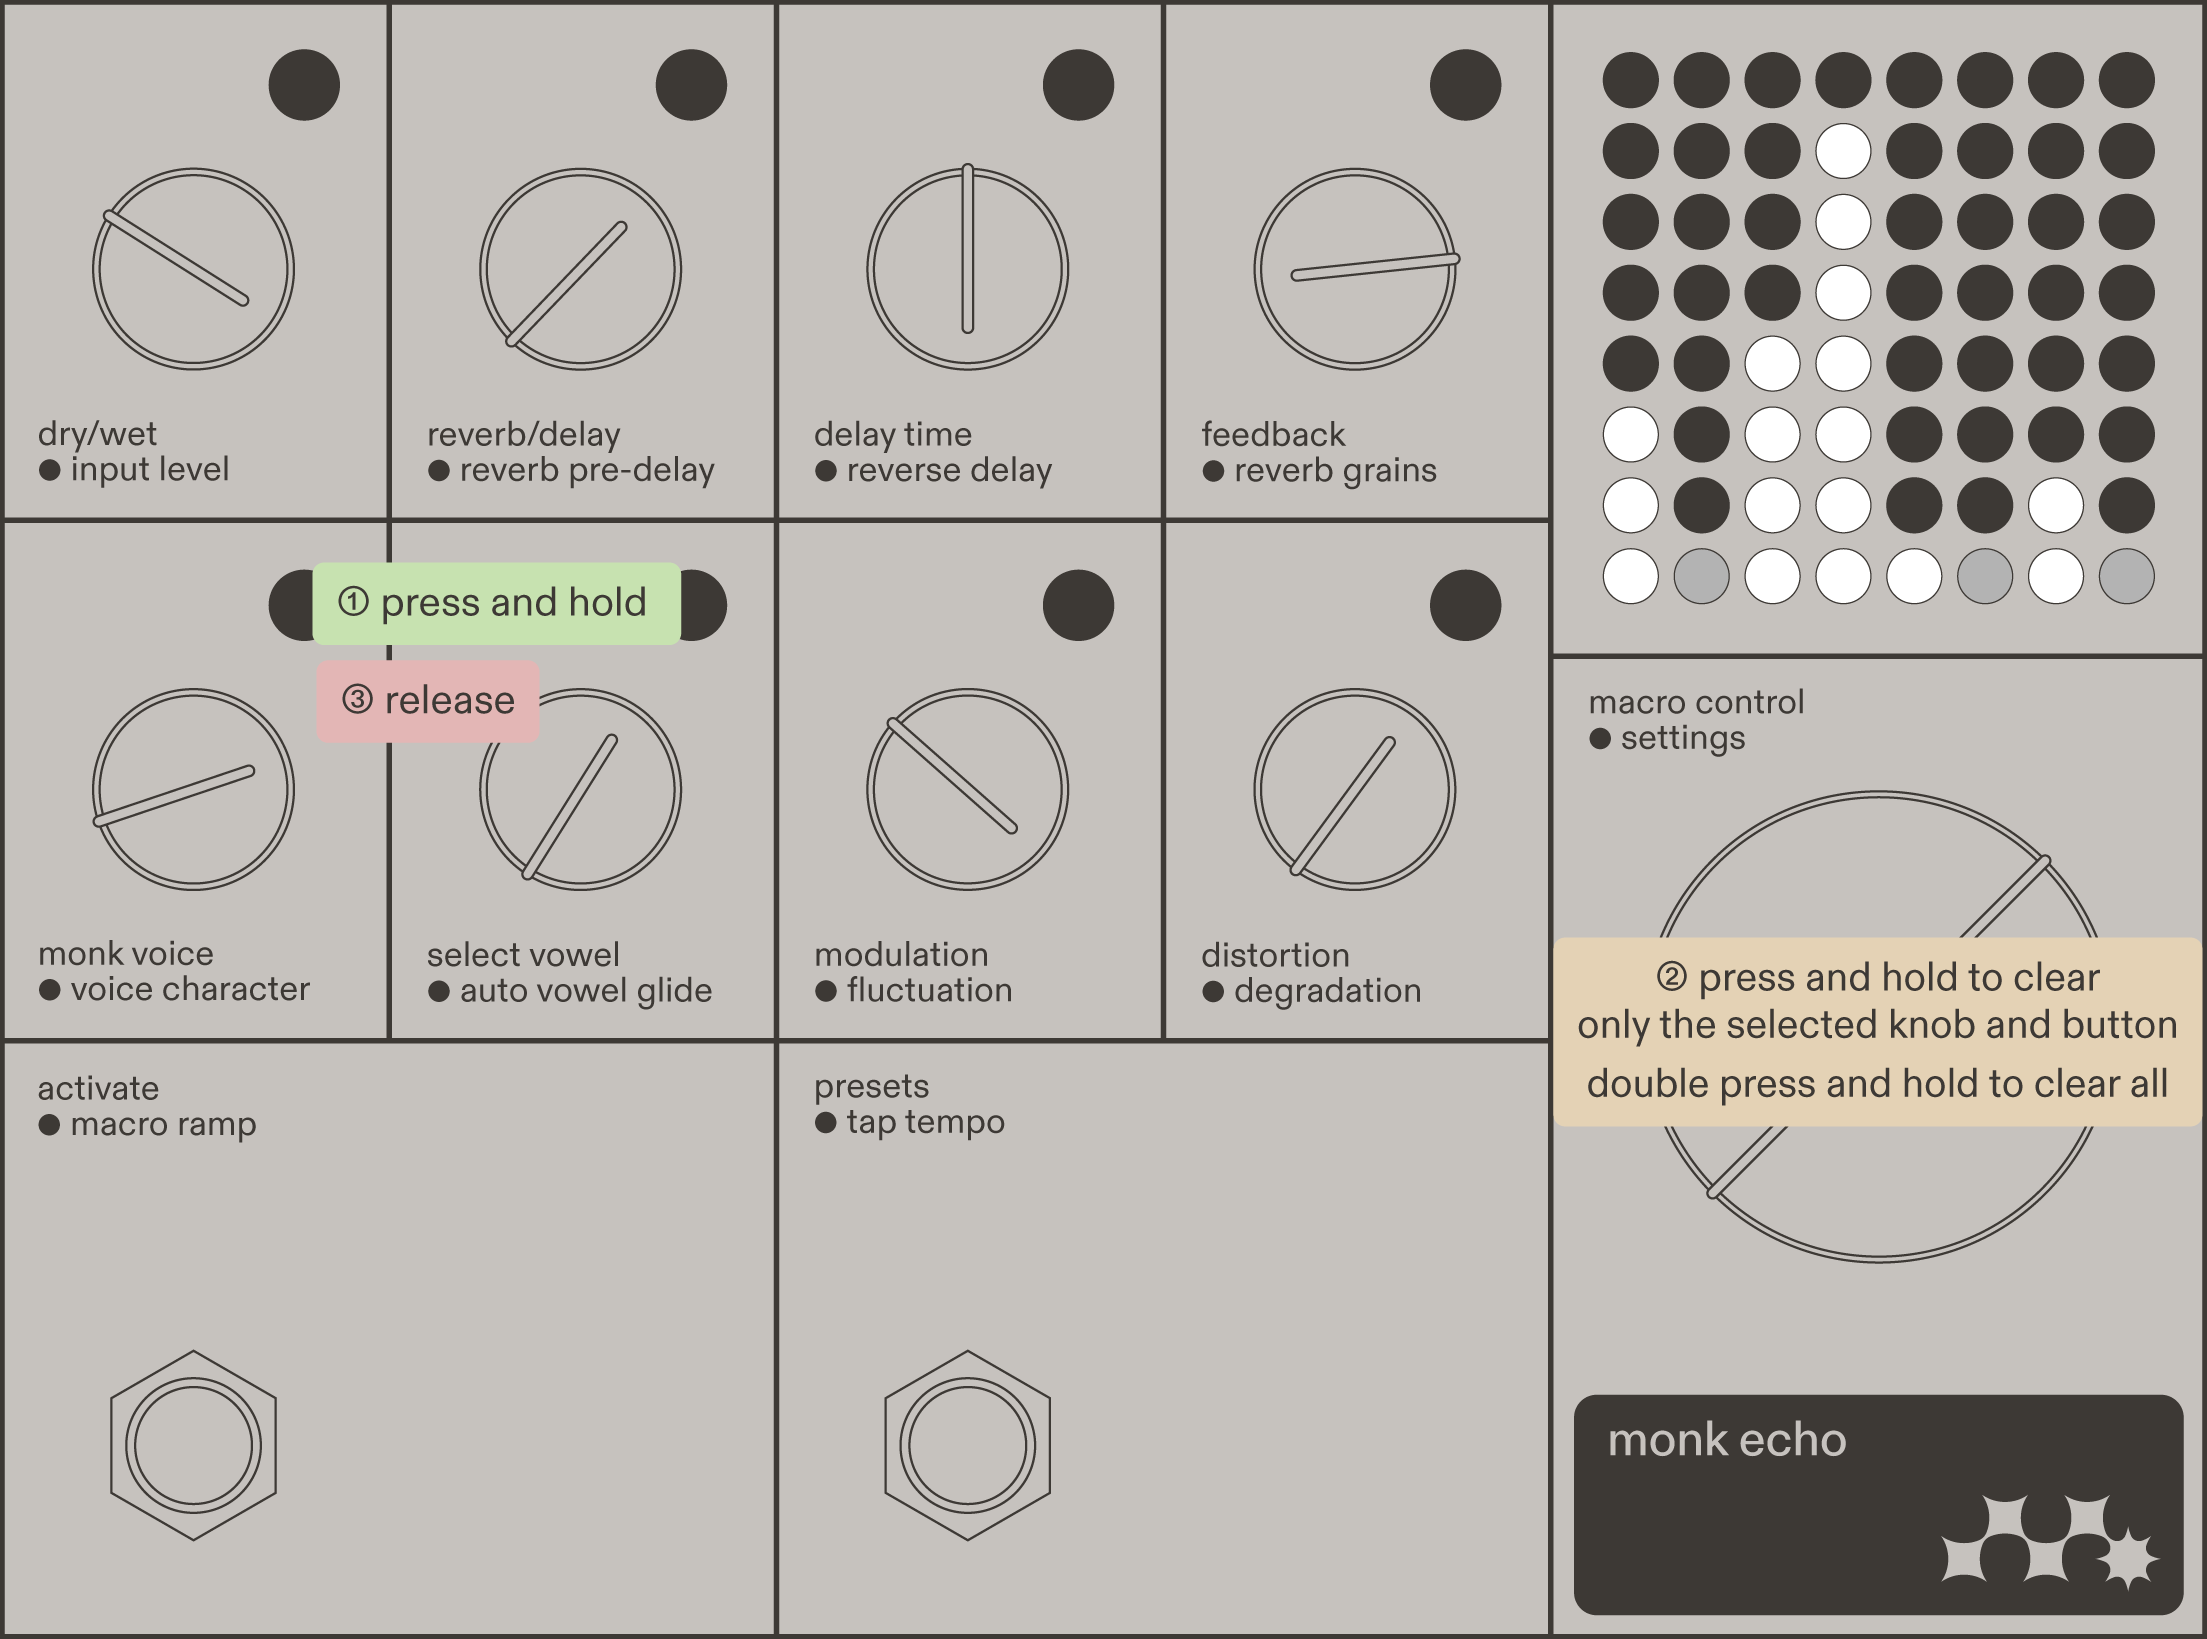
- Press and hold the LED button for the corresponding knob.
- While holding the button, turn the macro control clockwise to increase the parameter or counter-clockwise to decrease it. You can monitor the changes in the audio and on the dot display.
- Release the LED button to save the setting and exit macro setup.
- Repeat these steps for any other knob.
If you press and hold any of the 8 buttons, Monk Echo temporarily moves all previously configured parameters to their maximum macro positions, both in the sound and on the dot display. This lets you hear and see the full macro control setup during this process.
Macro setup for a button
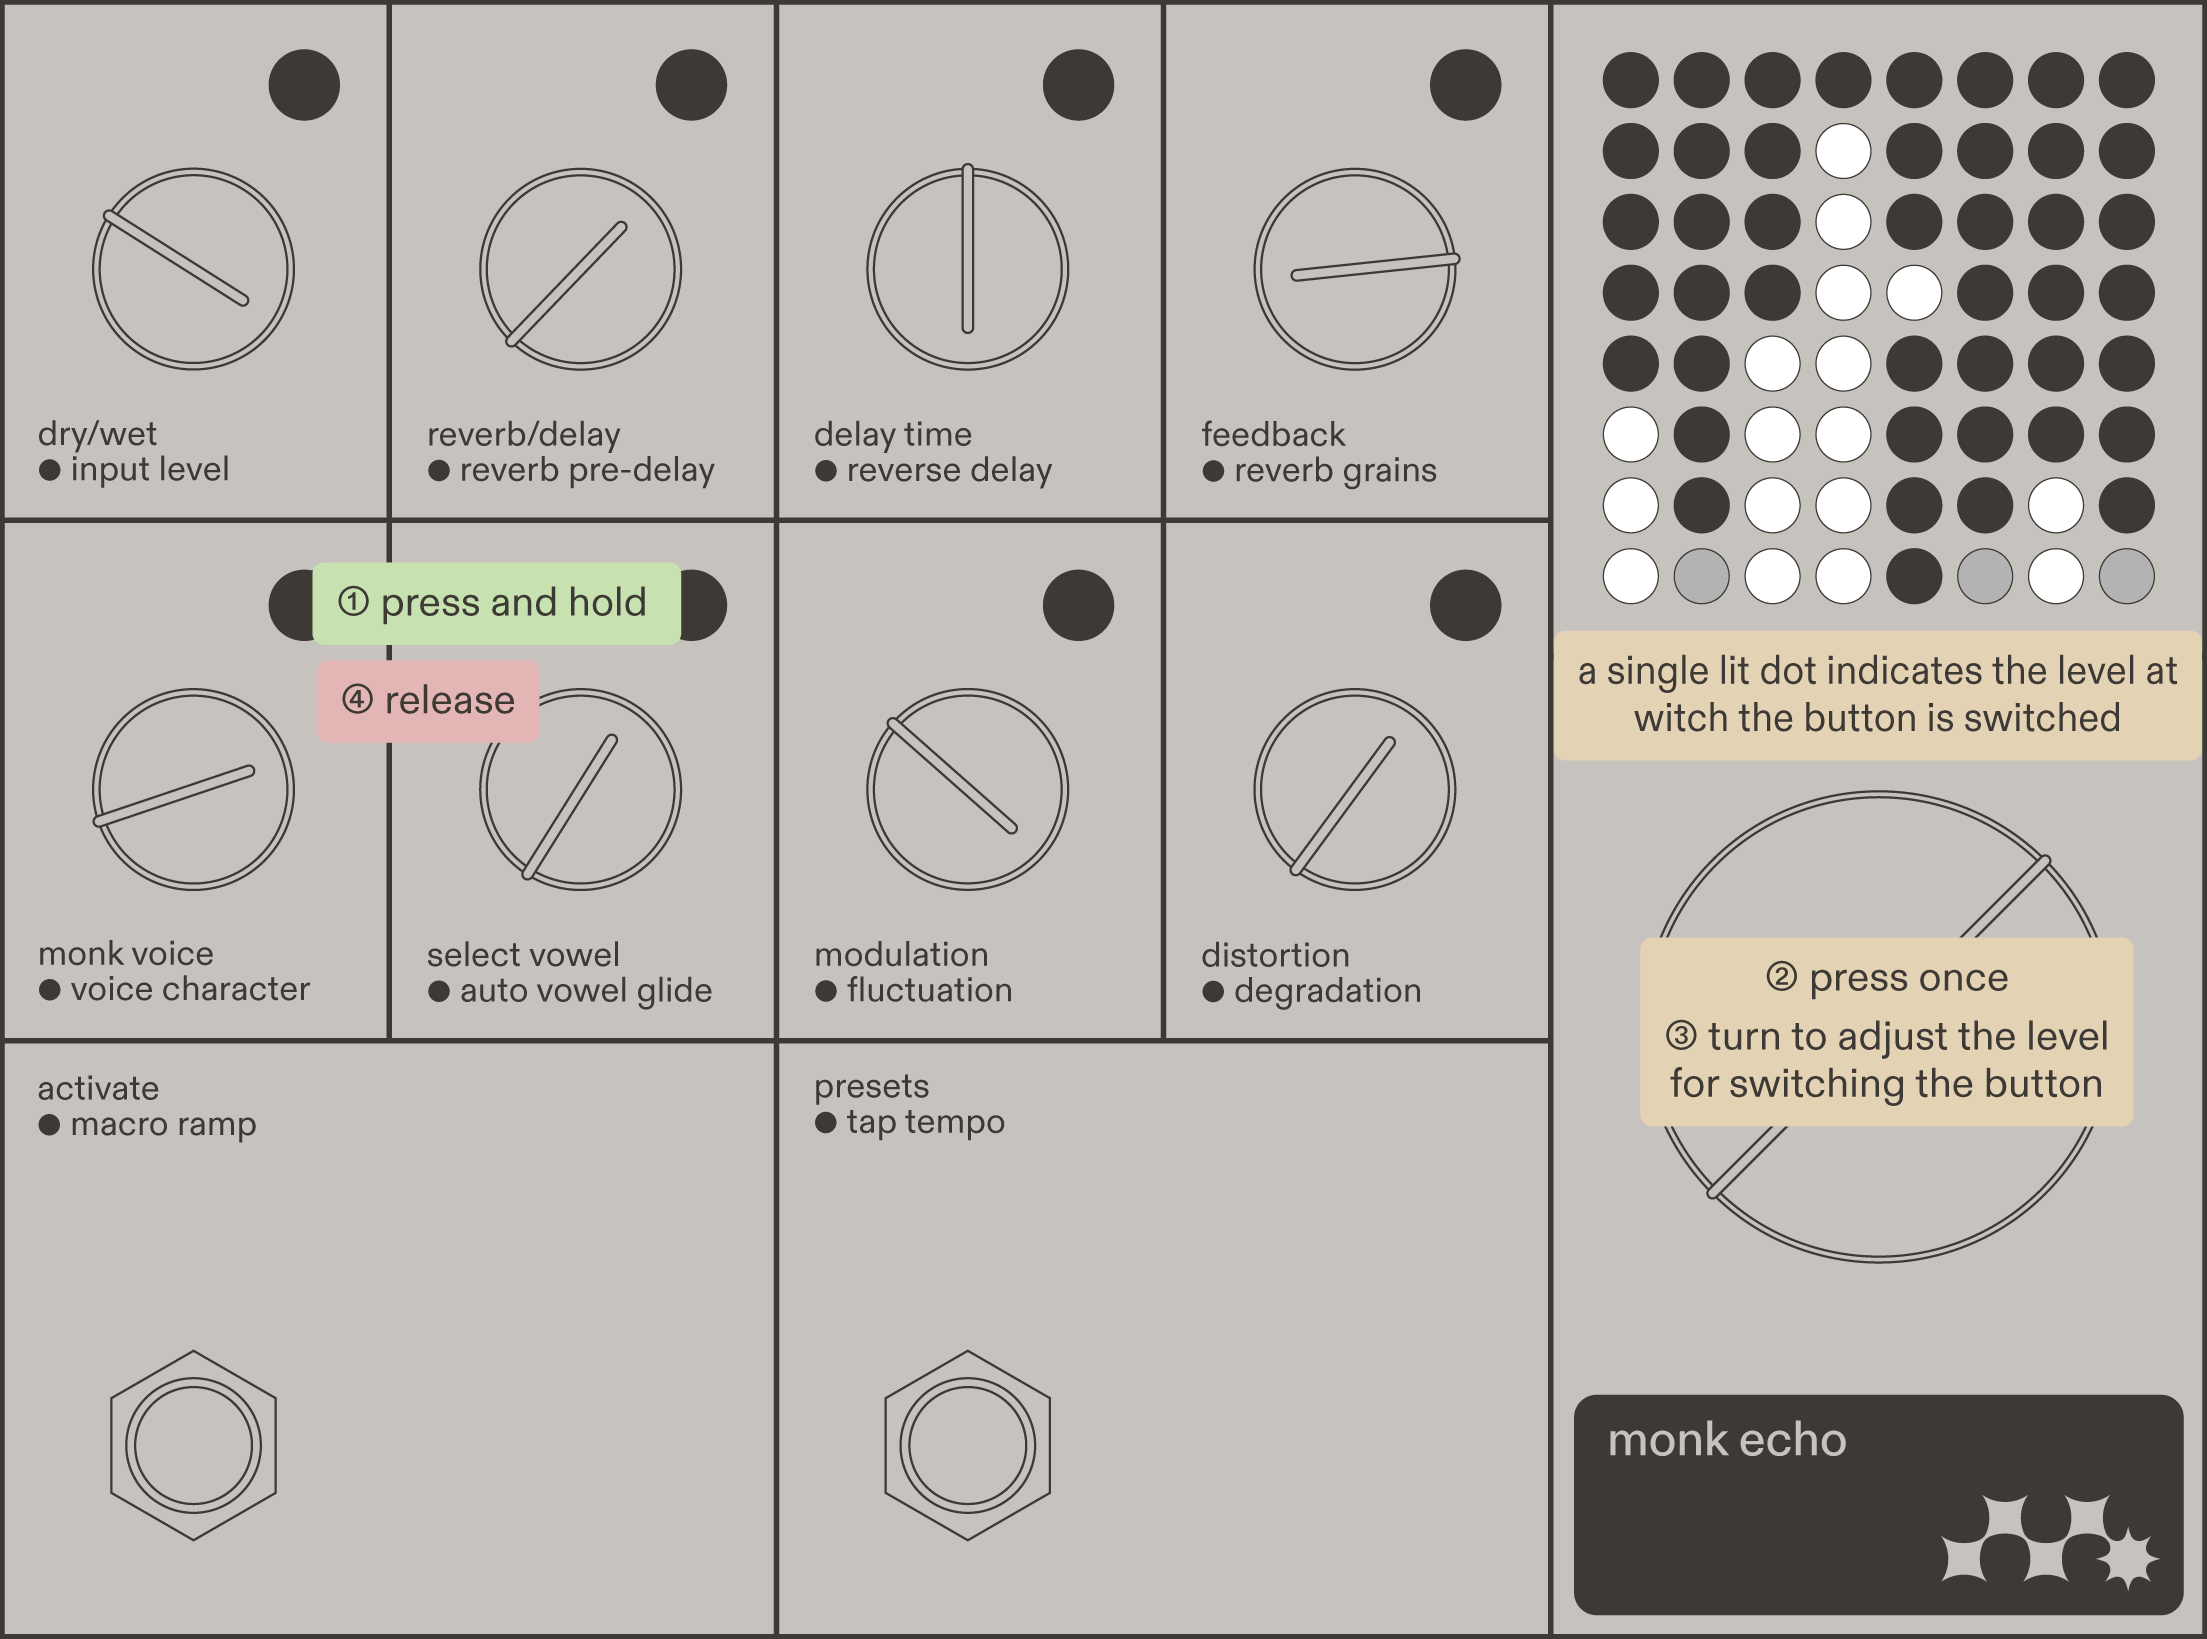
The macro control can also change the state of an LED button. Each button can be set to change state at a different macro level, allowing button changes to be timed with other parameter changes.
To set up macro control for a button:
- Press and hold the LED button you want to control.
- While holding the button, press the macro control encoder to enter button setup mode. The parameter bar is replaced by a single dot.
- Turn the macro control clockwise to set the macro level at which the button changes state.
- Release the LED button to save the setting and exit macro setup.
- Repeat these steps for any other button.
The macro control flips the button state rather than saving a specific state. If you manually change the state after setting up the macro, the macro control will flip it from its new state.
Once set up, turning the macro control will morph the selected parameters and change the states of the selected buttons.
Macro control performance
There are four ways to perform macro control, each with its own benefits and limitations.
Macro control knob
The macro control knob is great for performing if your Monk Echo lives on a desktop or somewhere else within reach of your hands. Turn the big knob, and all the parameters you have previously configured will follow your gesture at the same time.
The macro control knob responds to how fast you turn it. Turn it slowly, and the parameters will change subtly and gradually. Turn it really fast, and the macro will quickly reach its maximum position within a single turn.
You don’t have to turn the macro control all the way to maximum and back, either. You can leave it anywhere in between. Sometimes, you’ll find surprising new sounds in these in-between positions that you didn’t plan for.
When you reach the maximum or minimum position, you can keep turning to temporarily overdrive the macro control. Once you stop turning, it settles back to the maximum or minimum setting. The temporary overdrive is indicated by randomly flashing dots on the display.
Macro ramp with the footswitch
If your Monk Echo lives on the floor or on a pedalboard, long-pressing the macro ramp footswitch lets you perform the macro control with your foot. While you hold the footswitch, the macro control ramps up. When you release it, the macro control ramps down.
The macro ramp time can be set in the additional master parameters. The display shows a timer-like clockface indicating the ramp time.
The shortest setting is almost instantaneous: the macro jumps to its maximum as soon as the long-press is detected. This lets you use the macro ramp like a switch. For example, you can set up the macro control to switch the reverse delay button, then use the shortest ramp time to quickly and temporarily reverse the delay with your foot.
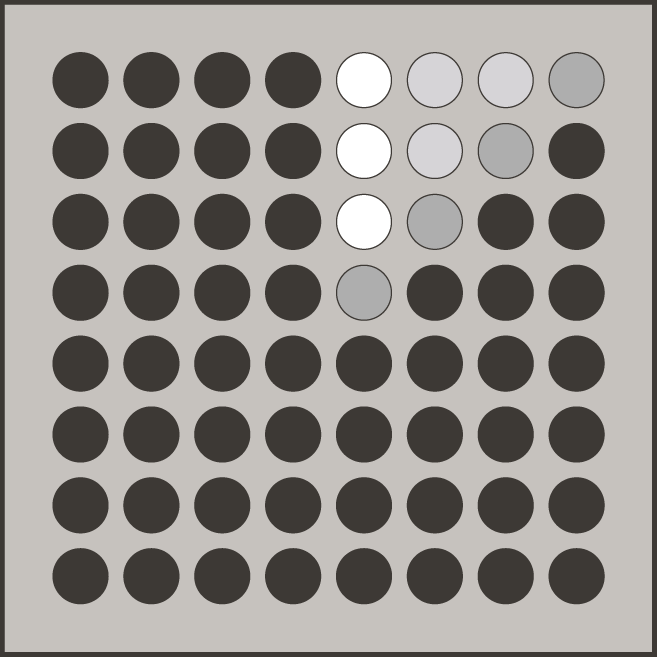
The longest ramp time is about 20 seconds, which is great for very slow parameter morphs. When you release the footswitch, the macro control starts ramping down. Press and hold the footswitch again to reverse the direction and ramp back up. The macro does not reset — it continues from wherever it was when you pressed the footswitch again.
Macro expression pedal and control voltage (CV)
If you have a favourite expression pedal, you can connect it to the macro expression input. The expression pedal overrides the macro control on the pedal, allowing you to use the macro control knob to set up the parameter changes and perform them with your expression pedal.
You can still use the macro control knob and the macro ramp footswitch on the pedal while using macro expression — they will take over control from the expression pedal.
The input also accepts active control voltage (CV). The voltage must be scaled to a range of 0 V to +3.3 V.
Because expression pedals are not all equal, Monk Echo automatically calibrates the expression pedal input each time a cable is plugged into the macro expression input. For best results, rock the expression pedal to its minimum and maximum positions after plugging it in, in either order. Monk Echo will calibrate to the range it sees.
This is not absolutely necessary, though, as Monk Echo can also automatically recalibrate during performance.
Macro control with MIDI
You can control each knob and button individually using MIDI CC input, but you can also set up the macro control to control multiple parameters and use a single CC to control the macro.
Use CC 1 for macro control MSB and CC 33 for macro control LSB. Make sure your MIDI settings are configured correctly to work with your controller.
Changing parameters after macro setup
The macro control saves how much, and in which direction, each parameter will be morphed, rather than the absolute value it will reach. So, if you set up a parameter to increase with the macro control and then manually lower the parameter, using the macro control will still increase it by the same amount, but it will not reach the same high point as before.
The same applies to the LED buttons. The macro control flips their state rather than saving a specific state. If you manually change the state after setting up the macro, the macro control will flip it from its new state.
Removing macro control
To remove macro control for a single knob and button:
- Press and hold the corresponding LED button.
- While holding the button, double-press the macro control knob and hold it on the second press for 2 seconds. When the macro control is removed, the parameter column on the dot display blinks twice.
- Release the button.
Note that this removes macro control for both the knob and the corresponding button.
To remove macro control for all knobs and buttons:
- Press and hold any LED button.
- While holding the button, double-press the macro control knob and hold it on the second press for 2 seconds. When the macro control is removed, all parameter columns on the dot display blink twice.
- Release the button.
Macro control in presets
The macro control setup is saved and recalled with presets. However, the exact position of the macro control is not saved. Every time you recall a preset, the macro control starts at its minimum position. Learn more in the presets section.
Tap tempo and MIDI clock
The delay time, reverb pre-delay and reverb pitch grain rate all respond to tap tempo and MIDI clock.
Tap tempo mode
The right footswitch gives you access to both presets and tap tempo. To access tap tempo, you must not be in the preset menu. The system settings allow you to choose between momentary tap tempo mode and toggling between permanent preset and tap tempo modes.
If you switch presets often, momentary tap tempo mode lets you return to preset mode automatically. If you use tap tempo frequently or switch presets with MIDI, toggling between preset and tap tempo modes may be more convenient. Jump ahead to system settings to choose the mode that suits your setup.
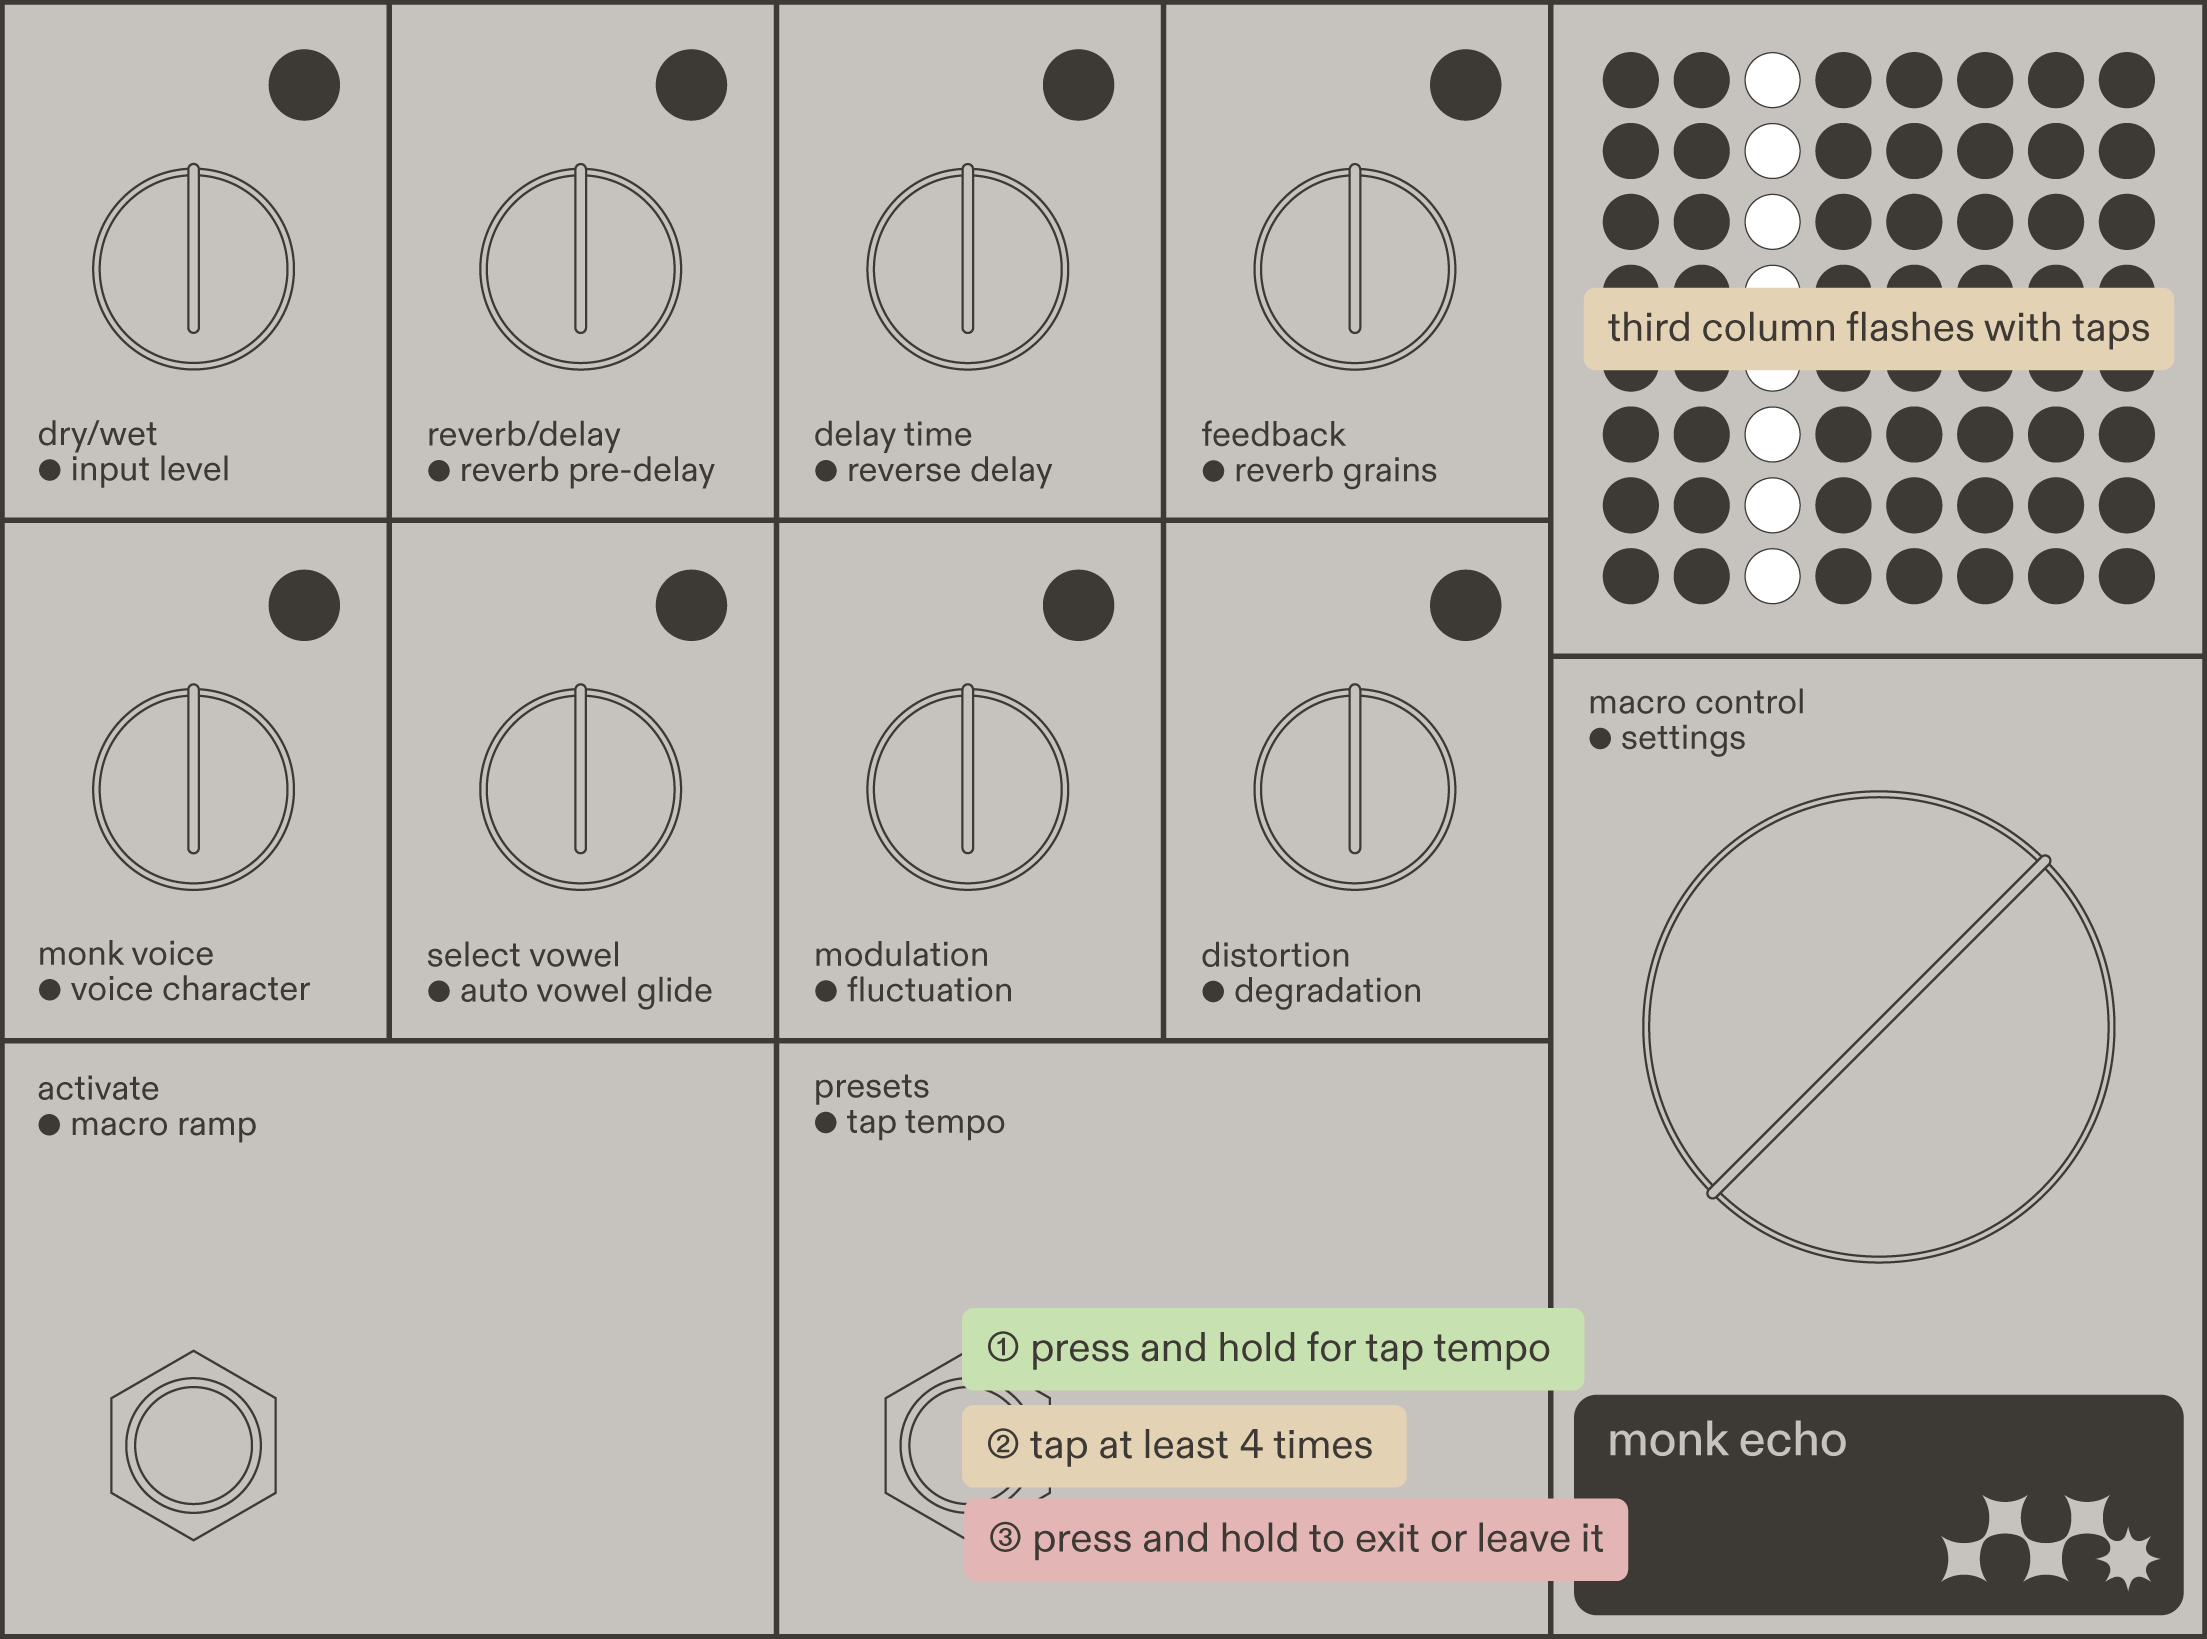
To enter tap tempo mode, press and hold the right footswitch. After a short animation, the third column on the dot display switches from indicating the delay time to indicating tap tempo with rhythmic flashing.
Tap at the desired tempo. Monk Echo starts responding after the fourth tap, which is also indicated by the third column on the dot display.
If the system settings are set to momentary tap tempo mode, Monk Echo automatically exits tap tempo mode after a short time. If set to toggling, press and hold the right footswitch again to exit.
One last detail before moving on – macro control over delay time is ignored while in tap tempo or syncing to midi clock.
Subdivisions
Tap tempo mode does not quantize the delay time knob. To set the tap tempo subdivision, press the macro control encoder to enter additional master parameters, then press the encoder three more times to access the subdivisions.
The subdivisions are shared between tap tempo and MIDI clock, and are saved with presets. The available choices range from 1/1 to 1/64, including dotted and triplet subdivisions. The subdivisions are relative to quarter-note taps.
If you turn the encoder counter-clockwise from 1/1, the setting before it is “X”. This disables the response to tap tempo and MIDI clock. It is useful when a preset is based on a very short or very long delay sound and syncing to a musical tempo would diminish the effect.
It is also possible to switch subdivisions with MIDI Continuous Controller CC 5, Values 0-18. The below table shows all subdivision options in the additional master parameters and the corresponding MIDI value.
| display | subdivision | midi |
|---|---|---|
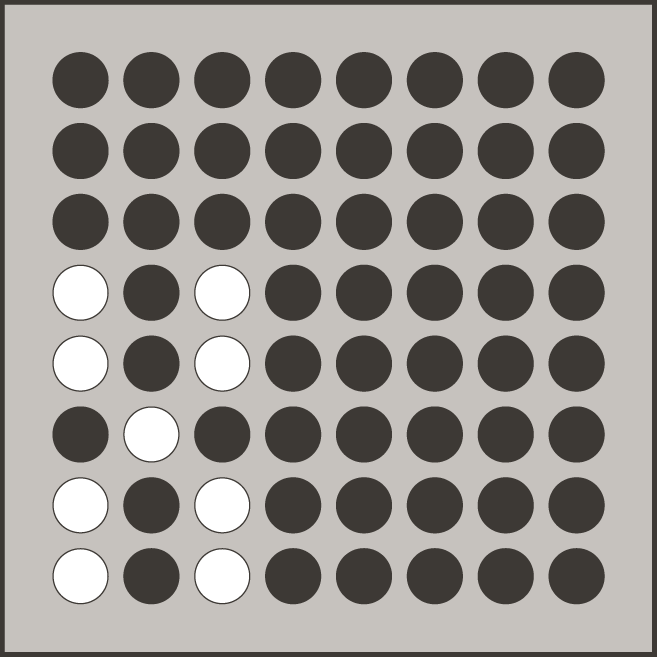 |
no response to tap tempo and MIDI clock | CC 5, value 0 |
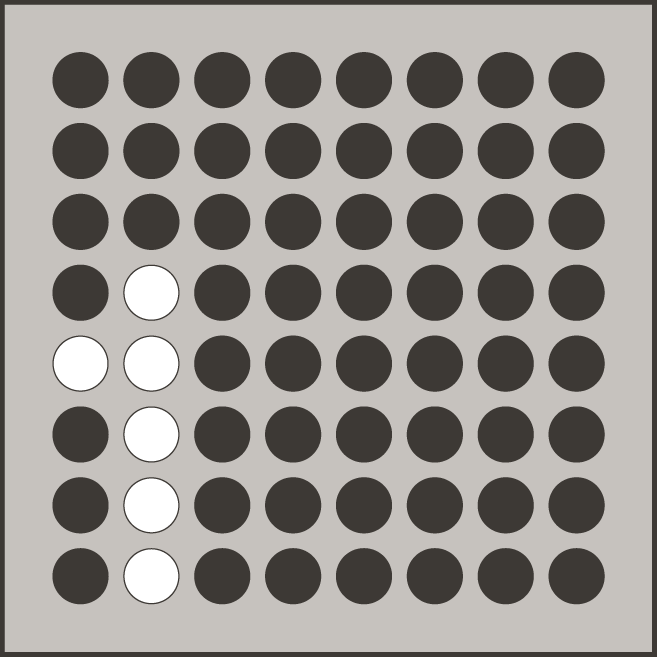 |
whole note | CC 5, value 1 |
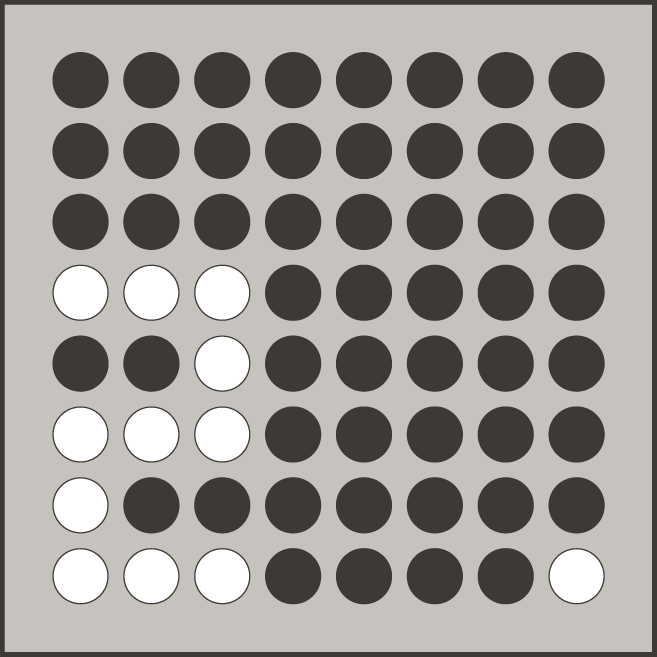 |
dotted half note | CC 5, value 2 |
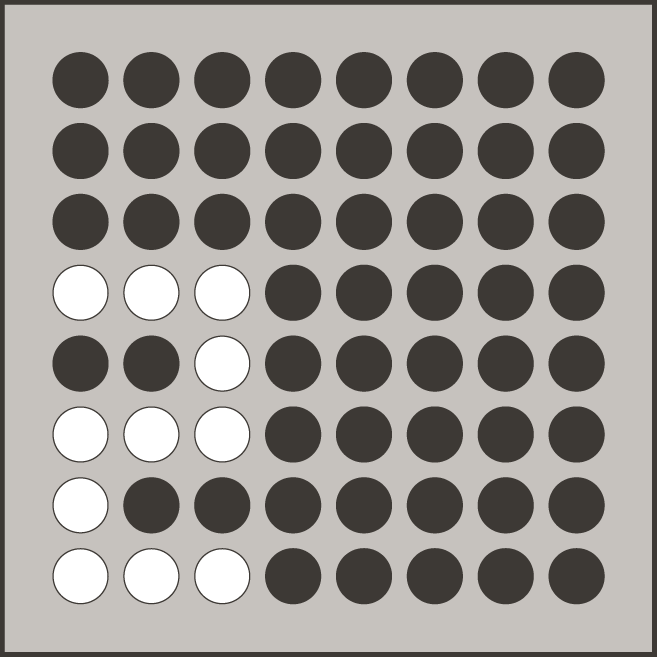 |
half note | CC 5, value 3 |
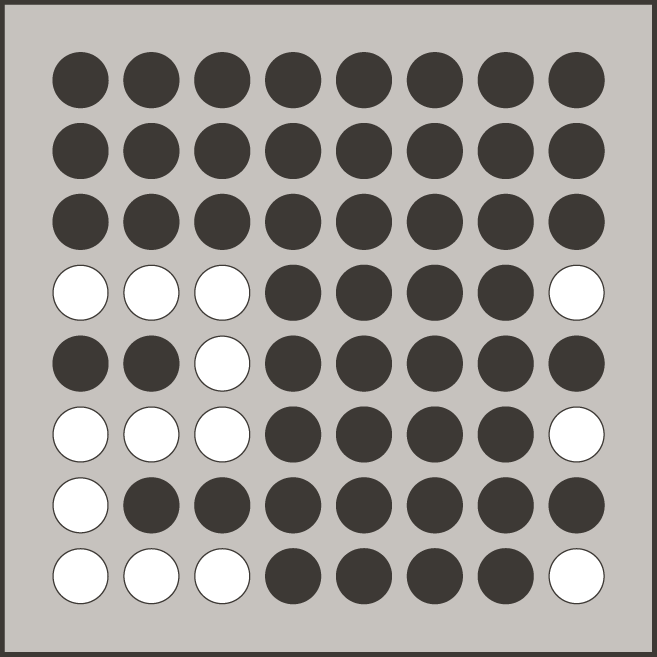 |
half note triplet | CC 5, value 4 |
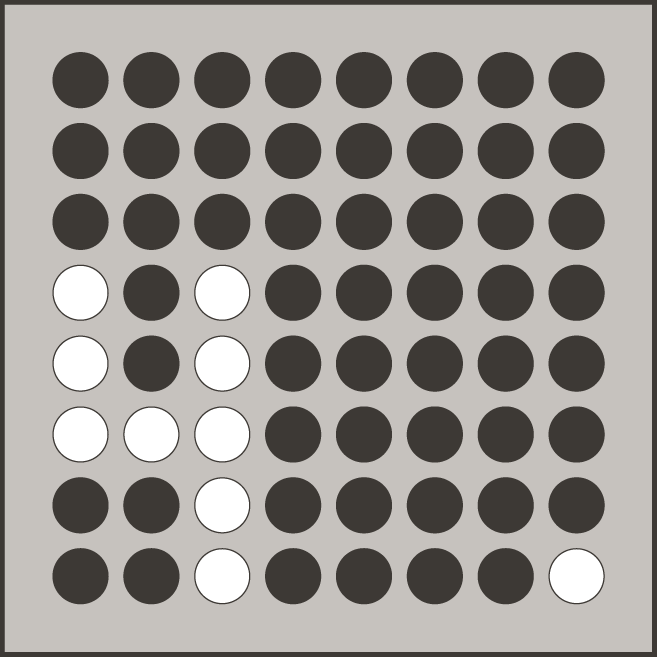 |
dotted quarter note | CC 5, value 5 |
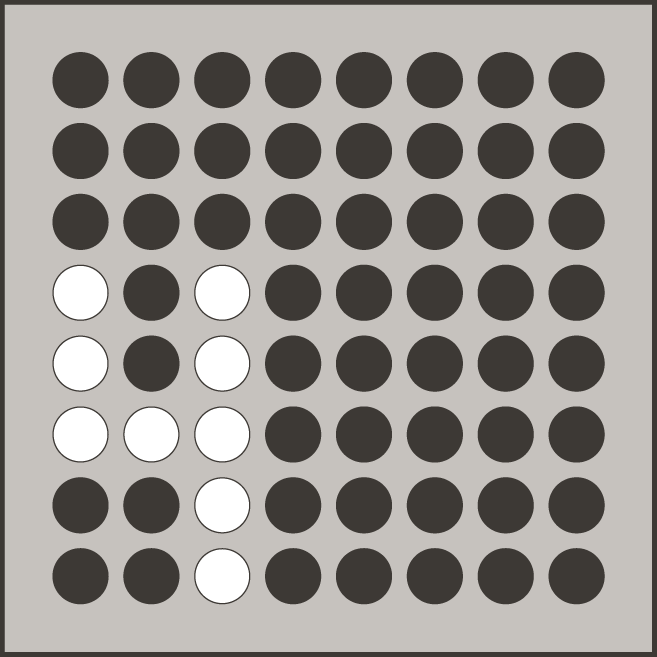 |
quarter note (same as taps) | CC 5, value 6 |
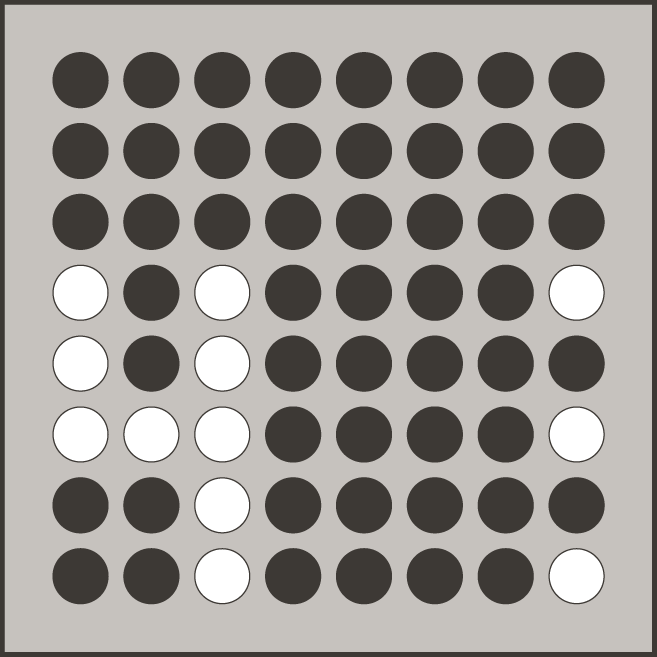 |
quarter note triplet | CC 5, value 7 |
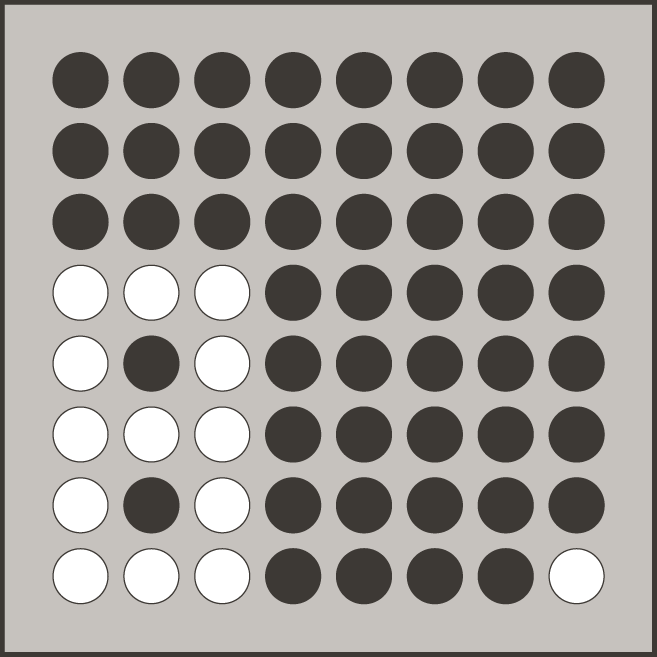 |
dotted eighth note | CC 5, value 8 |
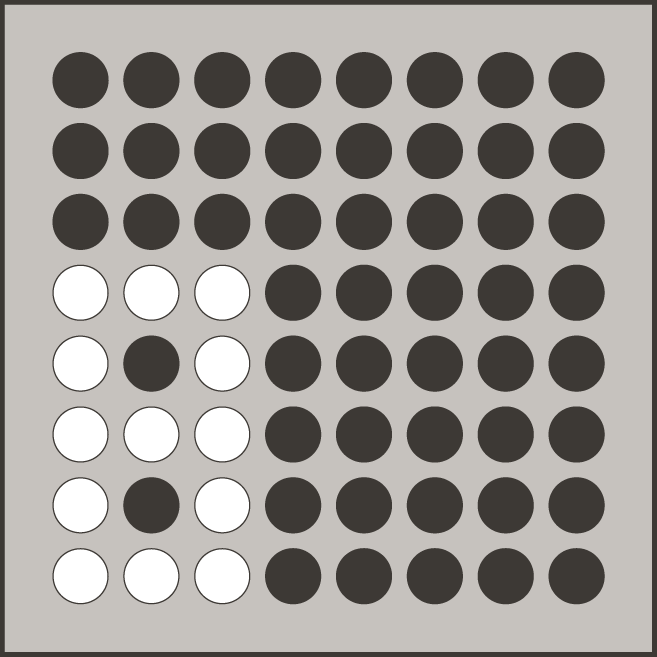 |
eighth note | CC 5, value 9 |
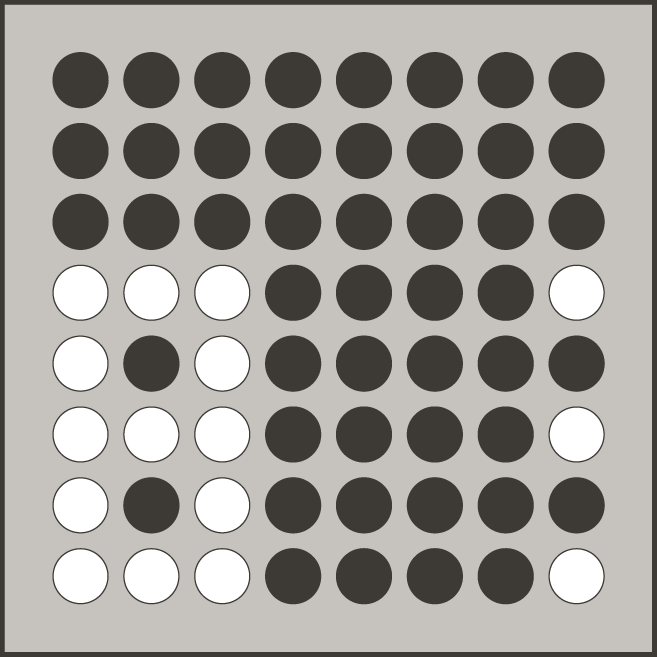 |
eighth note triplet | CC 5, value 10 |
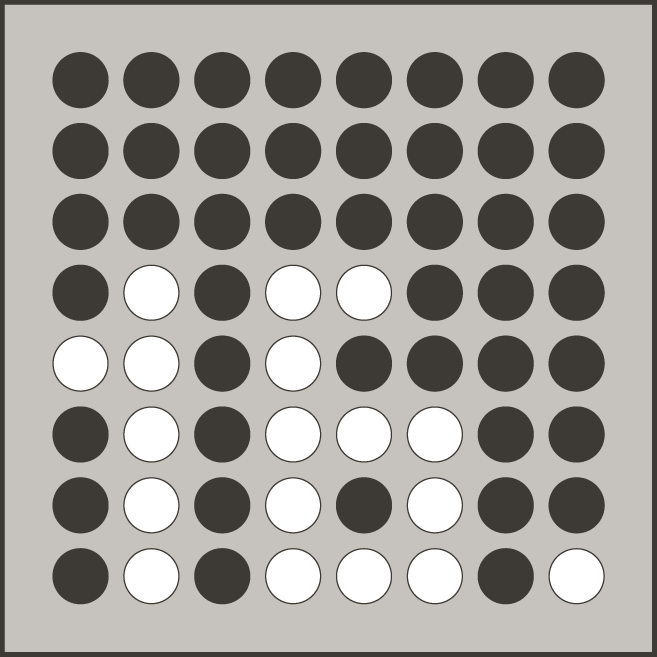 |
dotted sixteenth note | CC 5, value 11 |
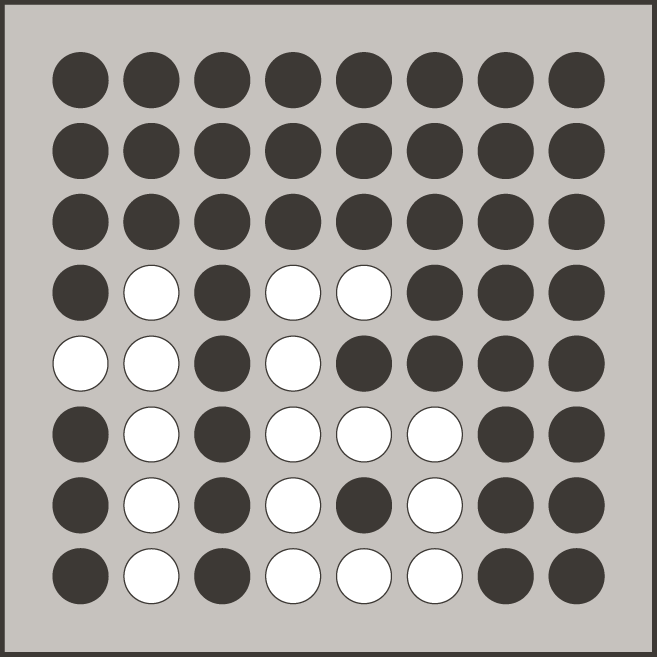 |
sixteenth note | CC 5, value 12 |
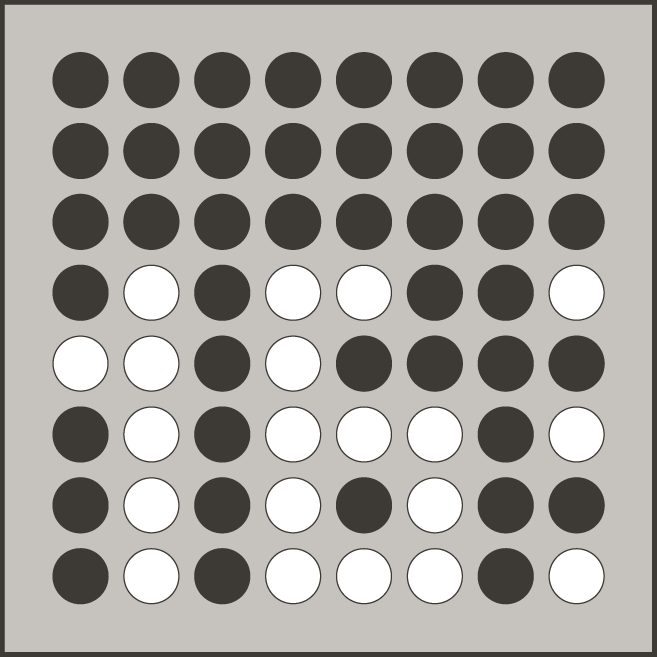 |
sixteenth note triplet | CC 5, value 13 |
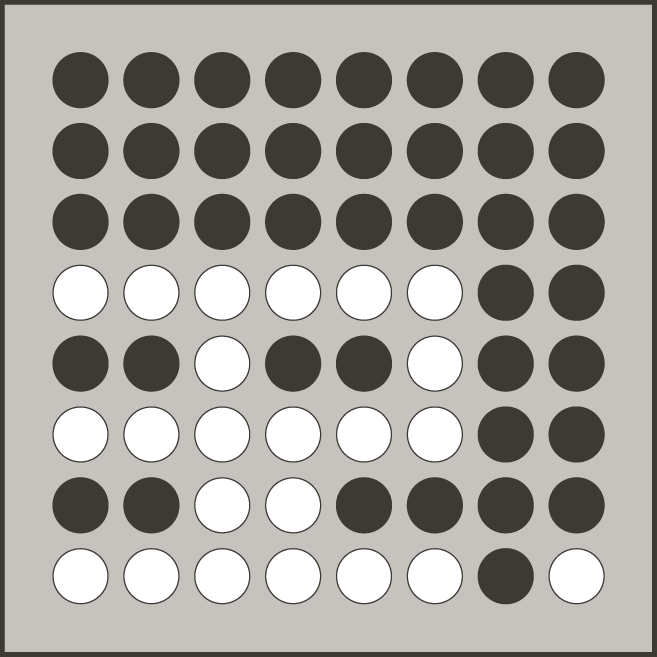 |
dotted thirty-second note | CC 5, value 14 |
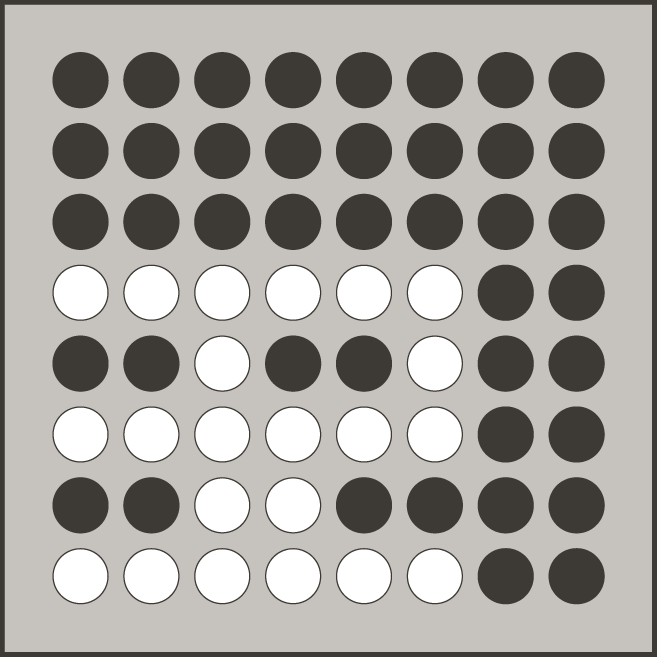 |
thirty-second note | CC 5, value 15 |
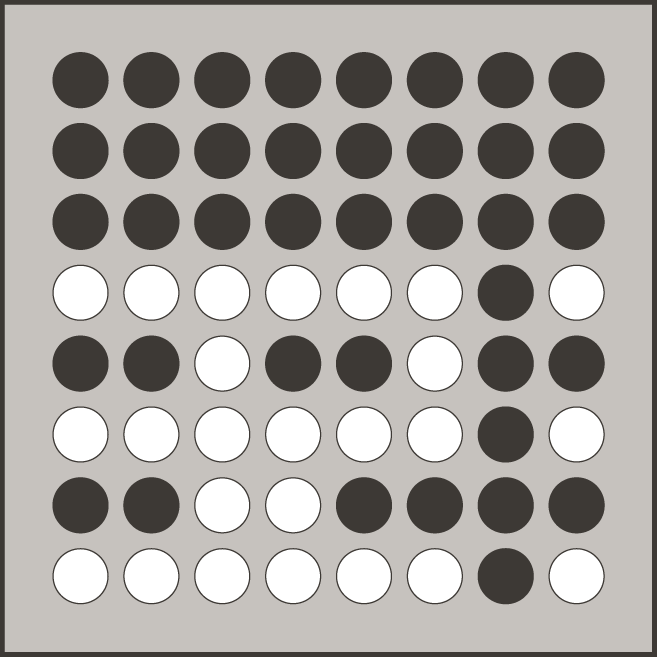 |
thirty-second note triplet | CC 5, value 16 |
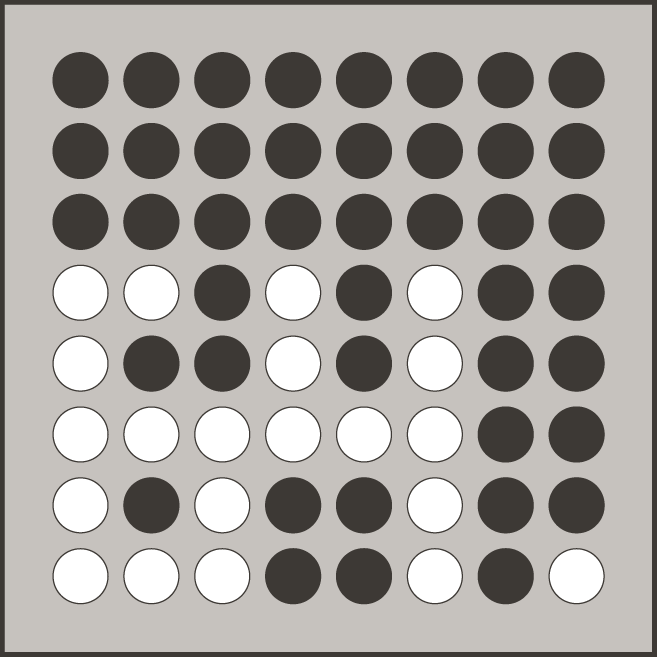 |
dotted sixty-fourth note | CC 5, value 17 |
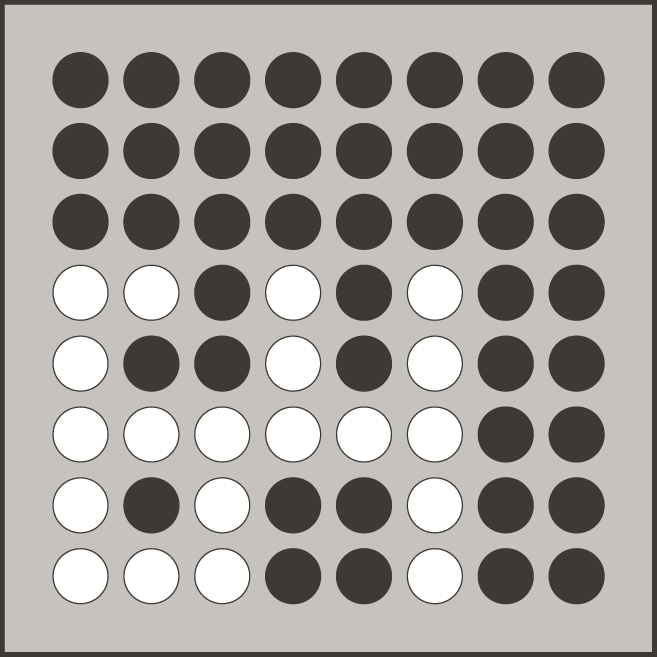 |
sixty-fourth note | CC 5, value 18 |
MIDI clock
The delay time, reverb pre-delay, and reverb pitch grains all sync to the MIDI clock. Make sure MIDI clock is enabled in the system settings. If MIDI clock is detected, the third column of the dot display indicates the tempo with rhythmic flashing.
MIDI clock is received at 24 pulses per quarter note (24 PPQN), the standard and most common format. The tempo from MIDI clock is modified by subdivisions, which are shared with tap tempo.
If you want the current sound or a preset not to respond to incoming MIDI clock without turning it off completely in the system settings, set the subdivision to “X”.
Delay time knob VS tap tempo VS MIDI clock
The subdivision setting is independent of the delay time knob, which means the knob always remains unquantized. If you tap in a tempo, you can still grab the delay time knob and manually drift away from it. Make sure that the knob catch-up setting is turned on in the system settings to avoid sudden jumps in delay time.
The delay time knob also remains unquantized and active when Monk Echo is syncing to MIDI clock. As soon as you start turning the delay time knob, Monk Echo stops syncing to the incoming MIDI clock. When you stop adjusting the delay time, and if MIDI clock is still incoming, the delay time gradually drifts back into synchronization.
This allows for expressive delay time wobbles even when syncing to a steady MIDI clock.
The same relationship applies to MIDI clock and tap tempo. Even when Monk Echo is syncing to MIDI clock, you can temporarily tap in a different tempo. Once you stop tapping, MIDI clock takes over again.
Presets
You can access 8 presets directly on Monk Echo, and there are 100 preset slots in total, accessible via MIDI Program Changes (PC). However, the eight onboard presets offer multiple ways to recall them and morph from one to another, each with its own benefits.
What is and isn't saved in presets
In short, all parameters described in this manual so far are saved with presets.
More specifically, presets contain:
- The eight knob and eight button parameters
- macro control setup
- additional master parameters:
- low-cut and high-cut filters
- delay panning
- tap tempo and MIDI clock subdivision
- macro ramp rate
Two things are not saved in presets.
First, the exact position of the macro control is not saved. Whenever you recall a preset, the macro control is reset to 0. The macro setup — what the macro control does — is saved with the preset.
Second, system settings are global and are not saved in presets.
Preset menu
Before learning to save presets, you can use the factory presets to learn how to navigate them.
The right footswitch gives you access to both presets and tap tempo. To access presets, you must not be in tap tempo mode. The system settings allow you to choose between momentary tap tempo mode and toggling between permanent preset and tap tempo modes.
If you switch presets often, momentary tap tempo mode lets you return to preset mode automatically. If you use tap tempo frequently or switch presets with MIDI, toggling between preset and tap tempo modes may be more convenient. Jump ahead to system settings to choose the mode that suits your setup.
Short-press the right footswitch to access the preset menu. When you do so, the LED buttons double as eight preset slots.
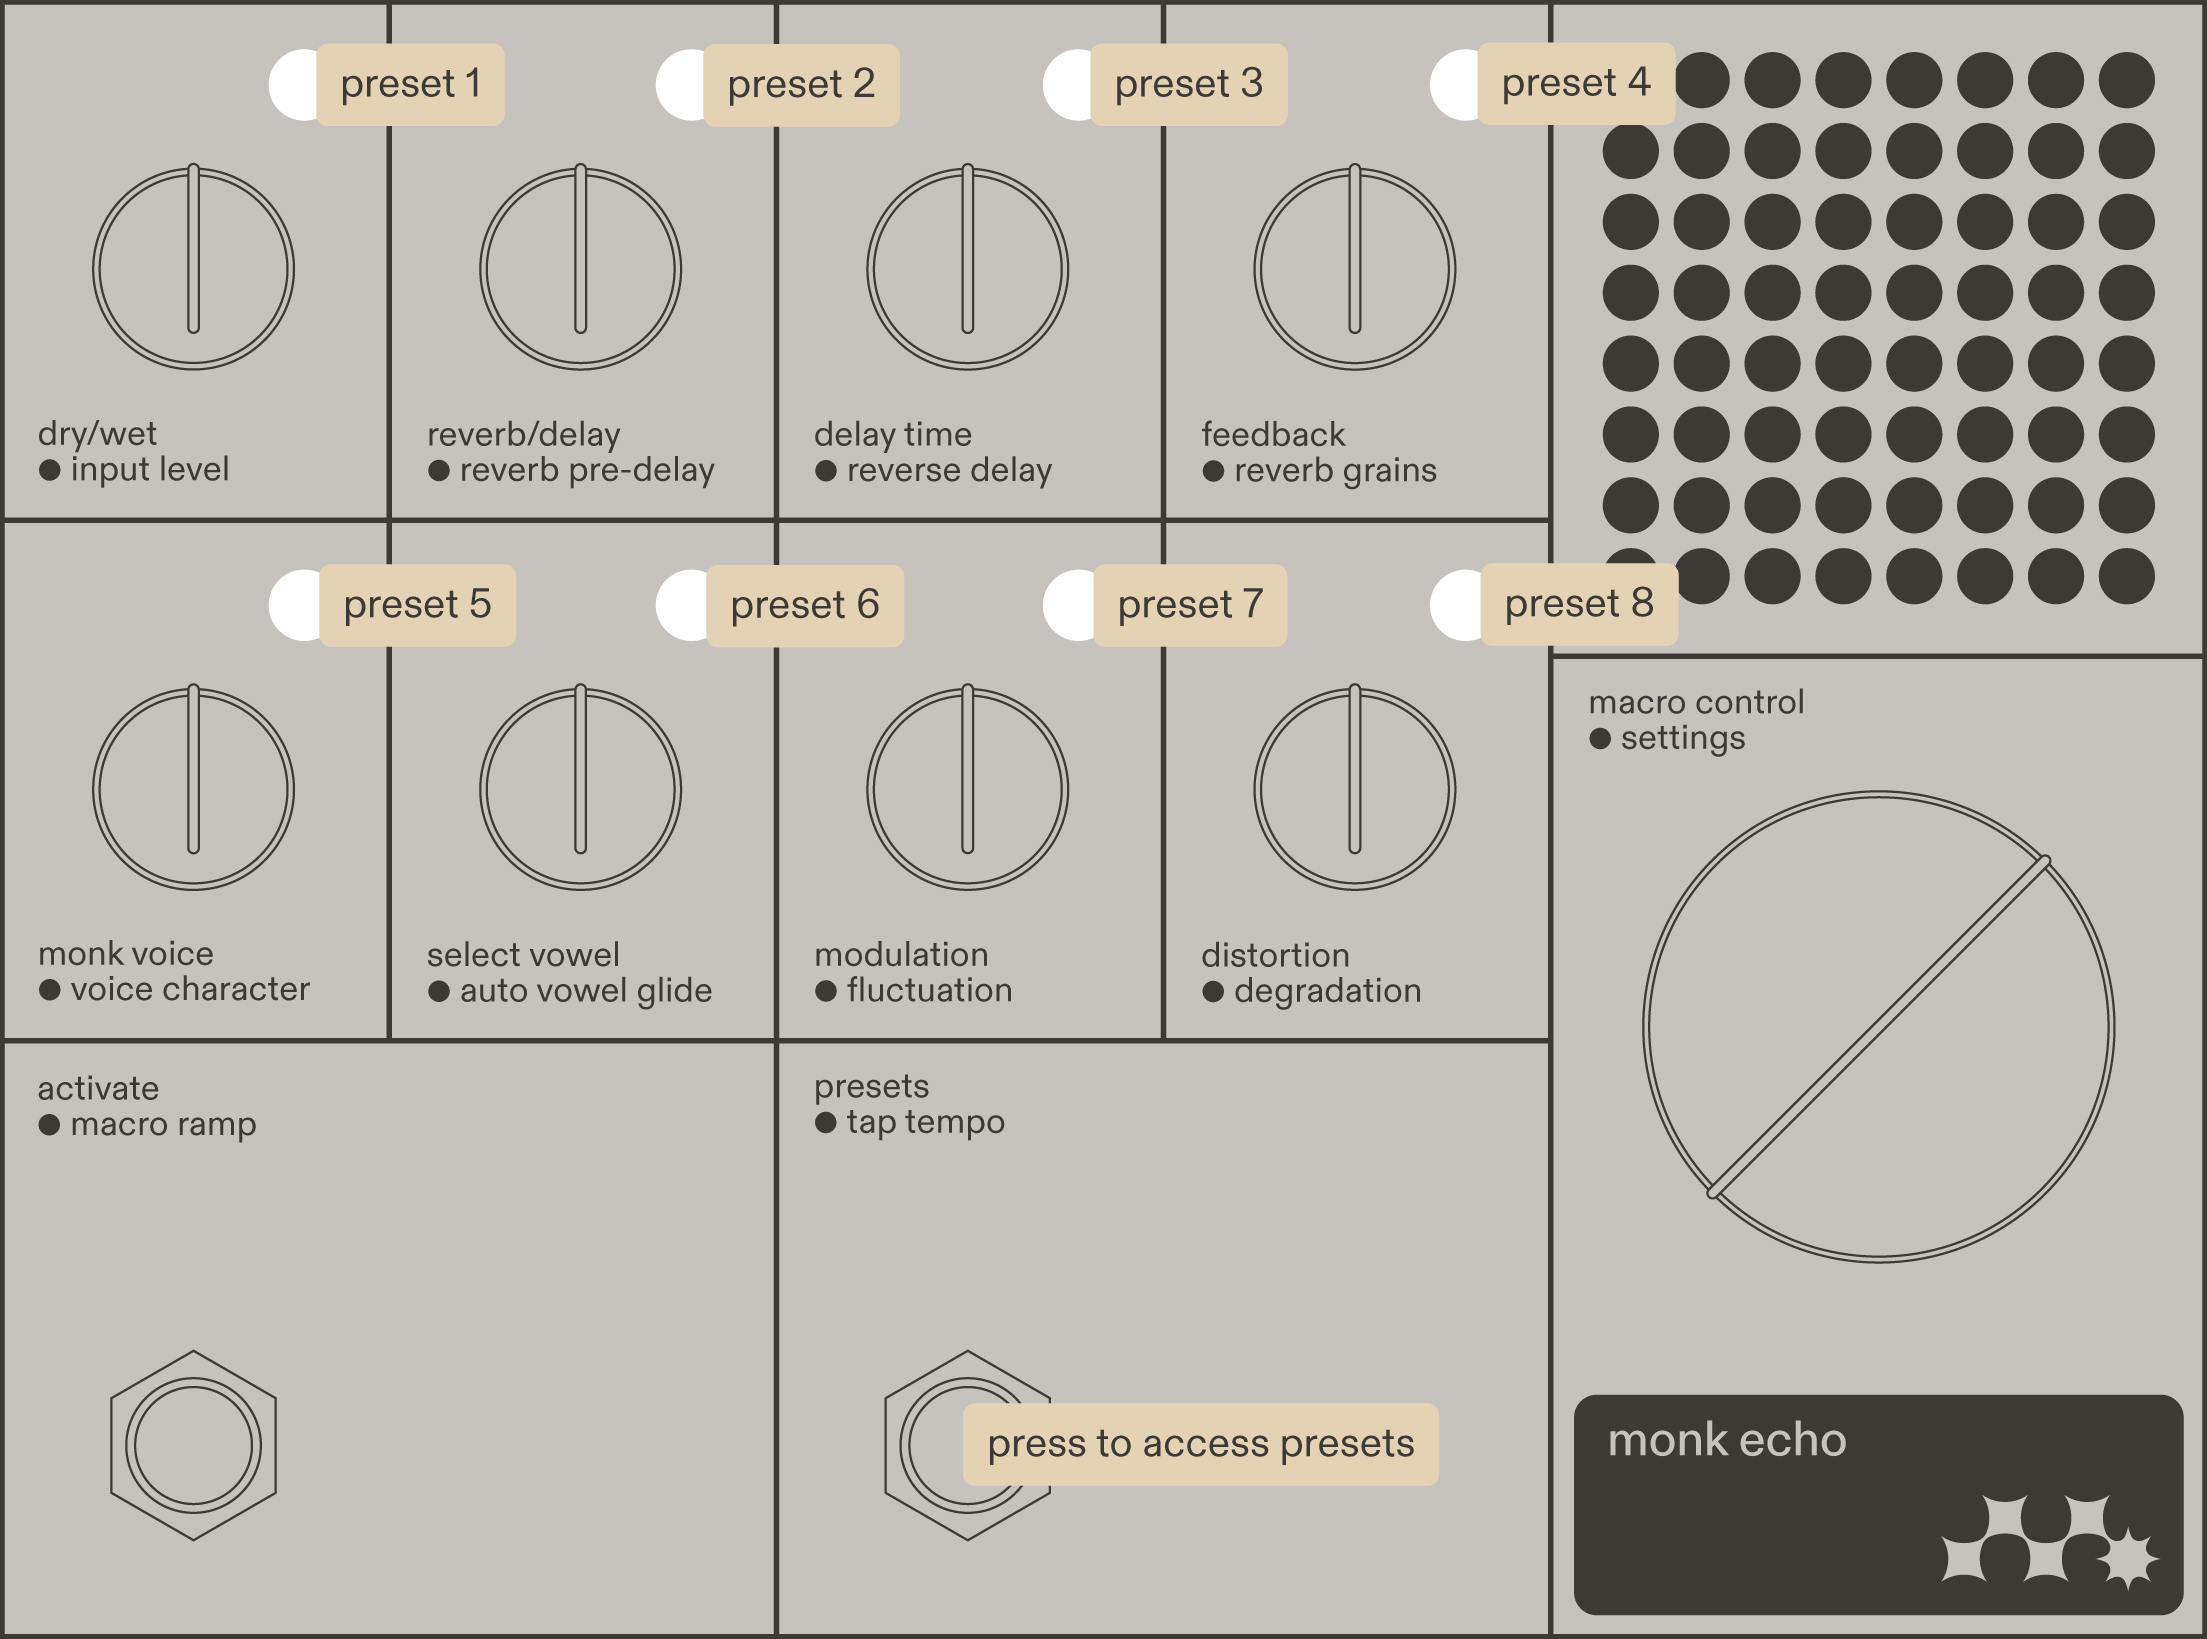
The LED lights guide you through the presets:
- All slots that have a preset saved in them are lit up.
- Empty preset slots are dark. By default, all eight slots are filled with factory presets.
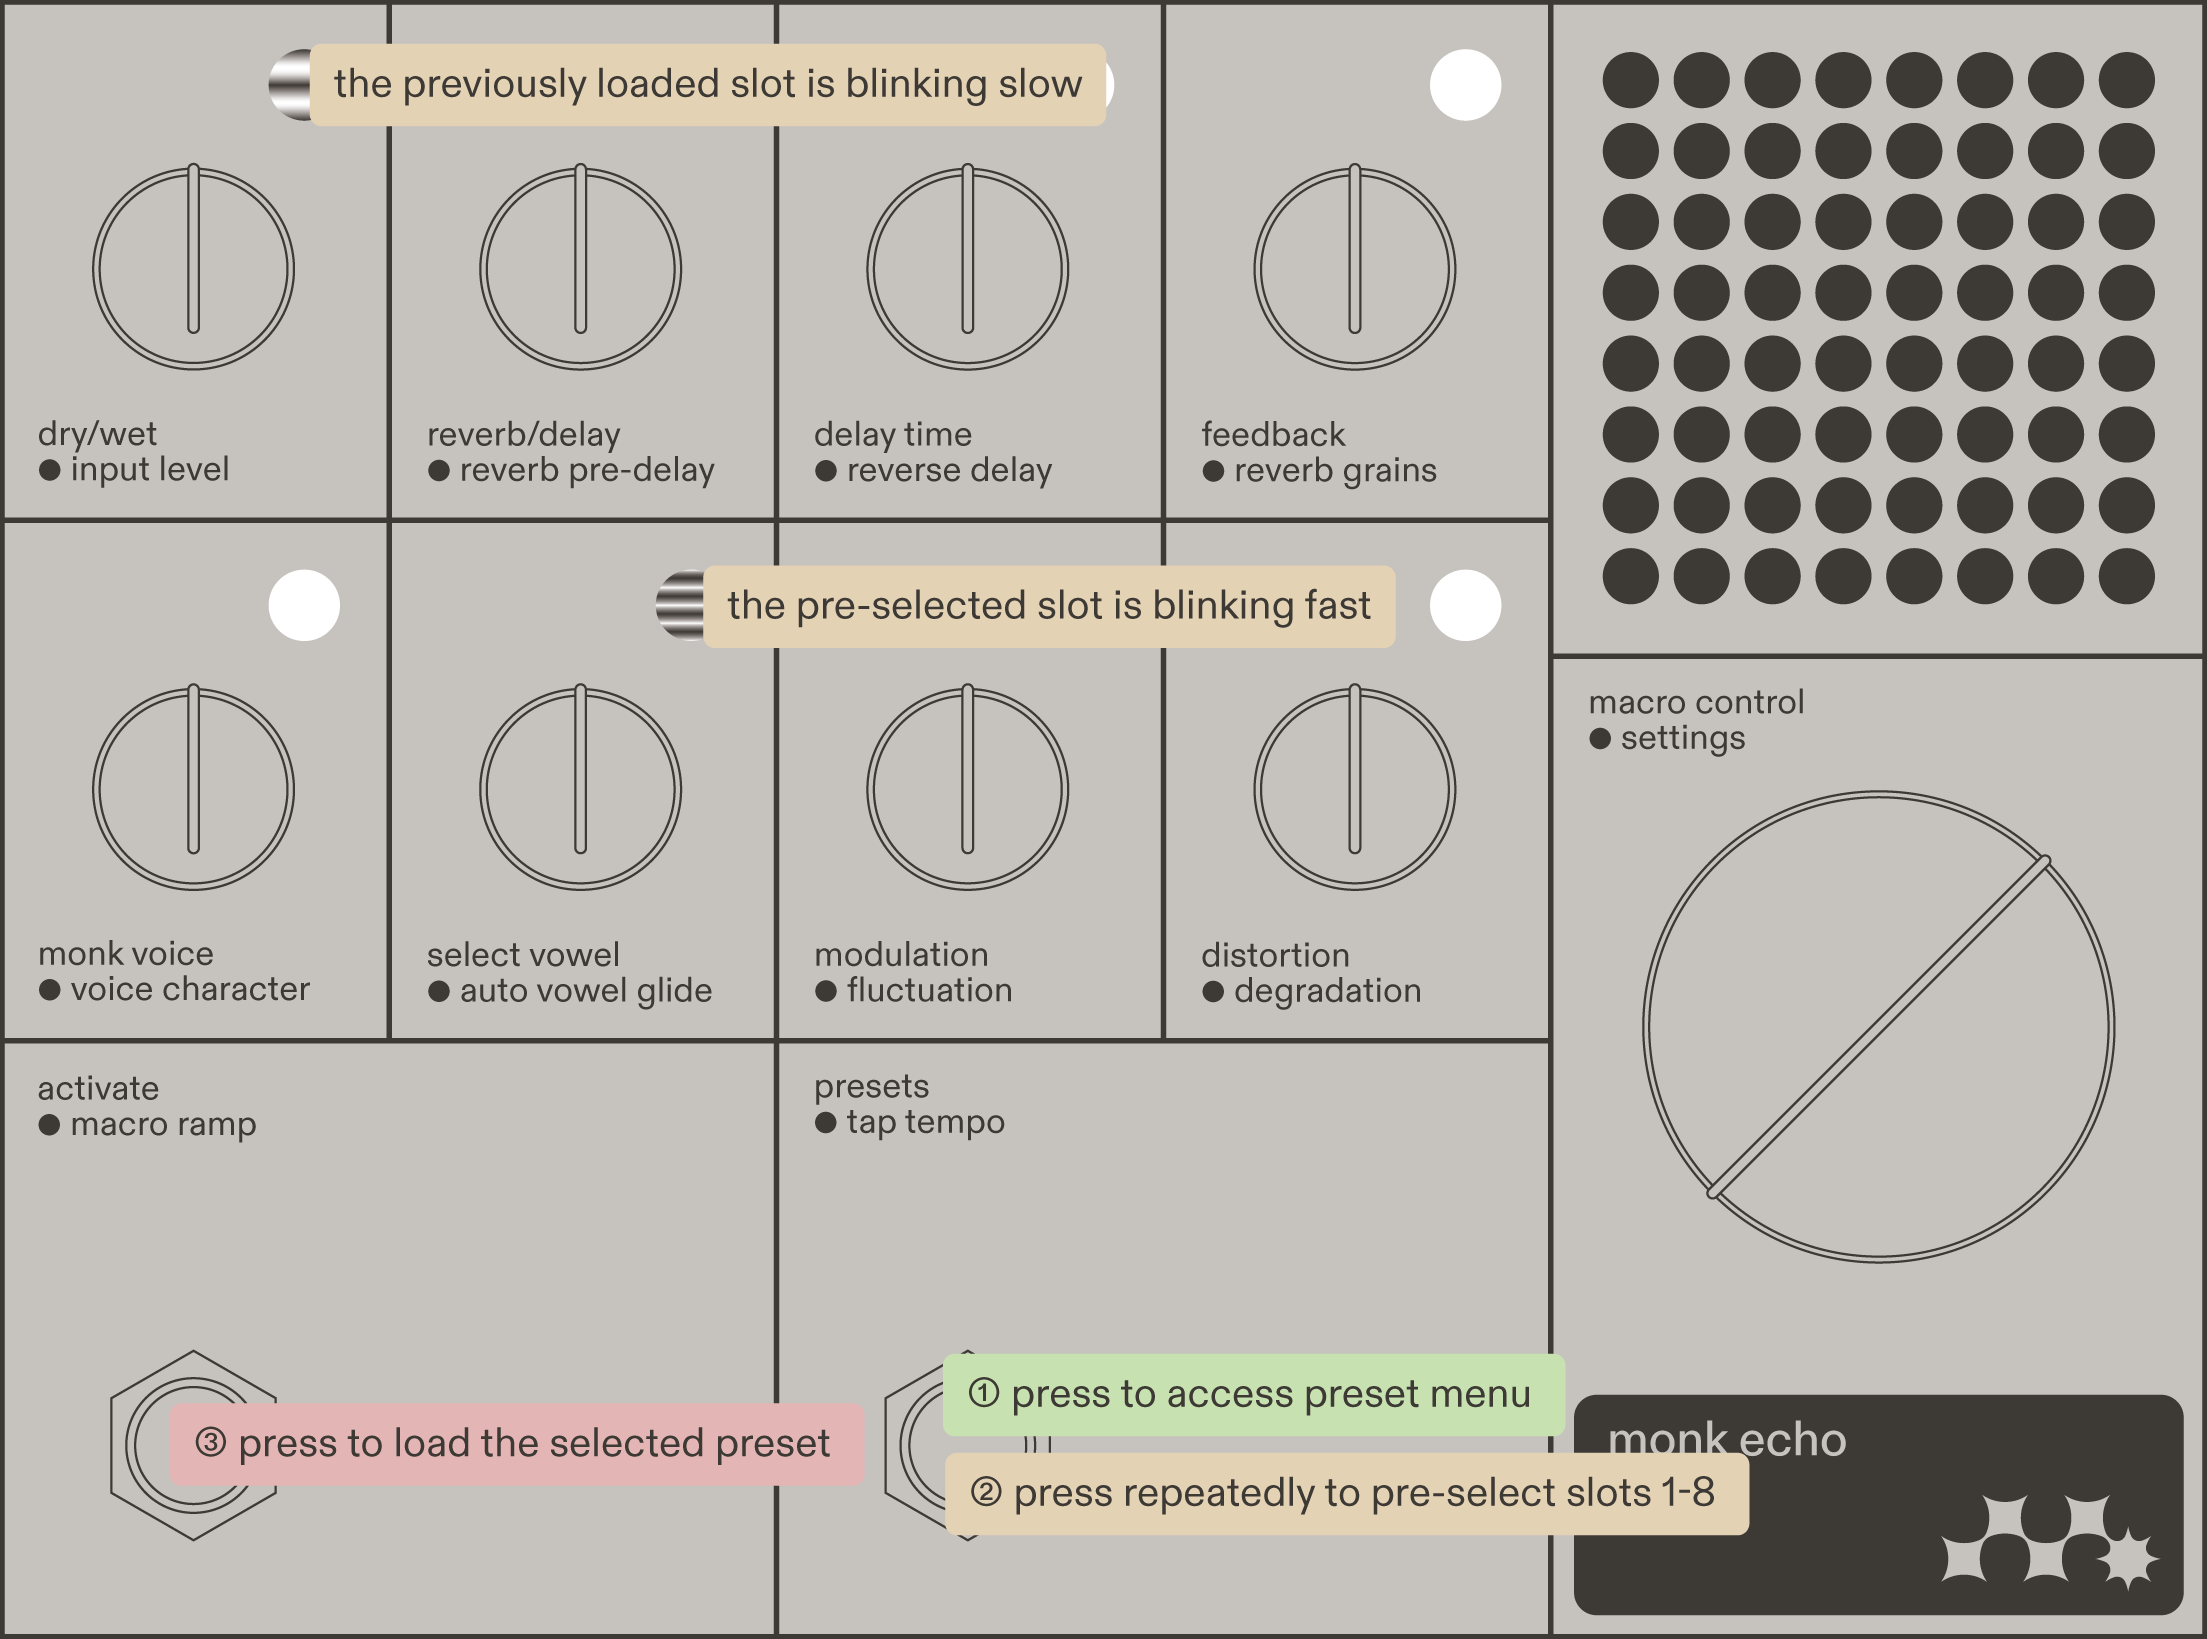
- The pre-selected preset slot blinks quickly.
- The last loaded preset slot blinks slowly.
If you don't load or save a preset, the preset menu closes automatically after a short moment.
Load presets
There are two ways to load presets on Monk Echo: with your hands using the buttons, or with your feet using the footswitches.
Load presets with the button
- Short-press the preset footswitch to access the preset menu.
- Short-press any of the eight buttons for preset slots 1–8. If Monk Echo was previously in bypass, it will remain in bypass with the new preset loaded.
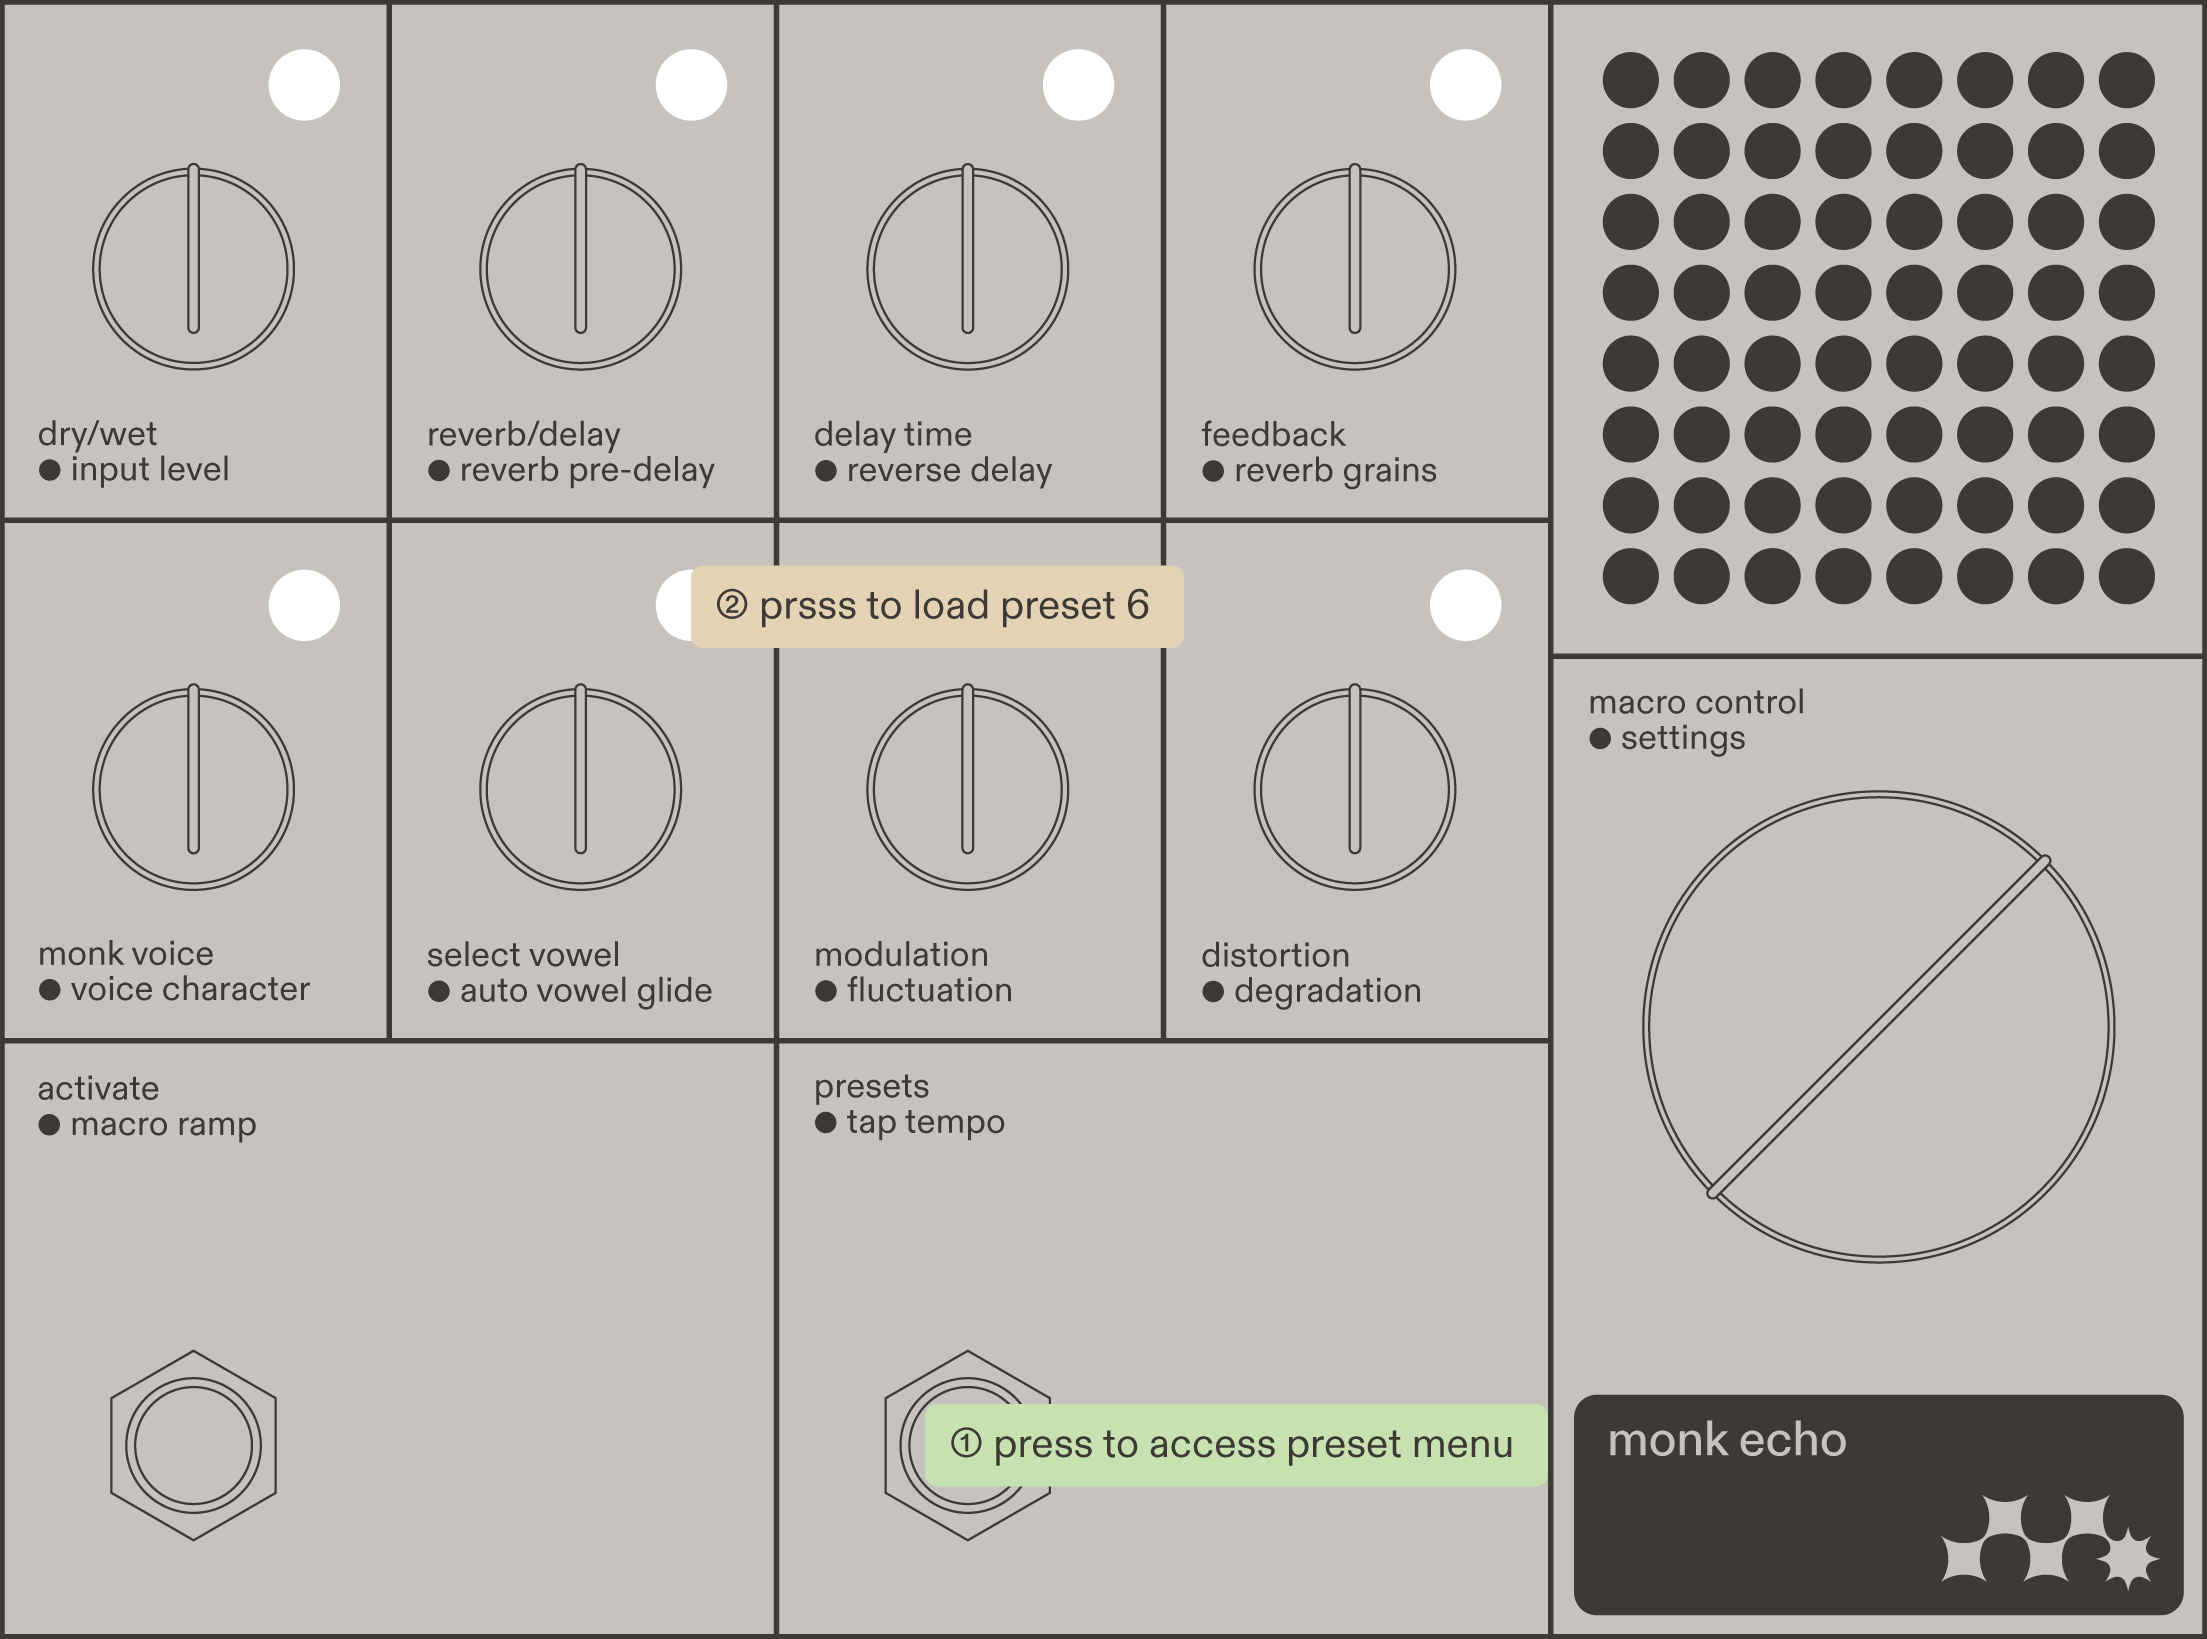
Load presets with the footswitches
If you are using Monk Echo on the floor, switching with the buttons is not an option. Instead, use the footswitches.
- Short-press the preset footswitch to access the preset menu. The footswitch automatically pre-selects the next preset slot that has a preset saved in it. This is indicated by a quickly blinking button.
- Repeatedly short-press the preset footswitch to scroll through the preset slots. If you reach preset slot 8, the next press takes you to preset slot 1. This does not load the preset; it only pre-selects the slot.
- Short-press the activate footswitch to load the selected preset. If Monk Echo was previously in bypass, this action also activates it.
Morph presets
The previously described preset loading clears all sound from the buffer before loading the new parameter values. This allows for classic, noiseless preset switching.
Preset morphing, on the other hand, allows you to gradually move from one preset into another. The buffer is not cleared, the input is not bypassed, and all parameters slowly move to their new values. This method is likely to be used in more experimental situations, as the resulting sound is highly dependent on four things:
- The preset you are coming from
- The preset you are going to
- The sound already in the buffer
- The sound at the input
While experimental in nature, it can still produce repeatable results if rehearsed. For example, you can morph into a new preset while the tails of the previous preset are still ringing out.
As with regular preset loading, you can morph presets with either your hands or your feet.
Morph with macro control knob
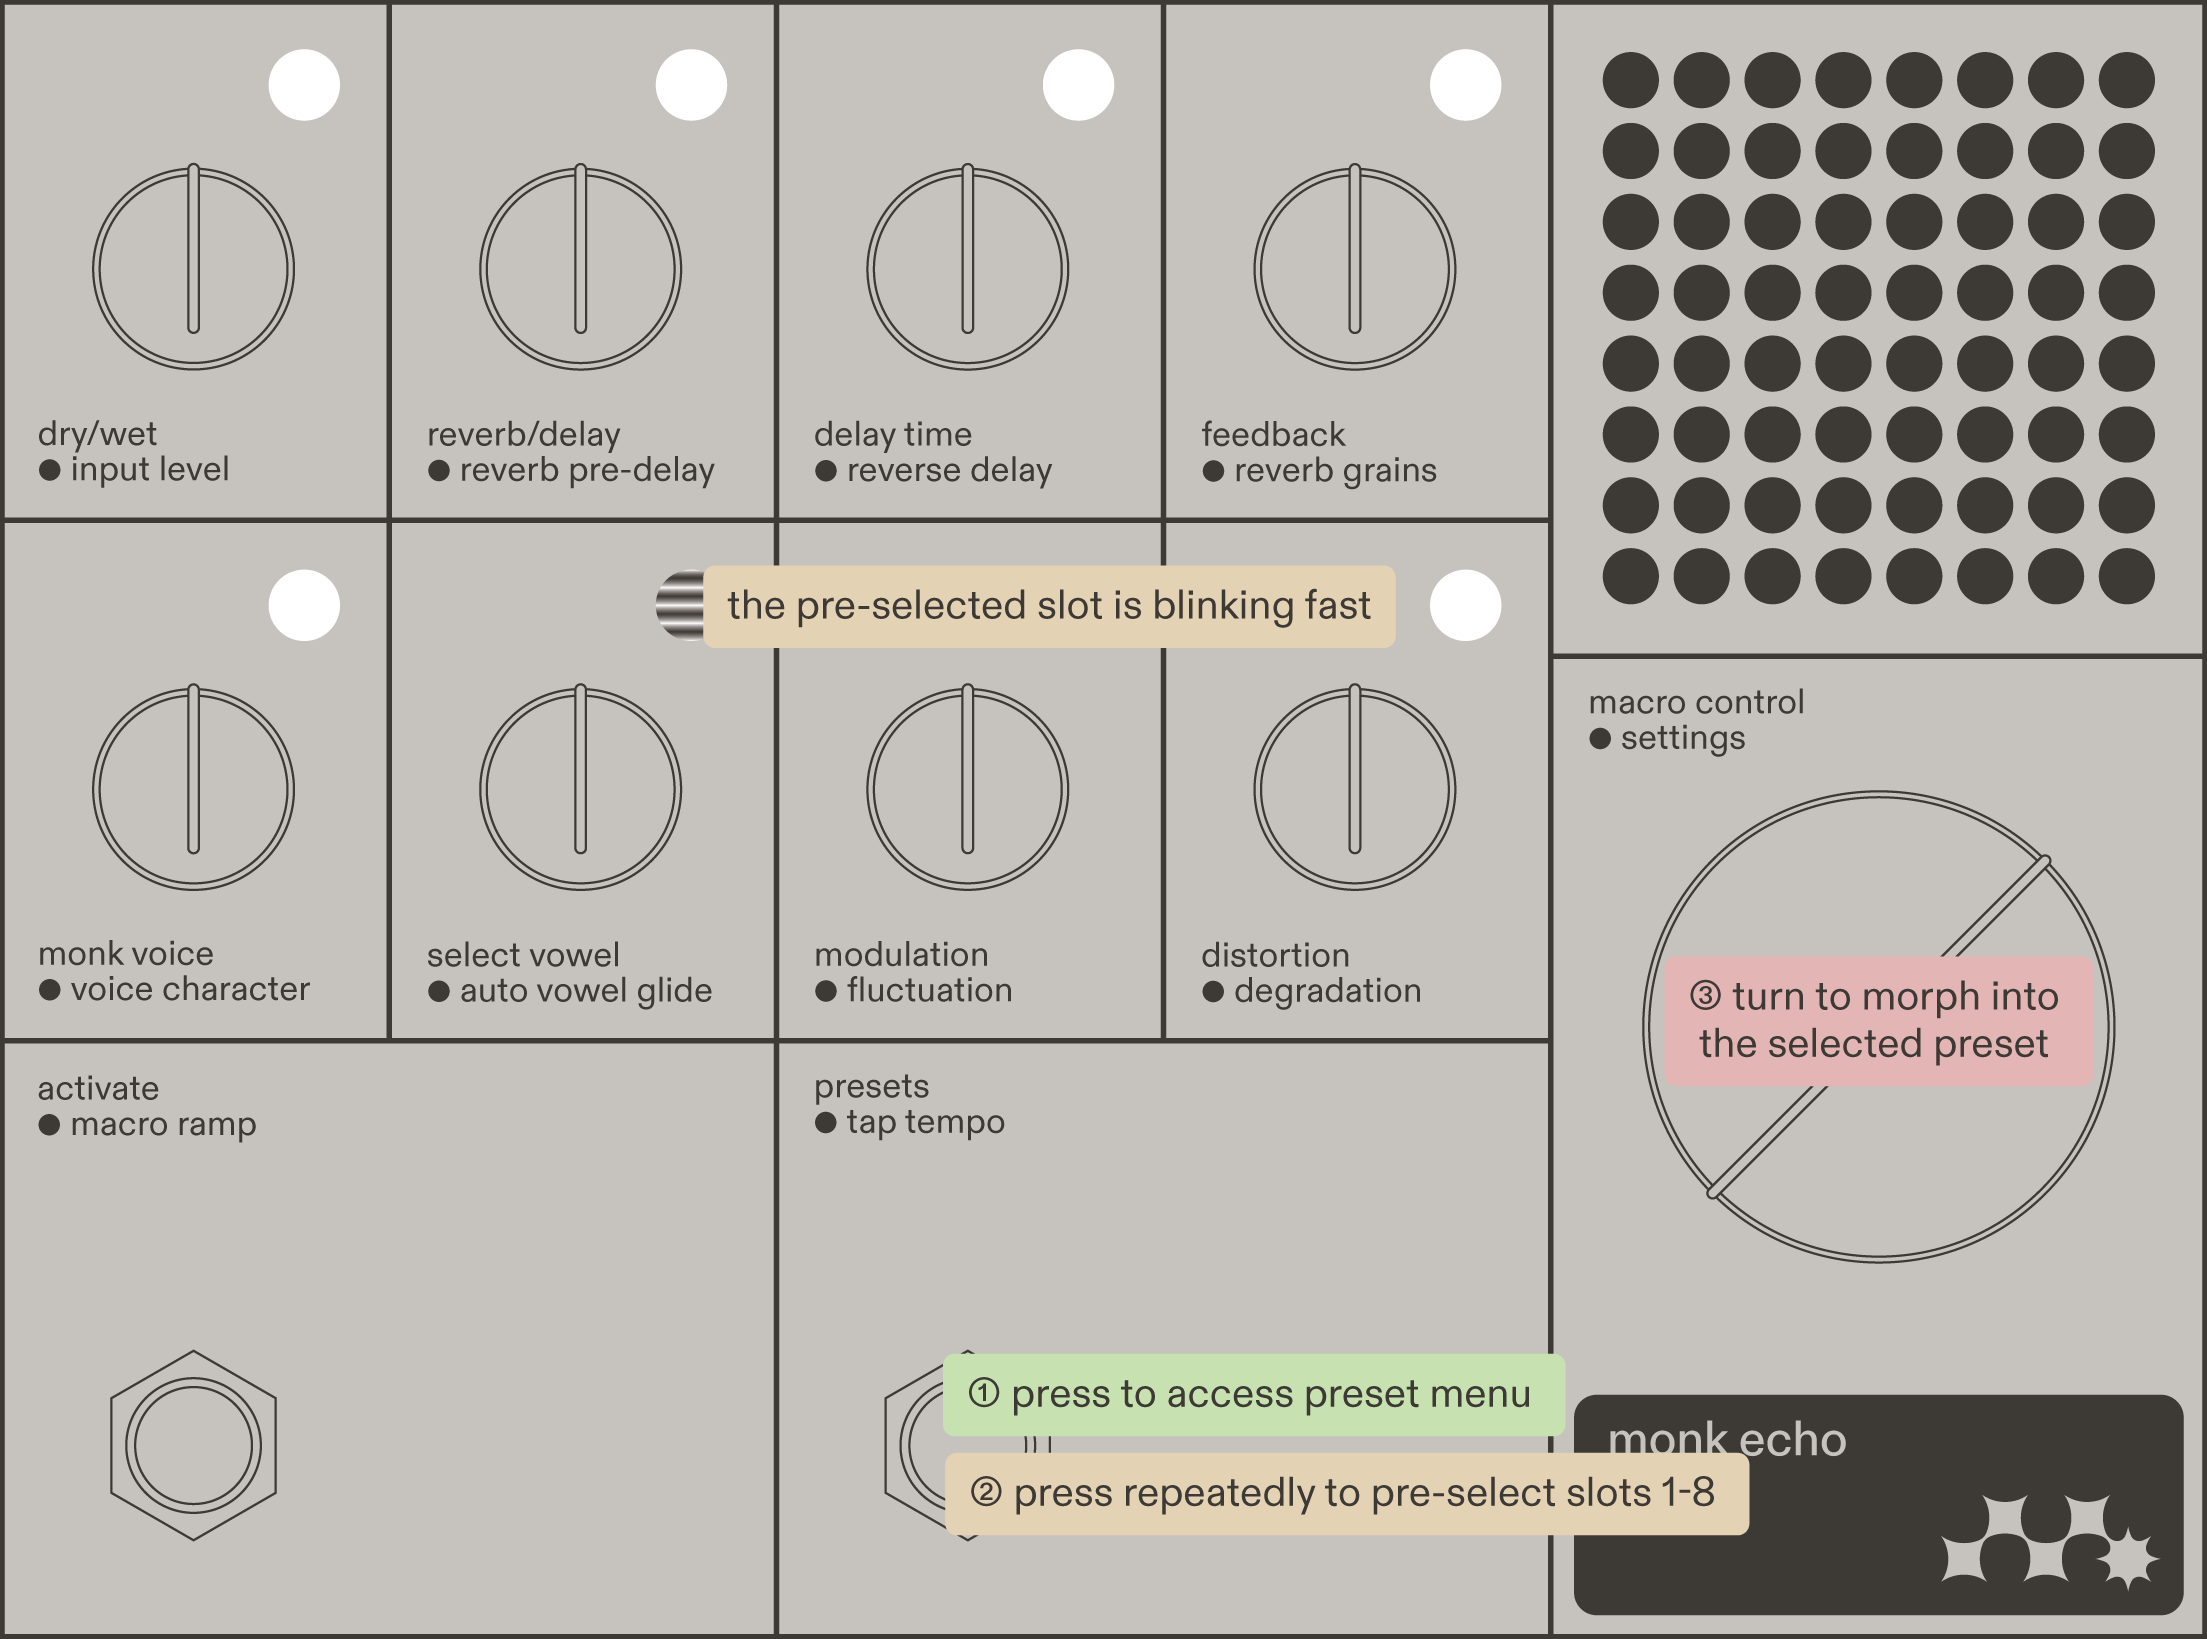
- Short-press the preset footswitch to access the preset menu.
- Repeatedly short-press the preset footswitch to scroll through the preset slots.
- When the desired preset is pre-selected, turn the macro control knob. You will see the parameters change on the dot display. Keep turning the macro control knob until the whole display blinks, indicating that the preset is fully loaded.
You can morph forward and back before the preset is fully loaded. If you stop at any point during the above steps, Monk Echo automatically reverts to the previous sound.
Morph with macro ramp footswitch
Use the macro ramp (left) footswitch to morph between presets if your Monk Echo is on the floor.
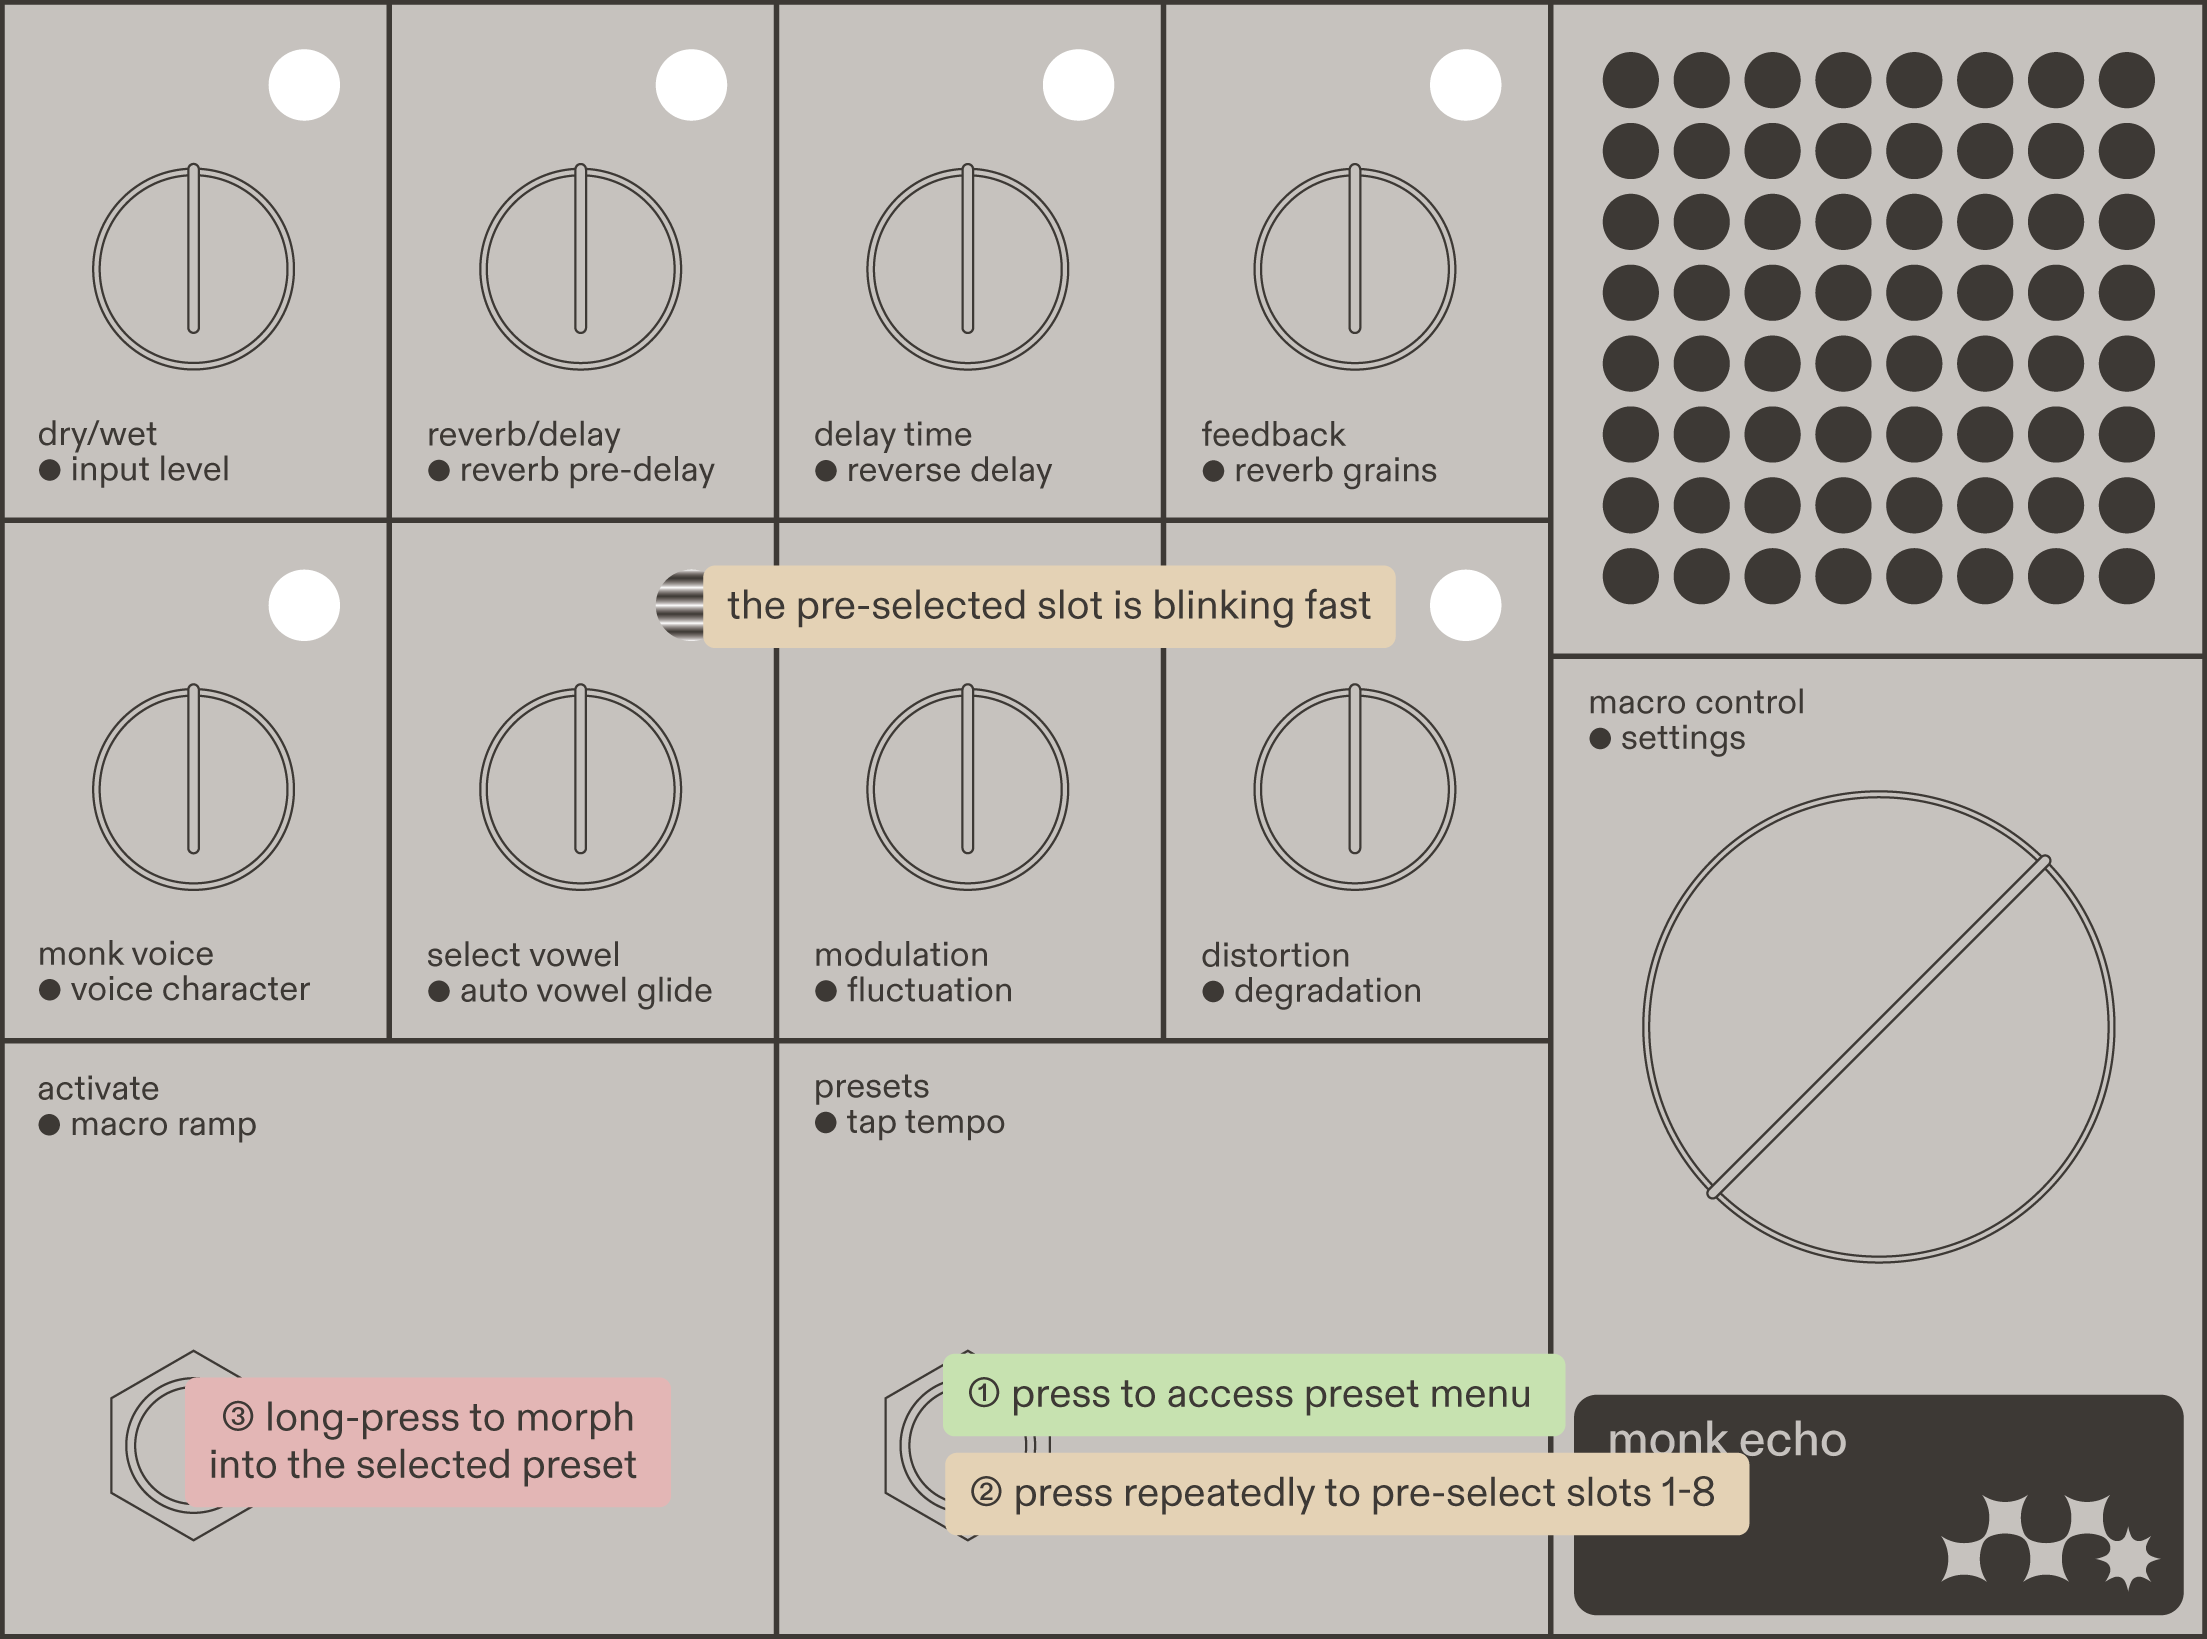
- Short-press the preset footswitch to access the preset menu.
- Repeatedly short-press the preset footswitch to scroll through the preset slots.
- When the desired preset is pre-selected, long-press the macro ramp (left) footswitch to morph. The morph time depends on the selected presets' macro ramp rate. The full dot display blinks to indicate that the preset is fully loaded.
You can morph forward and back before the preset is fully loaded. If you stop at any point during the above steps, Monk Echo automatically reverts to the previous sound.
Save presets
To save a preset in one of the eight onboard slots:
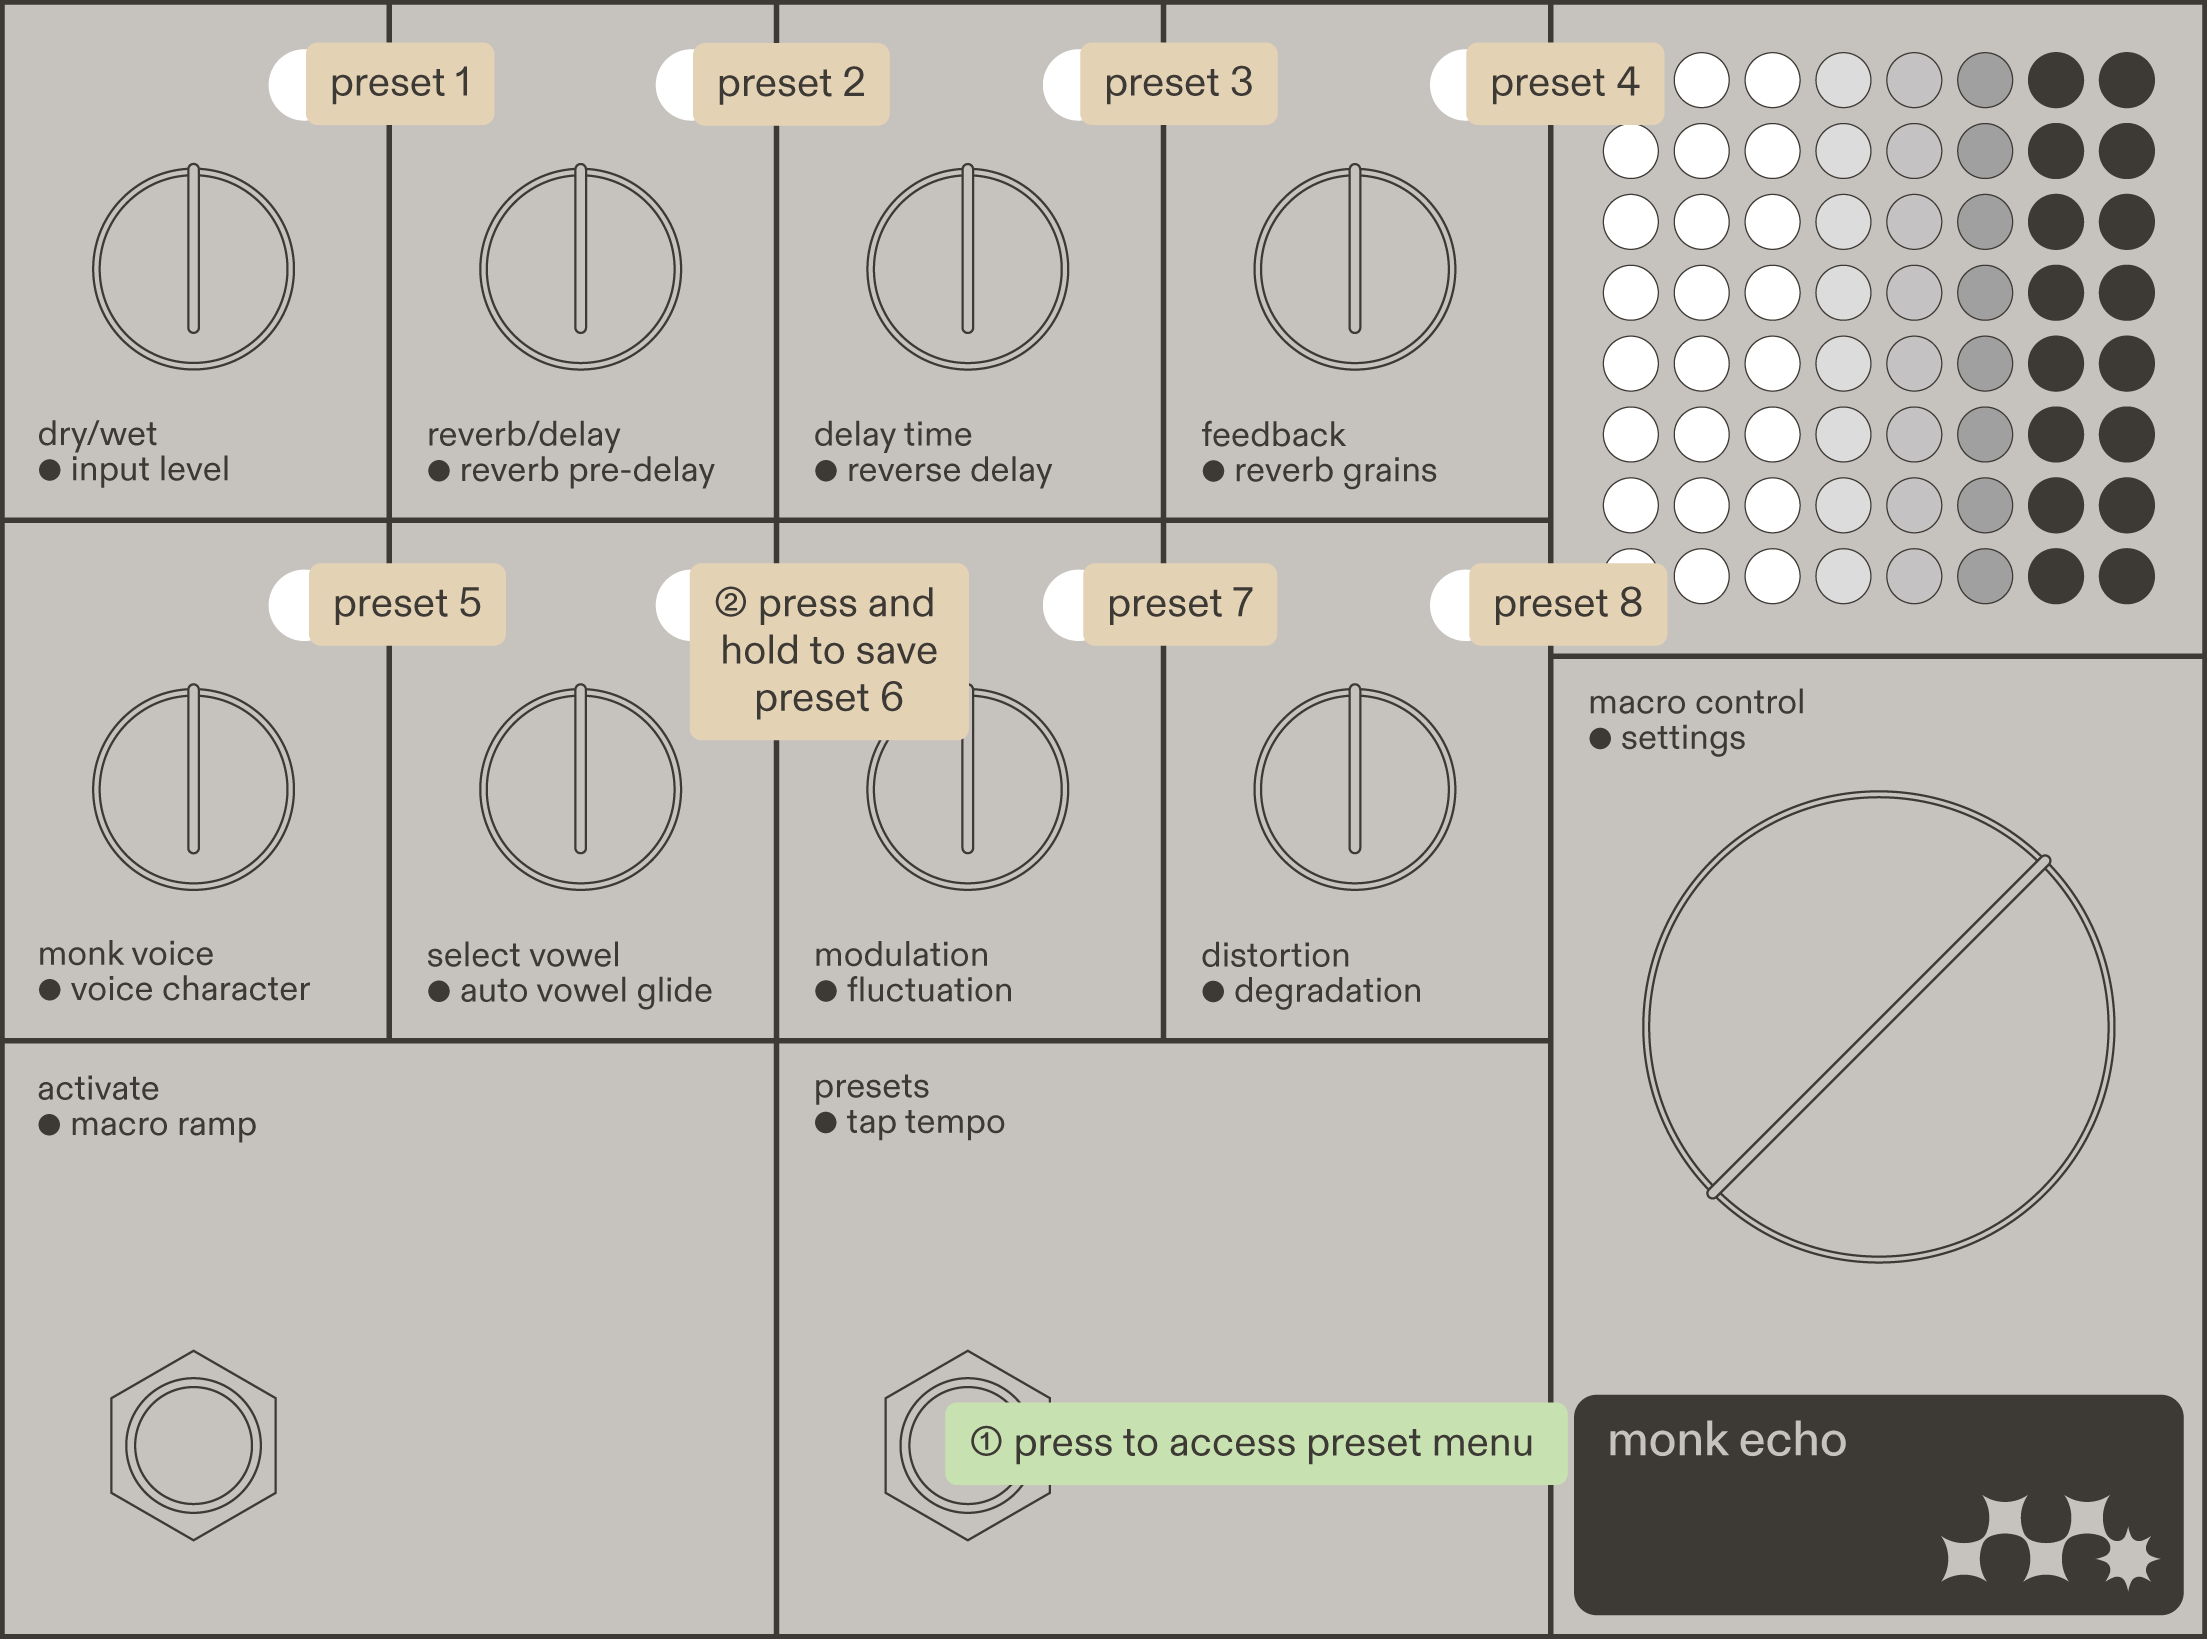
- Short-press the preset footswitch to access the preset menu.
- Press and hold the button for the corresponding preset slot. A loading-status-bar animation appears on the dot display to indicate that the preset is being saved. To cancel, release the button before the animation is finished.
To save presets in the remaining 92 slots, jump to presets with MIDI section.
Delete presets
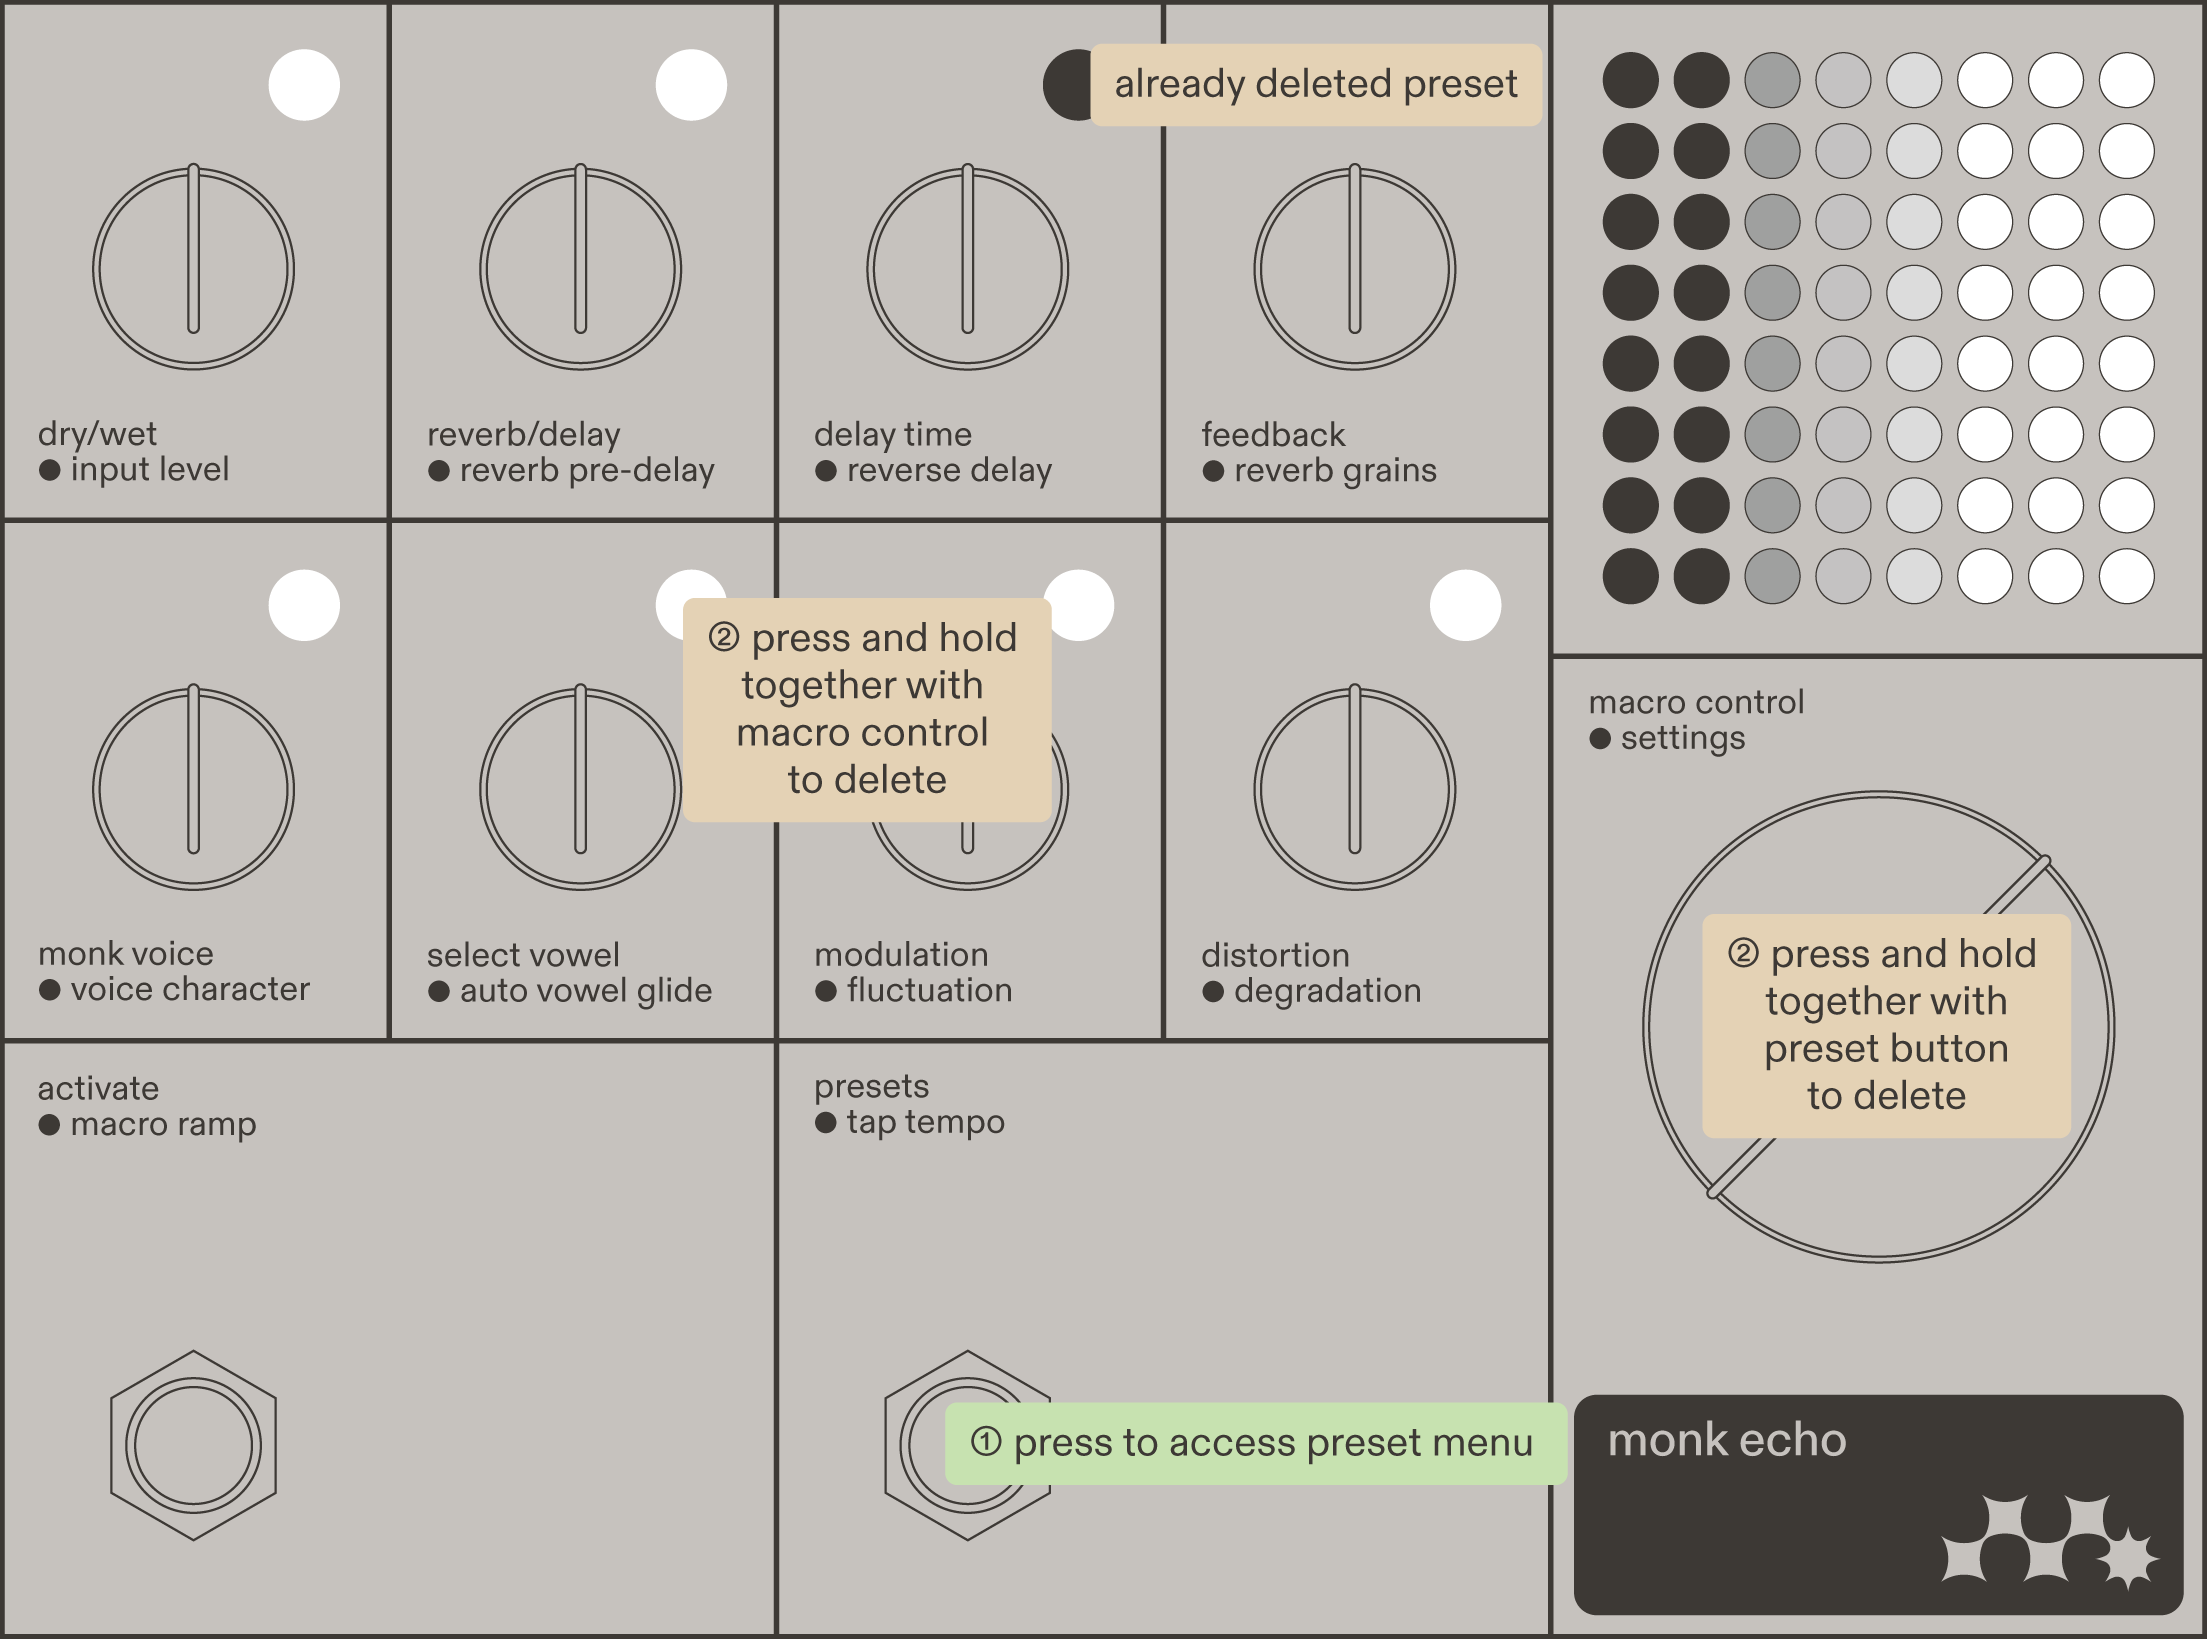
Because the preset footswitch scrolls through the eight onboard presets, it can be useful to delete unused or unnecessary preset slots, so that you only scroll through what you actually need during a performance. Before deleting presets, you can use the web app to back up your presets to a computer for later use.
To delete a preset and leave the slot empty:
- Short-press the preset footswitch to access the preset menu.
- Press and hold the corresponding preset slot button and the macro control encoder together. A reverse loading-status-bar animation appears on the dot display to indicate preset deletion. To cancel, release the button before the animation is finished.
From now on, the LED button for this preset slot will be dark in the preset menu, and repeatedly pressing the preset footswitch will skip this slot.
Presets with MIDI
To recall all 100 preset slots, use MIDI Program Change messages (PC) 1–100.
If Monk Echo receives a PC message in this range, it recalls the corresponding preset and activates Monk Echo if it was previously in bypass.
If you need to recall a preset via MIDI while keeping Monk Echo in bypass, transmit two consecutive PC messages: PC 1–100 followed by PC 121 (Bypass On).
To save a preset with MIDI, transmit PC 101 (Initiate preset save) followed by PC 1–100 for the corresponding preset slot.
System settings
To access system settings, press and hold the macro control encoder. A growing status bar fills the dot display to indicate how long you need to hold the encoder before entering system settings.
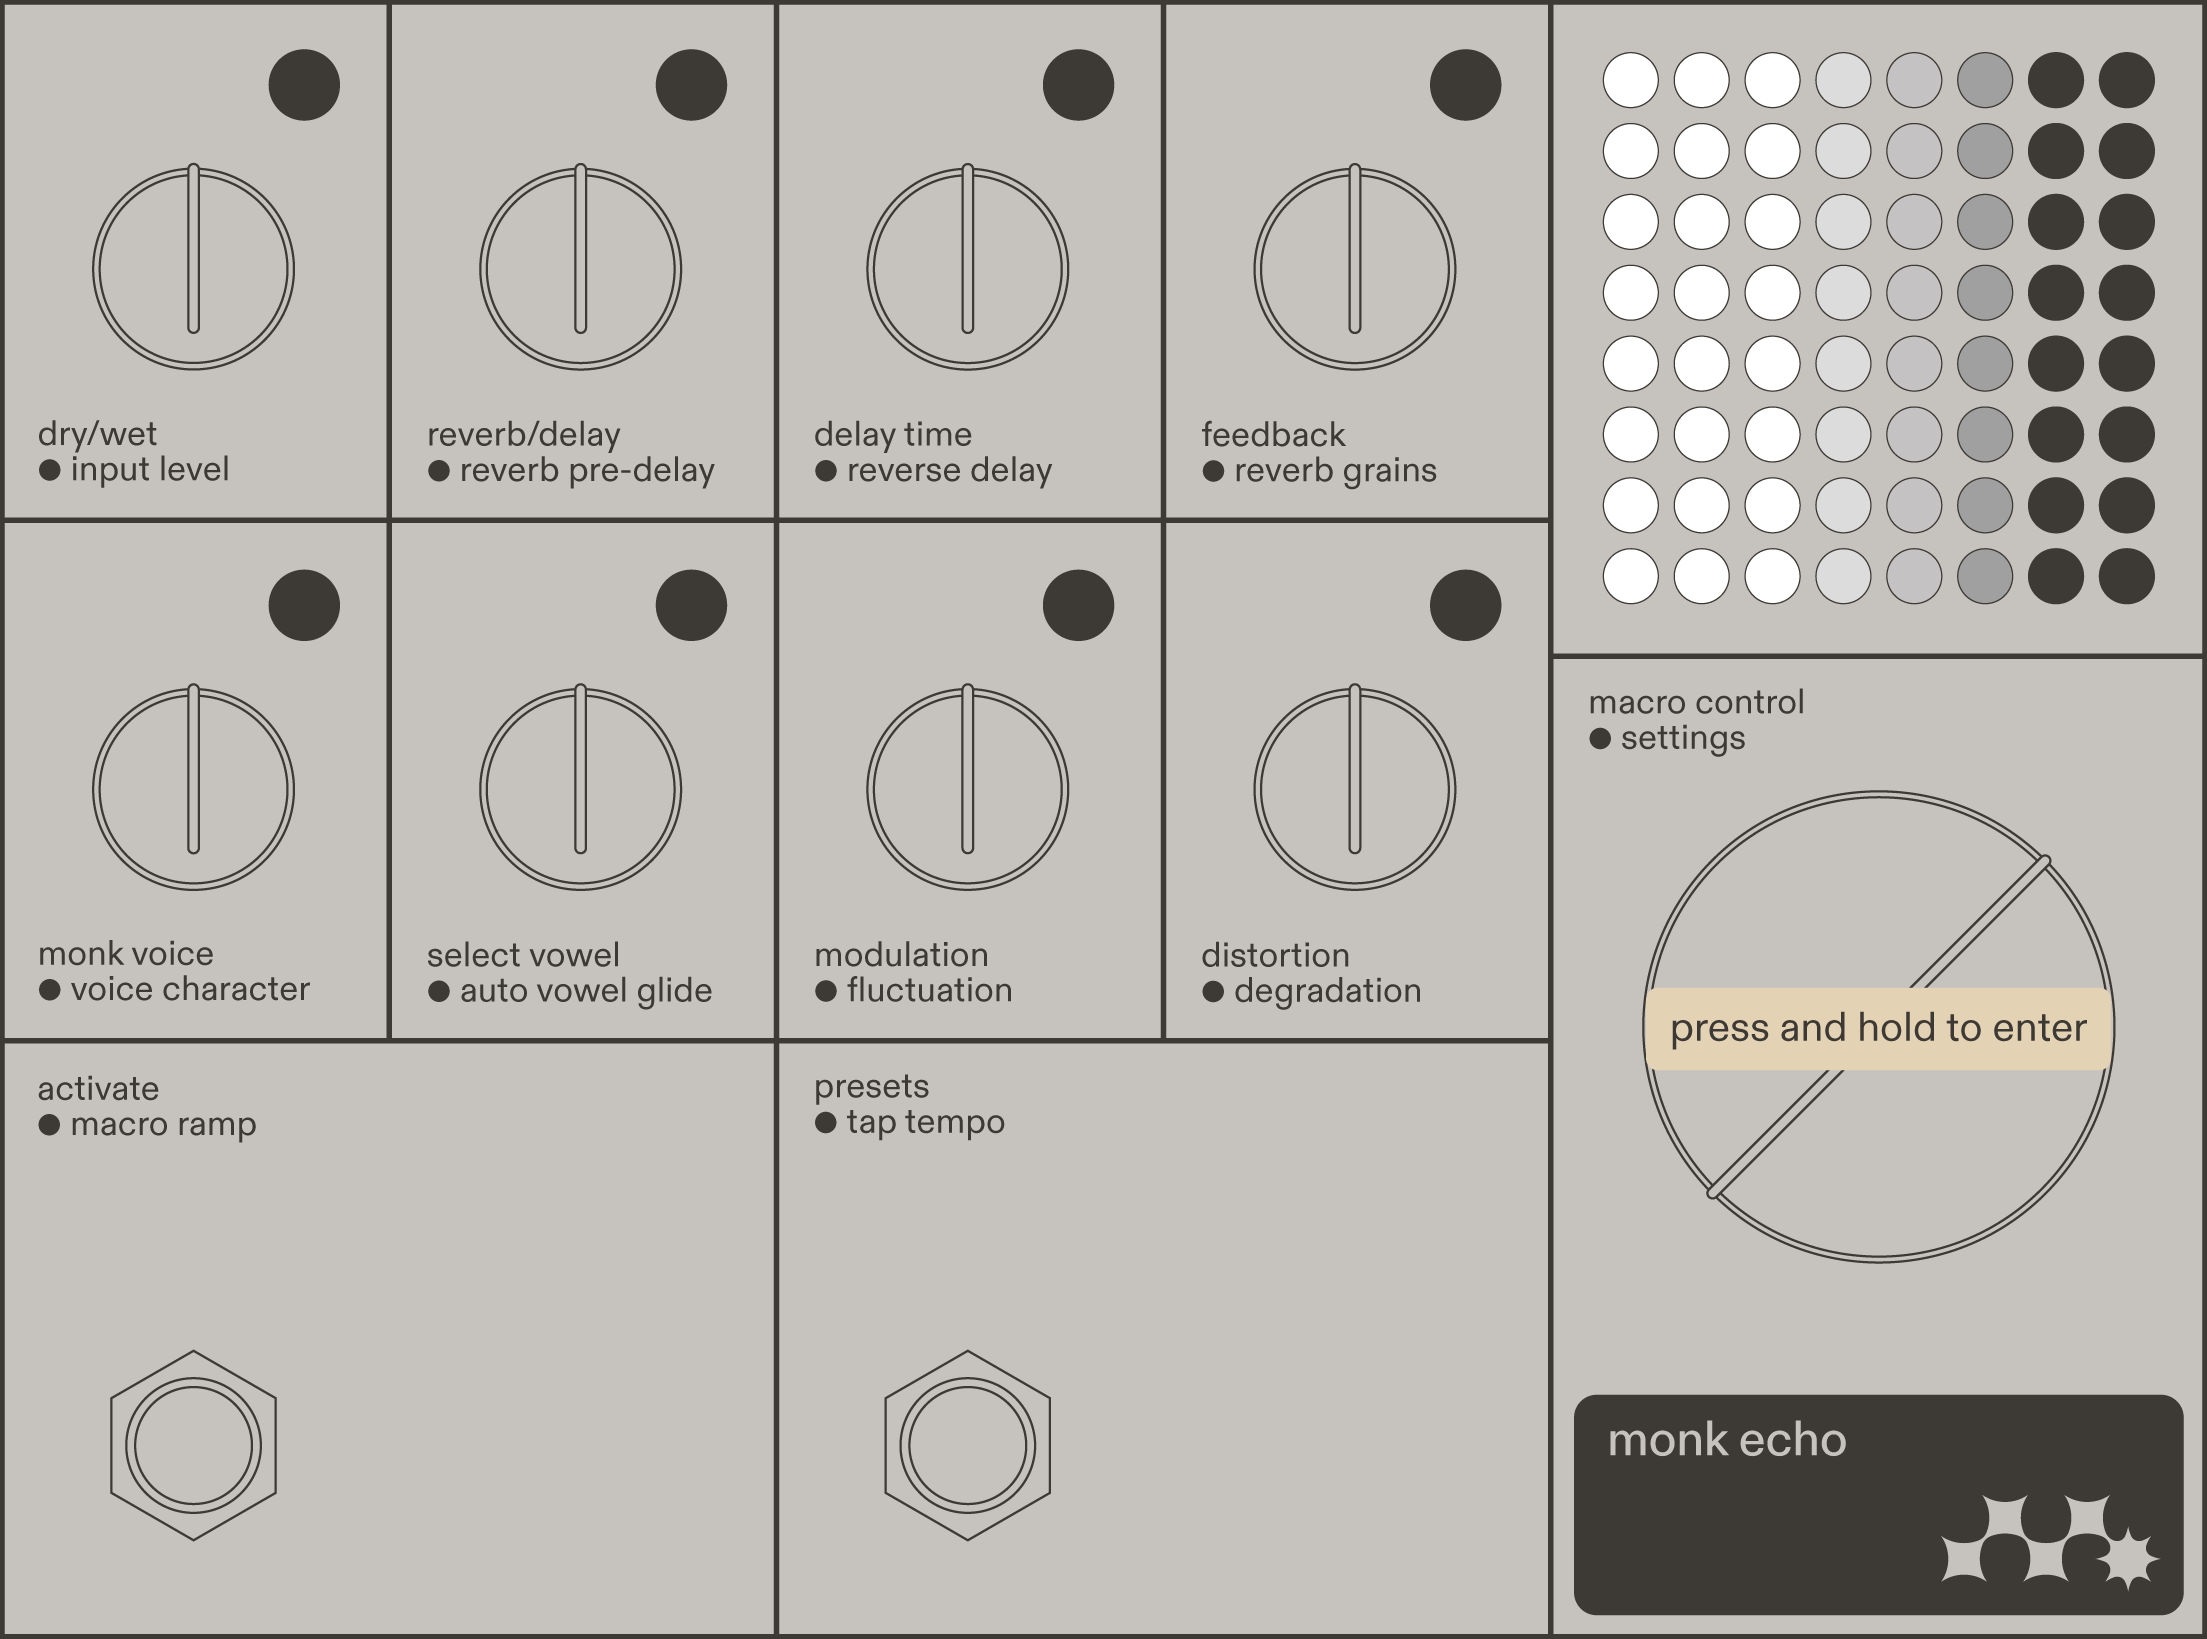
While in system settings, Monk Echo is set to true bypass.
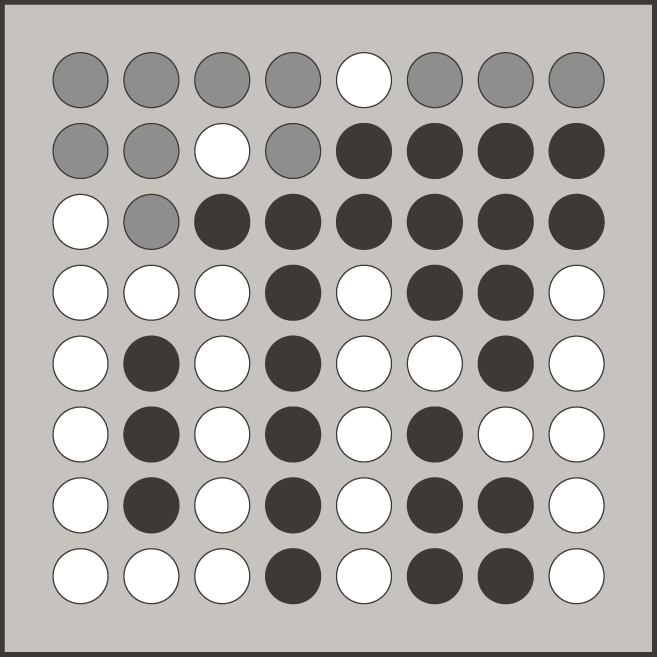
The top three rows of the dot display show where you are in the system settings tree. The rest of the dot display is used to show scrolling text.
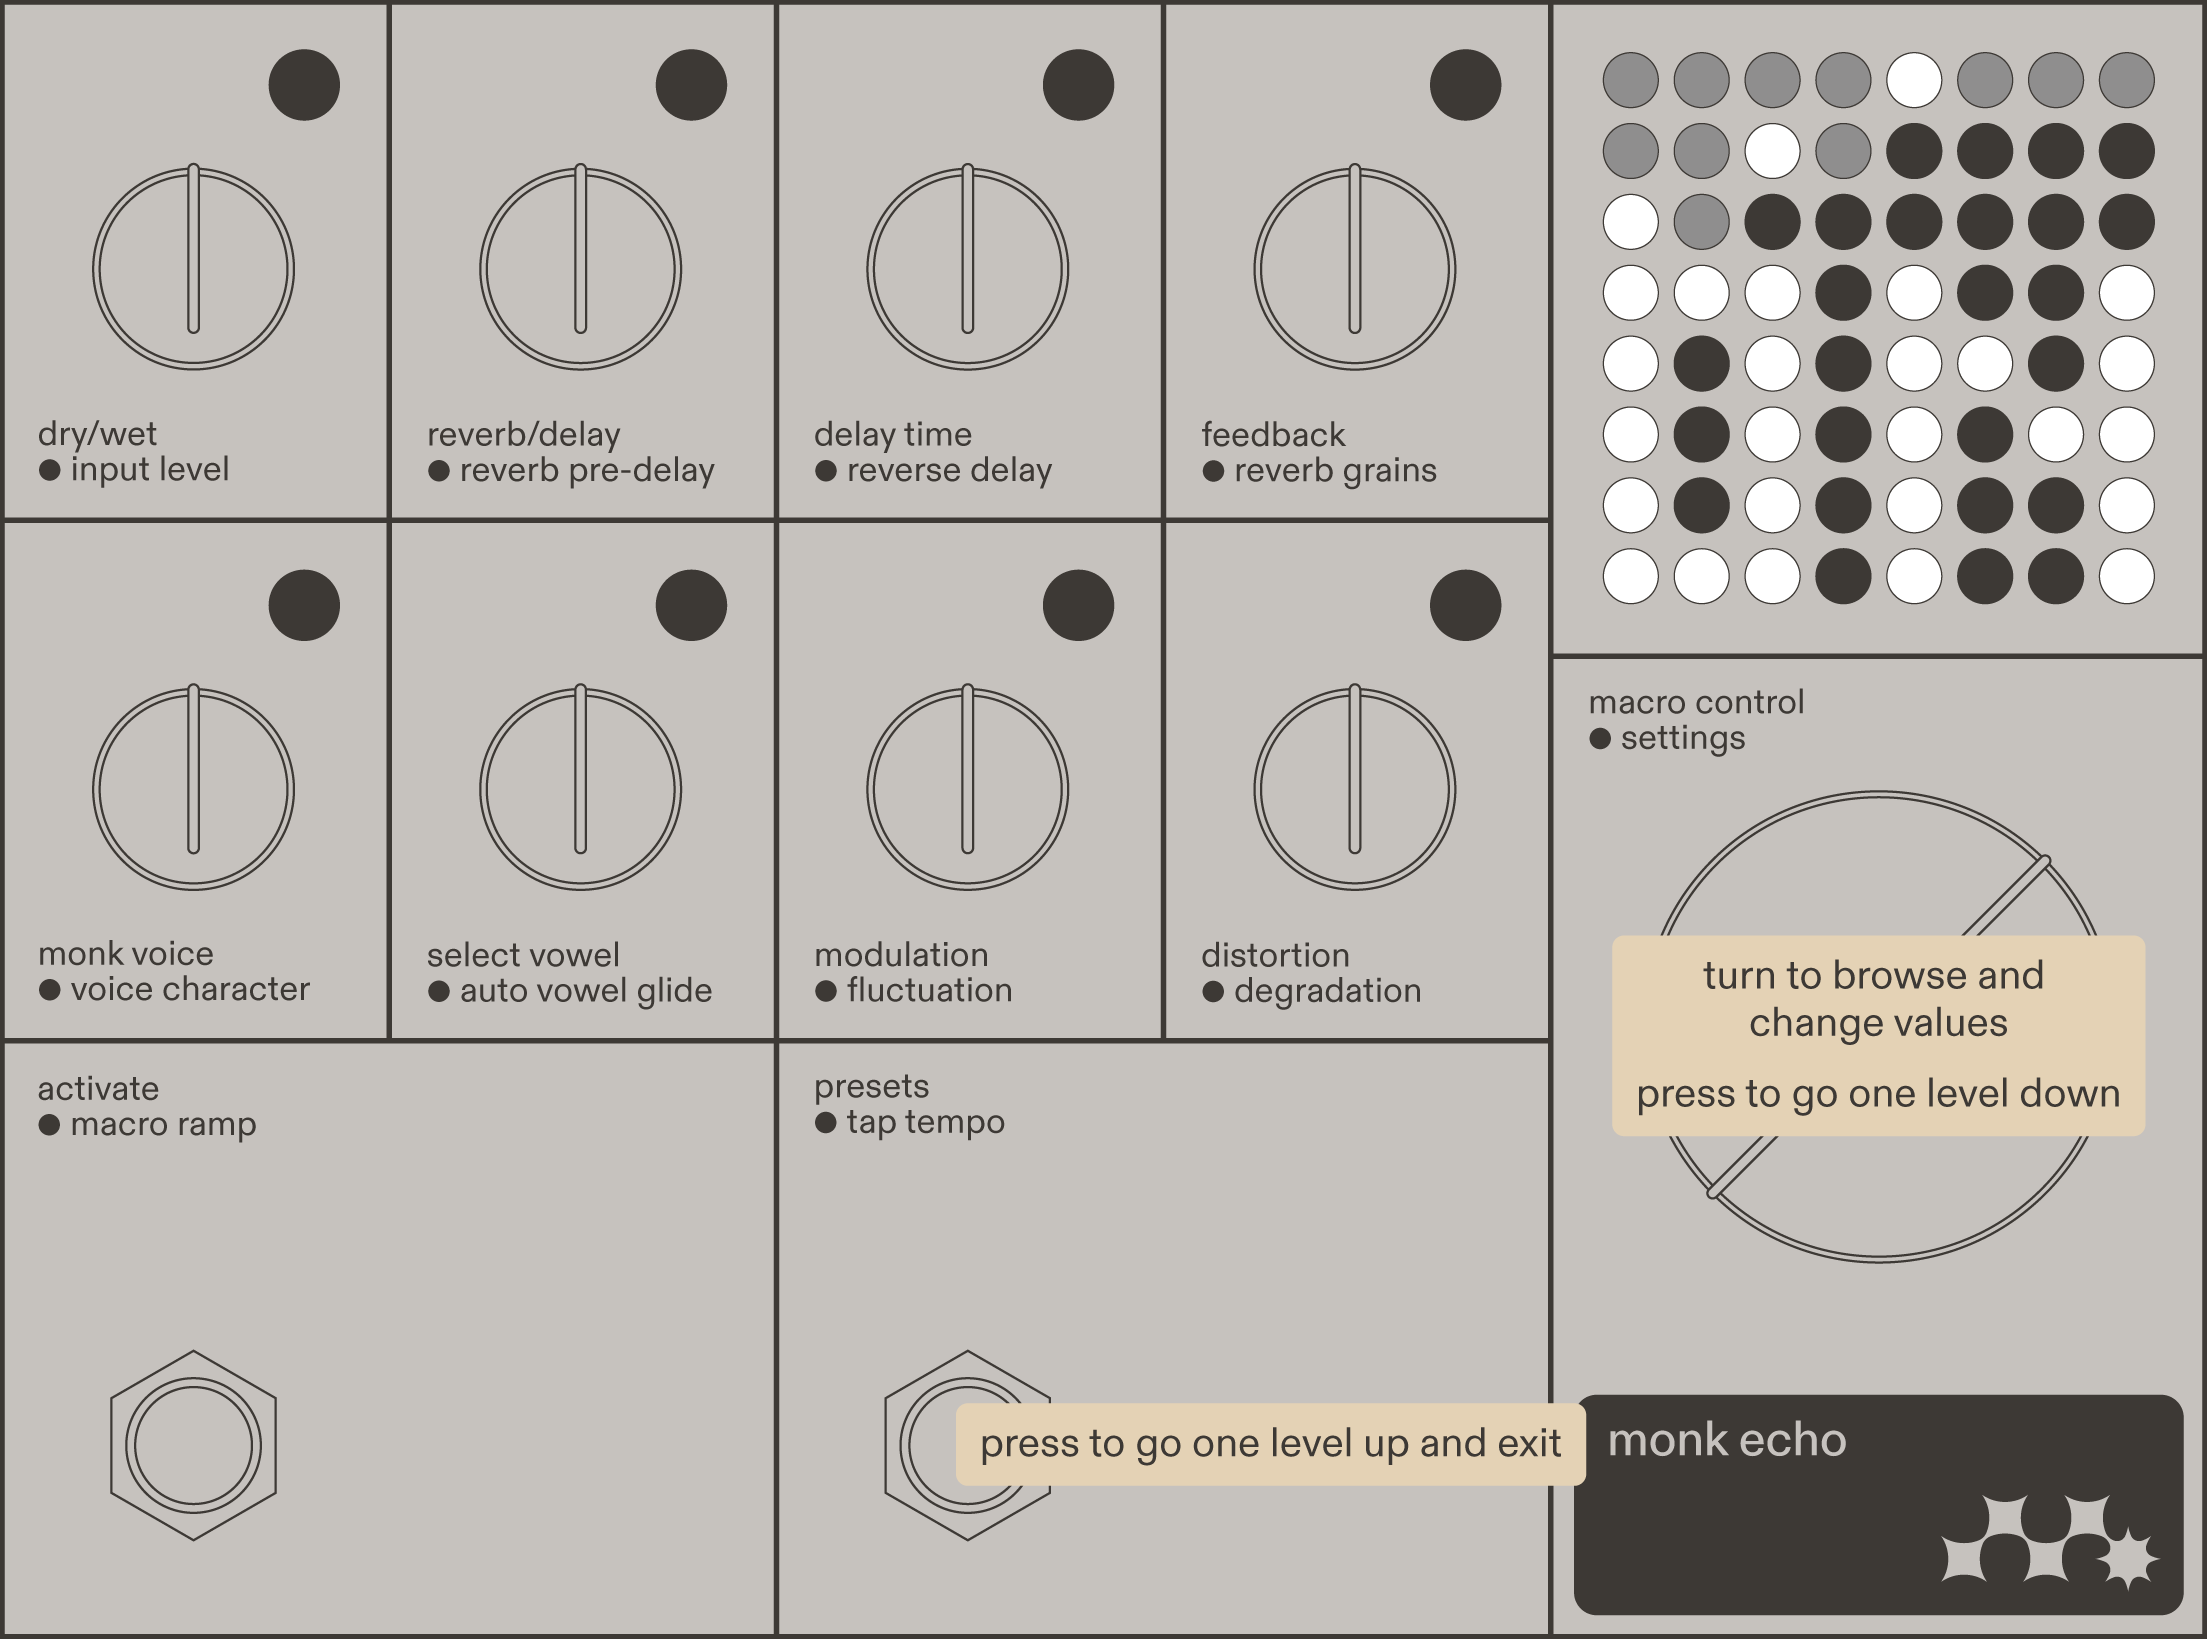
Navigate the system settings using the macro control encoder and the right footswitch
- Turn the encoder to browse the available settings
- Press the encoder to step down the menu tree
- Turn the encoder to change the parameter value,
- Press the right presets footswitch to go up the menu tree and finally exit system settings
As an alternative you can use the web app for managing the system settings
BYPASS
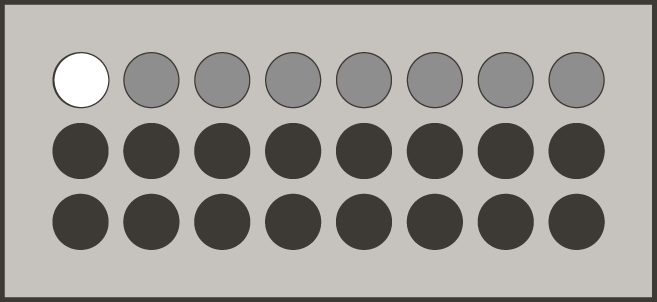
Changes the bypass and echo tails behavior.
CATCHUP
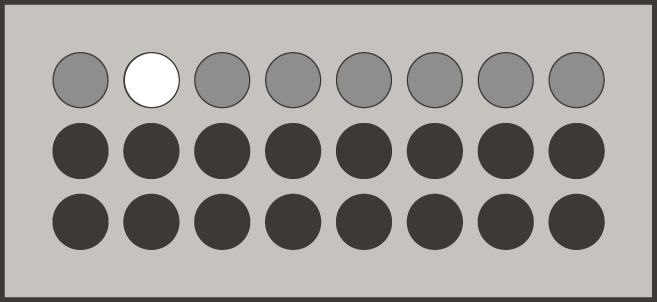
When recalling presets, the physical knob positions will inevitably differ from the recalled parameter values. You can choose whether turning a knob immediately jumps to its new parameter value, or whether the knob must first catch up with the recalled value before taking control.
DRY
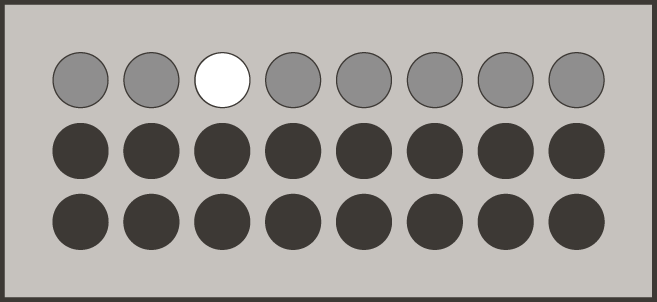
If you are using Monk Echo in a mixer send channel or another setup where the dry sound is completely unnecessary, you can remove it from the mix. The dry/wet and input level knob functions are adjusted slightly to reflect this.
TAP TEMPO
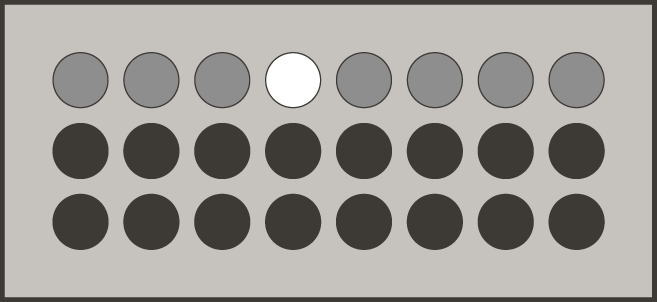
This setting determines the behavior of the right footswitch when switching between preset and tap tempo modes.
MIDI IN
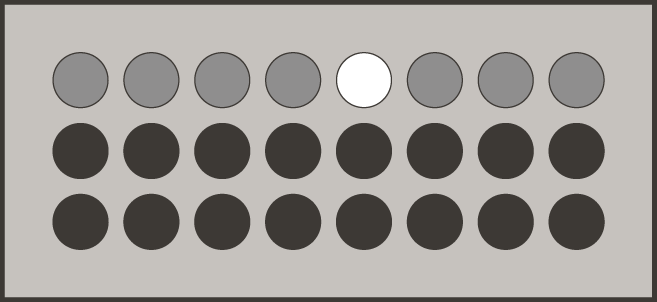
This section contains all MIDI input settings.
CH RXChoose the MIDI receive channel.
CC RXChoose whether to receive MIDI Continuous Controller (CC) messages.
PC RXChoose whether to receive MIDI Program Change (PC) messages.
CLK RXChoose whether to receive MIDI Clock.
MIDI OUT
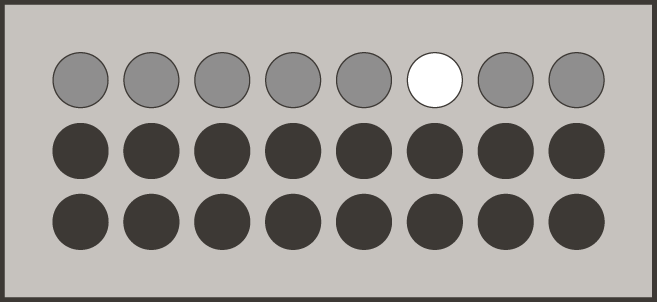
This section contains all MIDI output settings.
TYPEChoose the type of MIDI output.
CH TXChoose the MIDI transmit channel.
CC TXChoose whether the macro control generates and transmits MIDI CC 1 MSB and CC33 LSB.
PC TXChoose whether preset changes on Monk Echo transmit corresponding MIDI Program Change messages (PC 1–8).
CLK TXChoose whether to transmit MIDI Clock.
STARTUP
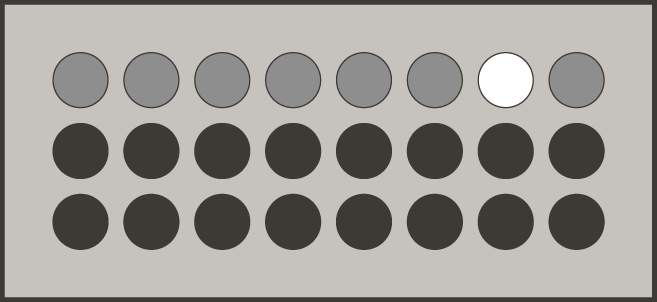
This section lets you tailor how Monk Echo powers on.
PRELOADChoose which set of parameters is loaded after power on.
STATEChoose whether Monk Echo is active after power on.
DISPLAY
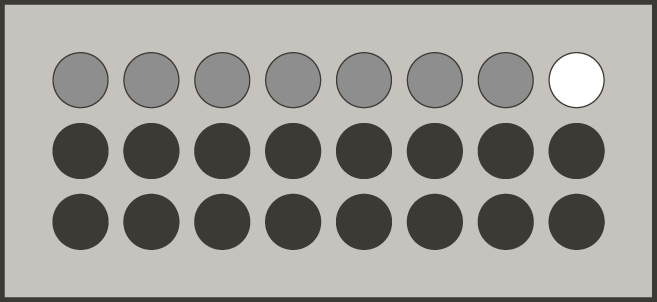
This setting adjusts the dot display brightness.
MIDI
Monk Echo features a fairly extensive MIDI implementation. The main possibilities are:
- Program Changes (PC)
- access to extended number of presets
- bypass switching
- button switching
- transmit PC when switching presets
- Continuous Controllers (CC)
- individual parameter control (MSB and LSB where applicable)
- macro control
- bypass switching
- button switching
- transmit CC when using macro control
- MIDI clock
- Sync delay, reverb pre-delay and reverb pitch grains
- Transmit MIDI clock
- MIDI output routing
- THRU (input data is passed to output)
- OUT (Monk Echo generates and transmits data)
- MERGE (input data is merged with generated data)
MIDI data can be transmitted and received via the MIDI IN and OUT 5-pin connectors or (coming soon) usb-c port.
You can configure various aspects of MIDI inputs and outputs in the system settings.
MIDI Map
Monk Echo receives MIDI Program Change (PC) and Continuous Controller (CC) messages. The tables below use the standard MIDI value range of 0–127. If your controller displays values from 1–128 instead, add 1 to each value from the tables below when converting.
MIDI Clock is received in 24 pulses per quarter note (24 PPQN), the standard and most typical format.
Program Changes (PC)
| message | action |
|---|---|
| PC 1 – PC 100 | Recall presets 1 – 100 and activate (exit bypass) |
| PC 101 | Initiate preset save. The following PC message 1-100 saves / overwrites the current sound in the corresponding slot 1-100 |
| PC 111 – 118 | Toggle the state of LED buttons 1-8 |
| PC 121 | Bypass on |
| PC 122 | Activate (Bypass off) |
| PC 123 | Toggle bypass state |
Continuous Controllers (CC)
| cc | parameter | values |
|---|---|---|
| CC 1 | macro control MSB | 0-127 |
| CC 33 | macro control LSB | 0-127 |
| CC 2 | high-pass MSB | 0-127 |
| CC 34 | high-pass LSB | 0-127 |
| CC 3 | low-pass MSB | 0-127 |
| CC 35 | low-pass LSB | 0-127 |
| CC 4 | delay width MSB | 0-127 |
| CC 36 | delay width LSB | 0-127 |
| CC 5 | subdivisions | 1-18 |
| CC 6 | macro ramp speed | 0-127 |
| CC 11 | knob 1 MSB | 0-127 |
| CC 43 | knob 1 LSB | 0-127 |
| CC 12 | knob 2 MSB | 0-127 |
| CC 44 | knob 2 LSB | 0-127 |
| CC 13 | knob 3 MSB | 0-127 |
| CC 45 | knob 3 LSB | 0-127 |
| CC 14 | knob 4 MSB | 0-127 |
| CC 46 | knob 4 LSB | 0-127 |
| CC 15 | knob 5 MSB | 0-127 |
| CC 47 | knob 5 LSB | 0-127 |
| CC 16 | knob 6 MSB | 0-127 |
| CC 48 | knob 6 LSB | 0-127 |
| CC 17 | knob 7 MSB | 0-127 |
| CC 49 | knob 7 LSB | 0-127 |
| CC 18 | knob 8 MSB | 0-127 |
| CC 50 | knob 8 LSB | 0-127 |
| CC 21 | button 1 | 0-64 OFF; 65-127 ON |
| CC 22 | button 2 | 0-64 OFF; 65-127 ON |
| CC 23 | button 3 | 0-64 OFF; 65-127 ON |
| CC 24 | button 4 | 0-64 OFF; 65-127 ON |
| CC 25 | button 5 | 0-64 OFF; 65-127 ON |
| CC 26 | button 6 | 0-64 OFF; 65-127 ON |
| CC 27 | button 7 | 0-64 OFF; 65-127 ON |
| CC 28 | button 8 | 0-64 OFF; 65-127 ON |
| CC 30 | bypass | 0-64 OFF; 65-127 ON |
Factory presets
This section explains the factory presets. They are by no means examples of the most interesting or beautiful sounds Monk Echo can produce, but rather examples of various features in action. Each factory preset is described in detail, with internal links to the relevant parts of this manual. You can use this section as an alternative way to learn Monk Echo without reading the manual from start to finish.
If you haven’t done so already, head back to the presets section to learn how to navigate presets, then come back here.
Factory preset 1 – basic reverb
The first preset holds a very basic clean reverb sound — a good starting point for more complex sounds. The macro control is purposefully not set up to do anything, so you can try the setup for yourself.
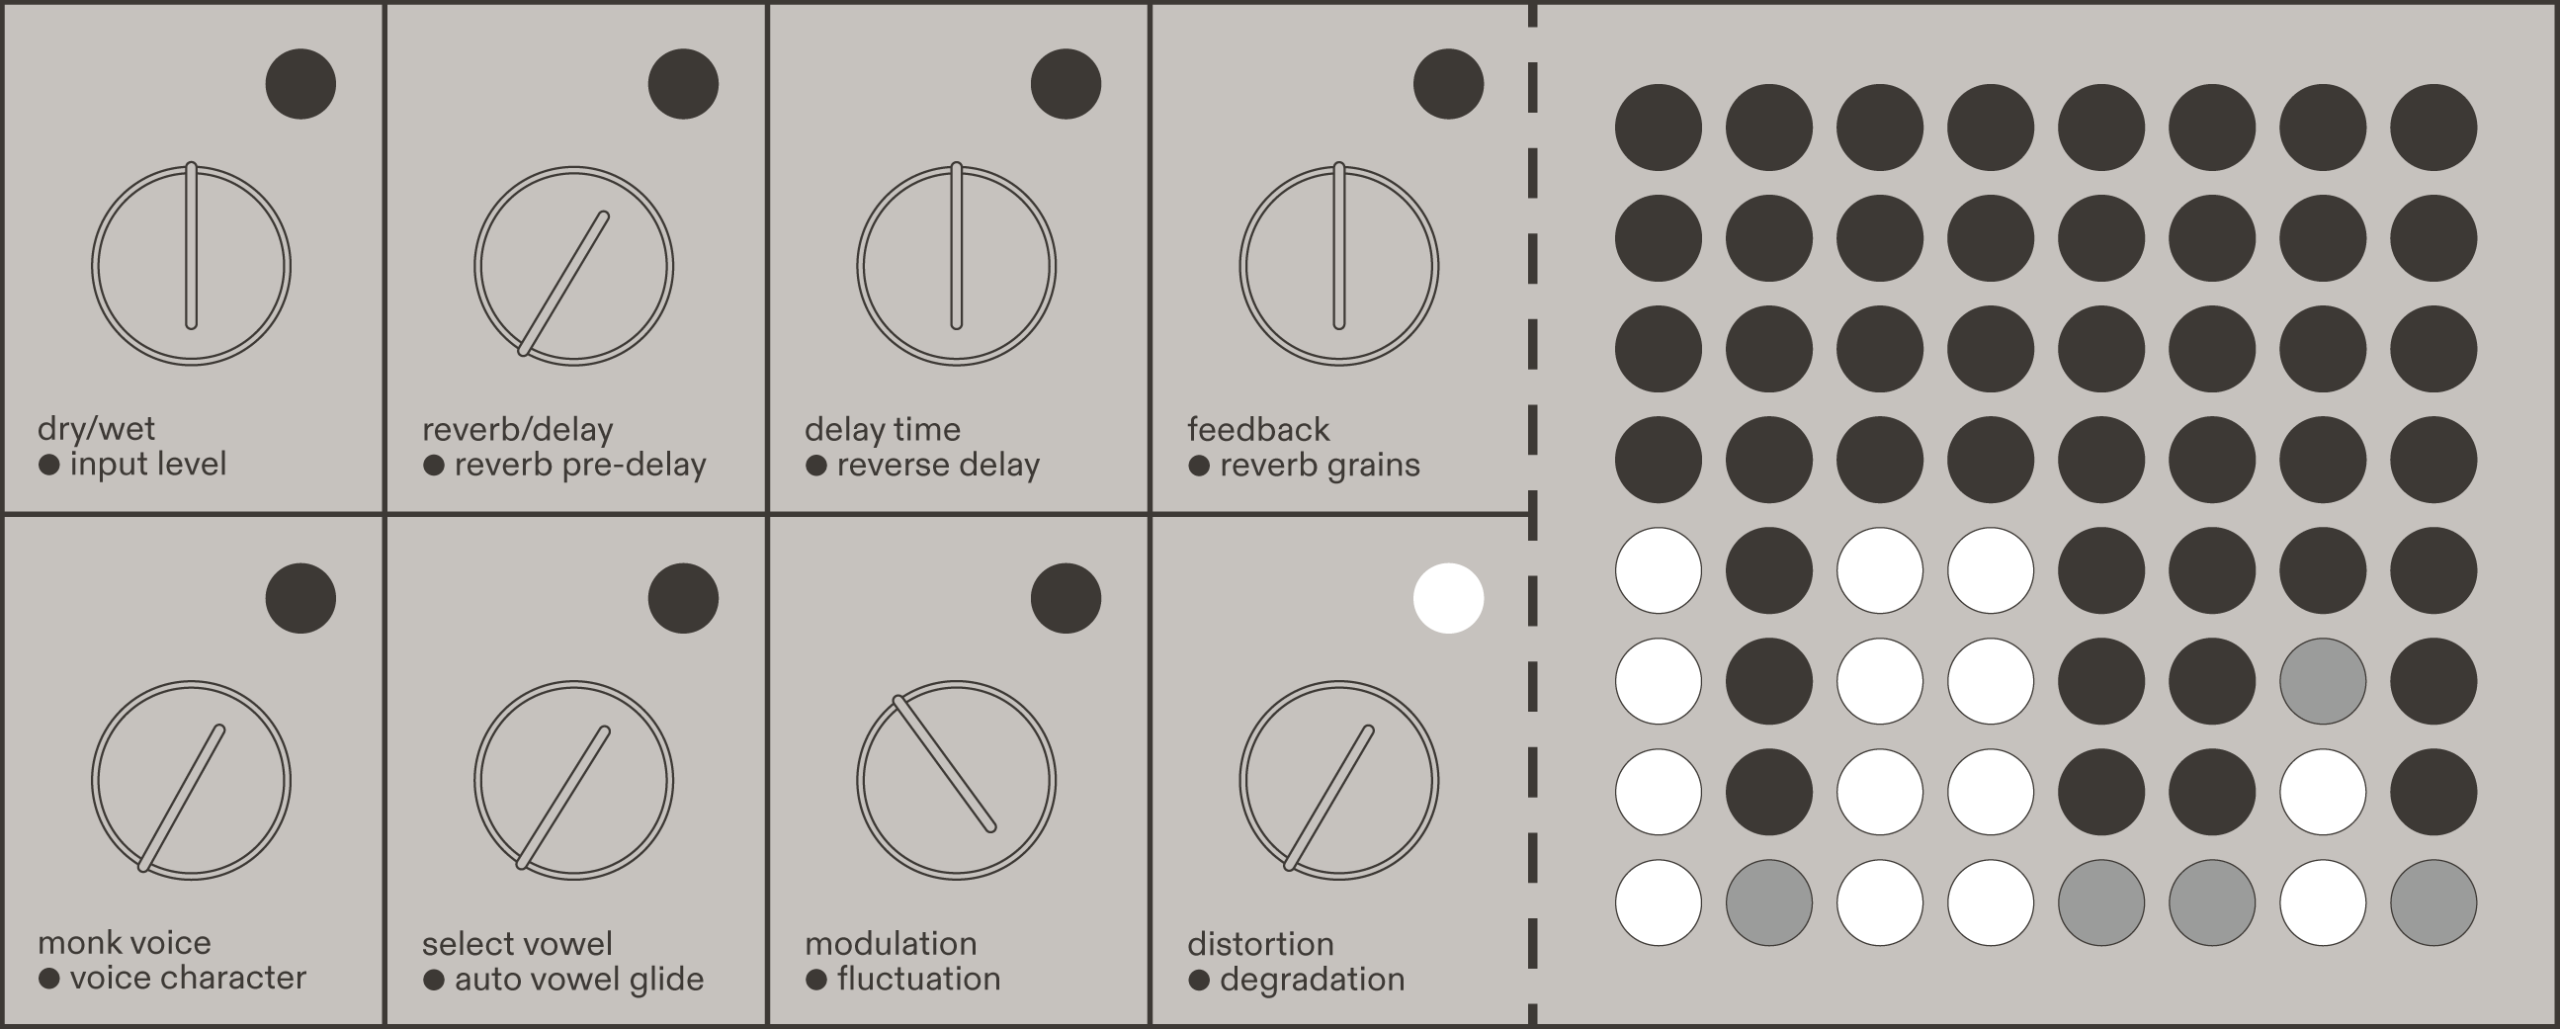
- Dry/wet mix is set right in the middle, where both signals are at full volume.
- Reverb/delay balance is set to reverb only.
- Delay time, while not heard in this preset, is set to the middle, giving you a nice rhythmic delay if you wish to blend it in.
- Feedback is set to medium — a big sound, yet not too ambient.
- Monk voice is fully off.
- A little bit of modulation for some depth.
- Distortion is fully off.
- All additional master parameters are at their default values.
Factory preset 8 – old radio
This is a quirky one. Here we are using a trick to apply some of the effects seemingly directly to the input signal.
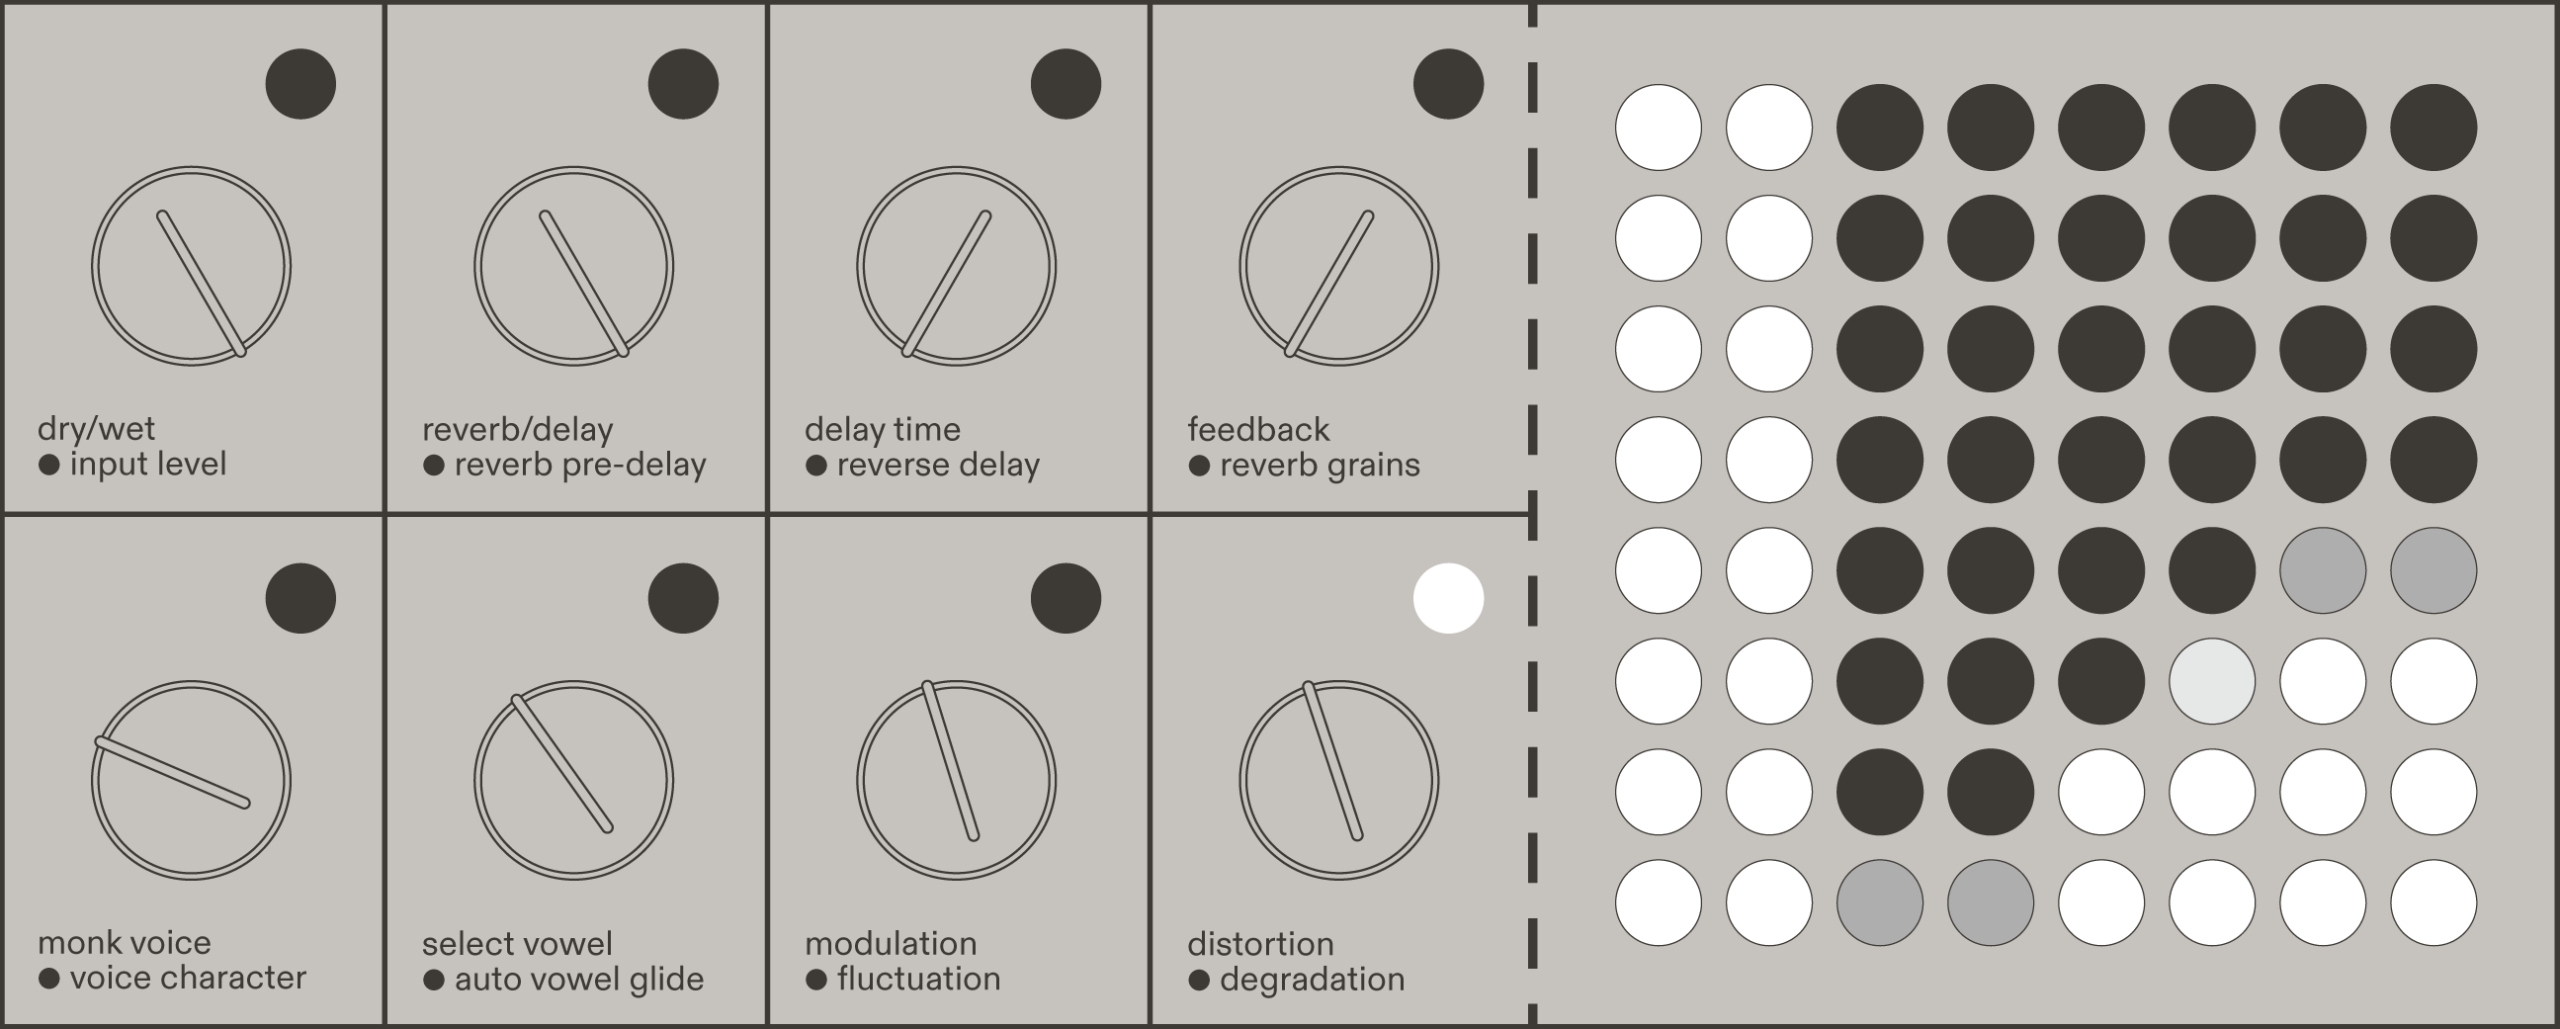
The trick is to set the first four knobs like this:
- Max out the dry/wet mix, so that no actual input signal is heard.
- Set the reverb/delay balance to delay only.
- Set the delay time to the minimum, which is 1 ms.
- Set the feedback to minimum as well, which gives you one repetition.
This results in hearing your input signal with only 1 ms of latency.
Then monk voice, modulation, and degradation are added to this signal. The monk voice is used in the range where it sounds more like mid contour than a vowel. The modulation gives the sound a bit of movement in space, while the degradation makes it sound like an old radio. And last, but not least, use the low- and high-cut filters in the additional master parameters to really dial in that vintage sound.
Now for some extra silliness, the macro control is set to morph this sound into a long, warm, and clean reverb. The macro control:
- Restores the dry/wet mix to the center position.
- Moves the reverb/delay balance all the way to the reverb side.
- Significantly increases feedback.
- Completely removes monk voice and degradation.
Furthermore, the macro ramp time is set to minimum, so you get an instant jump between the two very different sounds when long-pressing the macro ramp (left) footswitch.
Because this effect relies on the delay always remaining at 1 ms, the subdivisions are set to X, which means the delay time will disregard any tap tempo or MIDI clock input.
Web app
A companion web app is in the works and will be released soon. It will allow Monk Echo users to update their unit, manage and backup presets as well as manage system settings from a browser.
Technical specification
| Input Impedance | 1 MΩ |
| Output Impedance | 1 kΩ |
| Inputs | Dual 6.5mm (1/4″) TS Unbalanced |
| Outputs | Dual 6.5mm (1/4″) TS Unbalanced |
| Max Input Level | 2 Vrms |
| Max Audio Output | 2.5 Vrms |
| Frequency Response | 20Hz to 20kHz |
| Signal to Noise Ratio | 108 dB (A-weighted) |
| Signal Processing | 32-bit float, 48kHz |
| Bypass | Switchable between true bypass and buffered bypass |
| Dimensions | 187 x 142 x 59 mm / 7 3⁄8 × 5 5⁄8 × 2 5⁄16 inch, 1.1 kg / 2.4 lbs |
| Power requirements | standard 9V DC power supply, center-negative, 300 mA minimum |
Credits & thanks
| Monk Echo – reverb and delay both beautiful and strange | Designed, engineered, and built in Latvia by Mentha Works |
| Concept & Direction | Toms Lazdovskis & Matīss Tazāns |
| DSP | Eero-Pekka Damskägg & João Rossi |
| Firmware | Vilnis Jurķāns |
| Electrical | Tommi Otsavaara |
| Mechanical | Kristaps Kaļva |
| Support | Alise Golovacka |
| Designed – Overpriced Design | Jānis Klaučs & Aigars Mamis |
With special thanks to everyone who pre-ordered the first Monk Echo batch.
Version history
| user manual change date | monk echo firmware version | notes |
|---|---|---|
| 30-SEP-2026 | 2.0.0 | Initial version |